
Chocolate Sea Salt Nut Bars: A Recipe for Decadence
Chocolate Sea Salt Nut Bars – the name alone conjures images of rich, dark chocolate, the satisfying crunch of nuts, and that irresistible salty-sweet counterpoint that elevates this treat beyond the ordinary. I’ve always been fascinated by the seemingly simple yet incredibly effective combination of salty and sweet, and these bars are a perfect example of that magic.
While the precise origins of chocolate and nut bars are difficult to pinpoint, the combination of these flavors has delighted palates across cultures for centuries. Think of the ancient Mayan use of cacao beans, or the countless variations of nut-based confections found throughout history. These Chocolate Sea Salt Nut Bars represent a modern interpretation of this timeless pairing, a delicious evolution of a classic.
What makes these bars so beloved? It’s the perfect balance, of course! The intense bitterness of the dark chocolate is beautifully offset by the salty crunch of sea salt and the satisfying texture of your choice of nuts. Whether you prefer almonds, pecans, or walnuts, the nutty element adds a layer of complexity that keeps you coming back for more. Beyond the incredible taste and texture, these bars are remarkably easy to make, requiring minimal baking time and simple ingredients. They’re perfect for a quick dessert, a thoughtful gift, or a satisfying afternoon snack. So, let’s dive into the recipe and create some truly unforgettable Chocolate Sea Salt Nut Bars together!

Ingredients:
- 1 cup (2 sticks) unsalted butter, softened
- 1 cup granulated sugar
- 1 cup packed light brown sugar
- 4 large eggs
- 2 teaspoons pure vanilla extract
- 2 cups all-purpose flour
- 1 cup unsweetened cocoa powder
- 1 teaspoon baking soda
- 1 teaspoon baking powder
- 1 teaspoon salt
- 1 cup chopped pecans or walnuts (or a mix!)
- 1 cup semi-sweet chocolate chips
- 1/2 cup flaky sea salt
Preparing the Batter:
- Preheat your oven to 350°F (175°C). Grease and flour a 9×13 inch baking pan. I like to line the bottom with parchment paper for easy removal later – it makes cleanup a breeze!
- In a large bowl, cream together the softened butter, granulated sugar, and brown sugar until the mixture is light and fluffy. This is where a stand mixer really shines, but a good old-fashioned hand mixer works perfectly fine too. Just be prepared for a bit of a workout!
- Beat in the eggs one at a time, then stir in the vanilla. Make sure to scrape down the sides of the bowl to incorporate everything evenly. You want a smooth, creamy base for your delicious bars.
- In a separate bowl, whisk together the flour, cocoa powder, baking soda, baking powder, and salt. This helps ensure that the dry ingredients are evenly distributed and prevents lumps in your batter.
- Gradually add the dry ingredients to the wet ingredients, mixing on low speed until just combined. Be careful not to overmix; a few lumps are okay. Overmixing can lead to tough bars.
- Stir in the chopped nuts and chocolate chips. I like to gently fold them in to avoid crushing the nuts too much. Remember, we want those beautiful, chunky pieces throughout the bars.
Baking Process:
- Pour the batter into the prepared baking pan and spread it evenly. A spatula is your best friend here. Make sure it’s nice and level for even baking.
- Bake for 25-30 minutes, or until a wooden skewer inserted into the center comes out with just a few moist crumbs attached. Don’t overbake! Slightly underbaked bars are gooey and delicious.
- Let the bars cool completely in the pan before cutting. This is crucial! Cutting them while they’re warm will result in crumbly, messy bars. Patience is key here.
Finishing Touches:
- Once the bars are completely cool, sprinkle generously with flaky sea salt. This salty crunch is what elevates these bars from good to amazing. Don’t be shy with the salt!
- Cut the bars into squares. I usually cut them into 24 squares, but you can adjust the size depending on your preference.
- Store the bars in an airtight container at room temperature for up to a week. They’re best enjoyed within a few days for optimal freshness and texture.
Tips and Variations:
- For a richer chocolate flavor, use dark cocoa powder instead of unsweetened cocoa powder.
- Feel free to experiment with different types of nuts. Almonds, cashews, or macadamia nuts would all be delicious additions.
- If you don’t have flaky sea salt, you can use regular sea salt, but the flaky salt provides a more visually appealing and texturally interesting finish.
- Add a drizzle of melted dark chocolate on top after the bars have cooled for an extra decadent touch.
- For a more intense salty-sweet experience, consider adding a pinch of sea salt directly into the batter.
- If you prefer a chewier bar, reduce the baking time slightly. Keep a close eye on them to prevent overbaking.
- These bars make a fantastic homemade gift! Package them up in pretty cellophane bags or tins for a thoughtful present.
- Leftover bars can be frozen for longer storage. Wrap them individually in plastic wrap and then place them in a freezer-safe bag or container. They’ll keep for up to 3 months.
Enjoy your delicious Chocolate Sea Salt Nut Bars!
Conclusion:
So there you have it – my recipe for the most incredible Chocolate Sea Salt Nut Bars! I truly believe this recipe is a must-try for several reasons. First, the combination of rich, dark chocolate, crunchy nuts, and the unexpected salty kick from the sea salt is simply divine. It’s a perfect balance of sweet and savory that will leave you craving more. Second, these bars are incredibly easy to make. The entire process, from prepping the ingredients to baking and cooling, is straightforward and doesn’t require any specialized baking skills. Even a complete beginner can confidently tackle this recipe and achieve delicious results.
Third, and perhaps most importantly, these Chocolate Sea Salt Nut Bars are incredibly versatile. They’re perfect for satisfying a sweet craving, bringing to a potluck, or even packing for a hike or picnic. Their portability and deliciousness make them ideal for any occasion.
Serving Suggestions & Variations:
While the recipe stands perfectly on its own, I encourage you to experiment and personalize it to your liking! Here are a few ideas to get you started:
- For a richer chocolate flavor: Use a higher percentage dark chocolate, or even add a tablespoon of cocoa powder to the mixture.
- For a nuttier experience: Feel free to substitute your favorite nuts! Pecans, macadamia nuts, or even a mix of different nuts would all work wonderfully.
- Add some spice: A pinch of cinnamon or cayenne pepper can add a delightful warmth and complexity to the bars.
- Drizzle with extra chocolate: Once the bars have cooled, melt some extra dark chocolate and drizzle it over the top for an extra decadent touch.
- Make them festive: During the holidays, add some dried cranberries or chopped cherries for a festive twist. For a summery feel, add some chopped dried mango or apricots.
- Gluten-Free Option: Use gluten-free oats to make these bars suitable for those with gluten sensitivities.
- Vegan Option: Substitute the butter with vegan butter and ensure your chocolate is vegan-friendly.
These Chocolate Sea Salt Nut Bars are also fantastic served with a scoop of vanilla ice cream, a dollop of whipped cream, or even a side of fresh berries for a delightful contrast in textures and flavors. They’re equally delicious enjoyed on their own, straight from the pan!
Give it a Try and Share Your Experience!
I genuinely hope you’ll give this recipe a try. I’m confident that these Chocolate Sea Salt Nut Bars will become a new favorite in your household. They’re the perfect combination of easy to make, incredibly delicious, and endlessly adaptable. Once you’ve made them, I’d love to hear about your experience! Share your photos and feedback on social media using #ChocolateSeaSaltNutBars – I can’t wait to see your creations!
Baking these bars is a rewarding experience, and the delicious results are well worth the effort. So, gather your ingredients, put on your apron, and get ready to enjoy the ultimate treat! Happy baking!
Remember, the magic of baking lies not just in the recipe, but in the joy of creating something delicious to share with loved ones. These Chocolate Sea Salt Nut Bars are more than just a recipe; they’re an opportunity to create memories and savor the sweet taste of success. So go ahead, give it a try, and let the deliciousness begin!
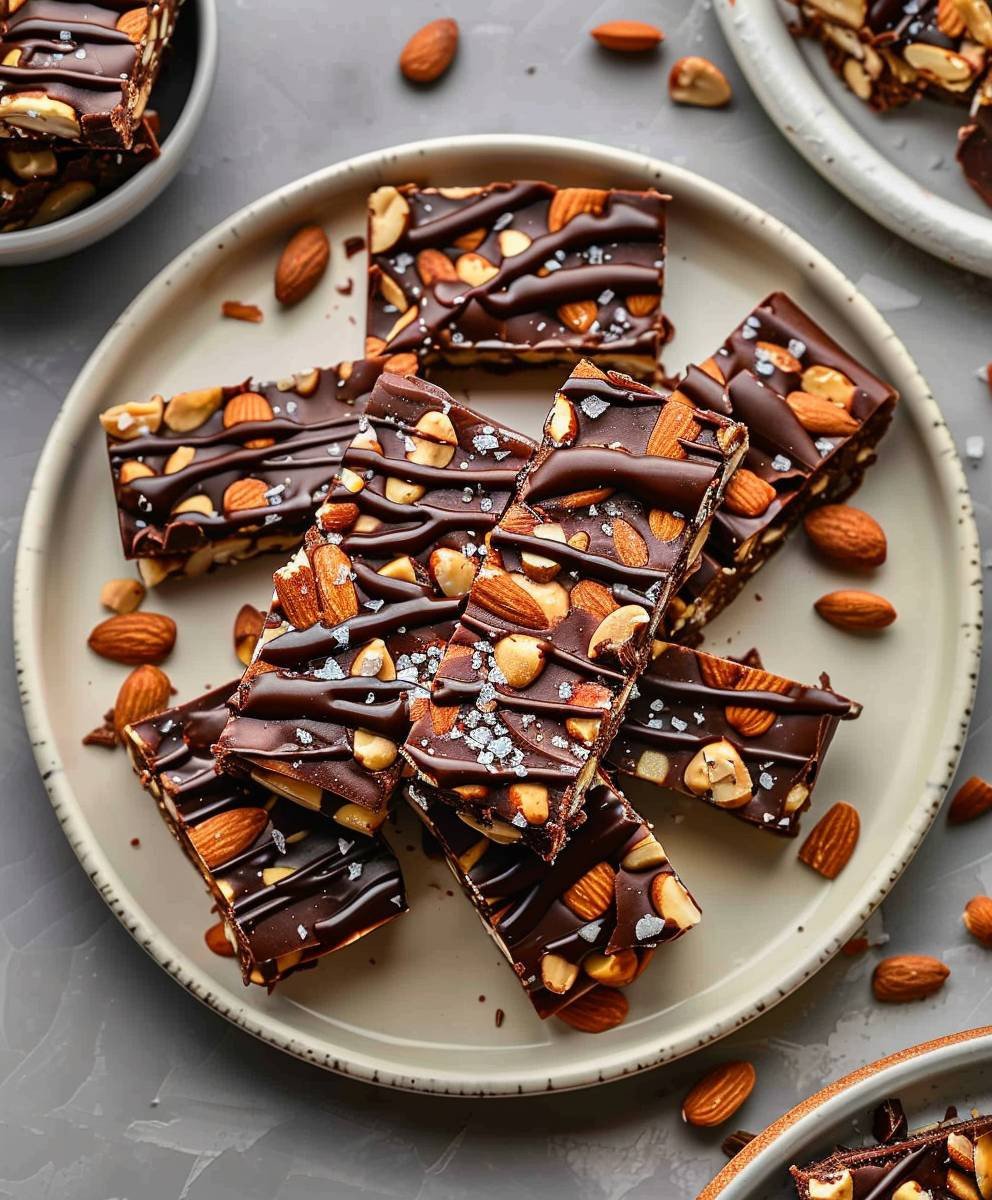
Chocolate Sea Salt Nut Bars: The Ultimate Homemade Recipe
Decadent chocolate bars with nuts and flaky sea salt; the perfect salty-sweet treat.
Ingredients
Instructions
Recipe Notes
- For richer chocolate flavor, use dark cocoa powder.
- Experiment with different nuts (almonds, cashews, macadamia nuts).
- Regular sea salt can be substituted for flaky sea salt.
- Add melted dark chocolate drizzle after cooling for extra decadence.
- A pinch of sea salt in the batter intensifies the salty-sweet flavor.
- Reduce baking time slightly for chewier bars.
- Freeze leftover bars for up to 3 months (wrap individually in plastic wrap, then place in a freezer-safe bag).
- Makes a great homemade gift!
Leave a Comment