
Chicken Avocado Melt Sandwich Recipe: Prepare to discover your new favorite lunch! Imagine sinking your teeth into perfectly toasted bread, yielding to a generous filling of tender, seasoned chicken, creamy avocado slices, and gloriously melted cheese. It’s a symphony of textures and flavors that transcends the ordinary sandwich, elevating it into an unforgettable meal that satisfies both the palate and the soul.
While this delightful combination may not boast centuries of tradition, the pairing of succulent chicken and nutrient-rich avocado has swiftly become a beloved staple in modern culinary landscapes. This particular meld of ingredients reflects our contemporary appreciation for fresh, flavorful, and satisfying meals that are as convenient to prepare as they are delicious to devour. It’s a testament to how simple, quality ingredients can combine to create something truly extraordinary.
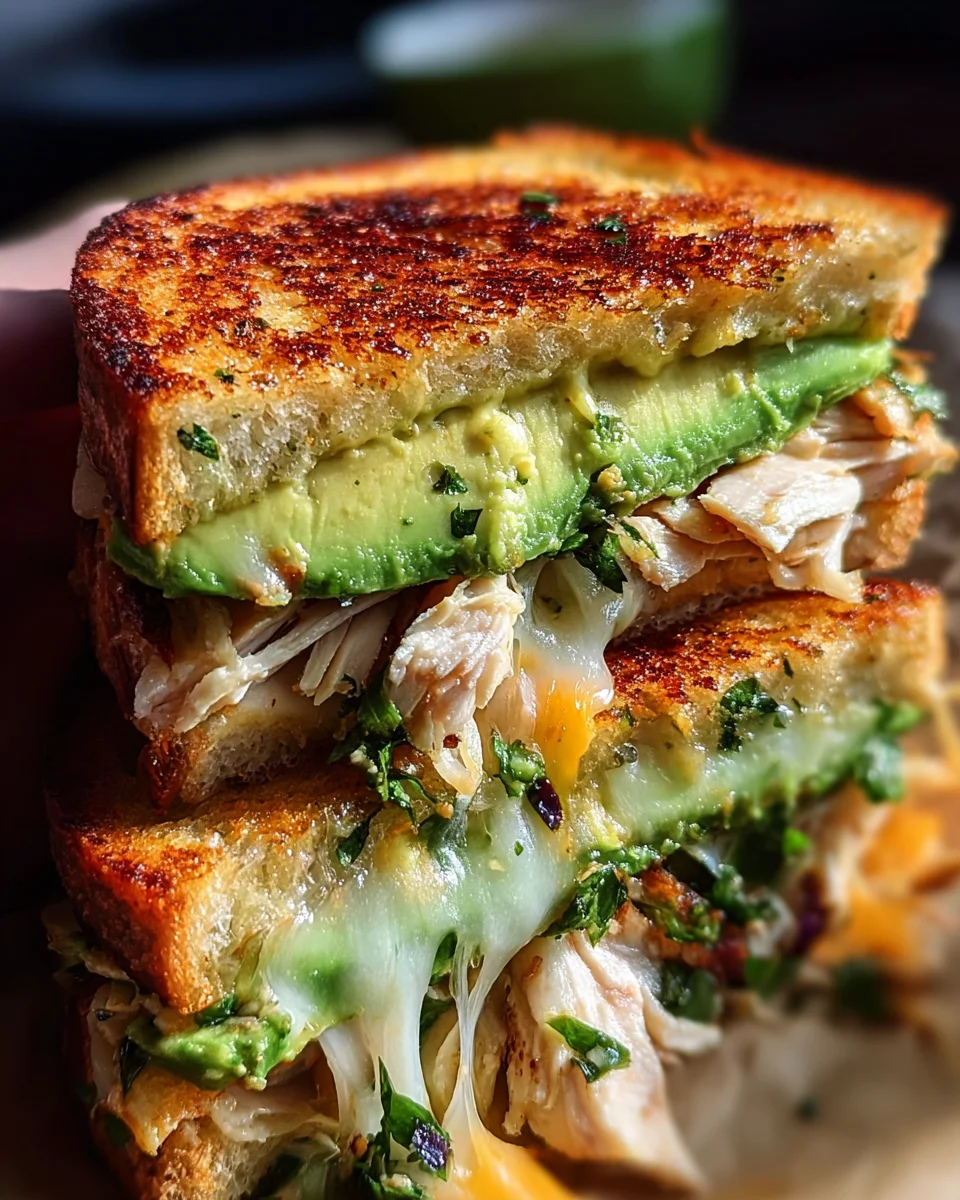
People worldwide adore this dish for its incredible versatility and irresistible appeal. The rich creaminess of ripe avocado provides a beautiful counterpoint to the savory, lean chicken, while the warmth of the crisp, toasted bread and the gooey, melted cheese create an ultimate comfort food experience. It’s an ideal choice for a quick yet substantial lunch, a delightful dinner, or even a sophisticated snack. Our comprehensive Chicken Avocado Melt Sandwich Recipe is meticulously designed to guide you in crafting the ultimate version of this modern classic, ensuring every single bite is packed with irresistible deliciousness and wholesome goodness.

Ingredients:
- For the Chicken:
- 2 boneless, skinless chicken breasts (about 12-16 ounces total)
- 1 tablespoon olive oil
- ½ teaspoon salt
- ¼ teaspoon black pepper
- ¼ teaspoon garlic powder
- ¼ cup chicken broth or water (if poaching)
- For the Creamy Avocado Mixture:
- 2 ripe medium avocados
- 1 tablespoon fresh lime juice (or lemon juice)
- ¼ cup finely chopped fresh cilantro
- 2 tablespoons very finely diced red onion (optional, but highly recommended for a kick)
- ¼ teaspoon salt
- ⅛ teaspoon black pepper
- Pinch of cayenne pepper (optional, for a subtle heat)
- For the Sandwich Assembly:
- 8 slices sturdy bread, such as sourdough, brioche, or country white bread (I love using a good artisan sourdough for its tang and texture!)
- 4 slices cheddar cheese, provolone, Monterey Jack, or a blend of your favorite melting cheeses (I often use a combination of cheddar and provolone for maximum flavor and meltability)
- 4 tablespoons mayonnaise (for spreading on the inside of the bread)
- 2-4 tablespoons unsalted butter, softened (for spreading on the outside of the bread, or you can use extra mayonnaise for a mayo-grilled cheese effect)
Preparing the Chicken: The Heart of Your Sandwich
- Choose Your Chicken Cooking Method: For the most tender and flavorful chicken, you have a couple of excellent options. I find that a perfectly cooked, juicy chicken breast makes all the difference in this sandwich.
- Poaching Method (My Personal Favorite for Tenderness): Place the chicken breasts in a small saucepan. Pour in the chicken broth or water, enough to just cover the chicken. Add a pinch of salt and pepper to the liquid. Bring the liquid to a gentle simmer over medium heat, then reduce the heat to low, cover, and cook for about 10-15 minutes, or until the chicken is cooked through and reaches an internal temperature of 165°F (74°C). The simmering, rather than boiling, ensures the chicken remains incredibly moist and easy to shred.
- Sautéing/Pan-Frying Method: Heat the olive oil in a large skillet over medium-high heat. Season the chicken breasts generously with salt, pepper, and garlic powder on both sides. Once the oil is shimmering, carefully add the chicken to the pan. Cook for 5-7 minutes per side, or until golden brown and cooked through, again reaching that internal temperature of 165°F (74°C). This method gives you a lovely browned exterior and a delicious savory flavor.
- Baking Method: Preheat your oven to 400°F (200°C). Place the seasoned chicken breasts on a baking sheet. Bake for 20-25 minutes, or until cooked through to 165°F (74°C). This is a hands-off approach that yields consistently good results.
- Cool and Shred/Dice the Chicken: Once your chicken is cooked, transfer it to a cutting board and allow it to rest for at least 5-10 minutes. This resting period is crucial as it allows the juices to redistribute, ensuring every bite of your chicken is succulent. After resting, you can either shred the chicken using two forks (which creates a wonderful texture for melts!) or dice it into small, bite-sized pieces. I personally lean towards shredding because it integrates beautifully with the creamy avocado and cheese, providing a delightful textural contrast. Place the shredded or diced chicken in a medium bowl.
- Season the Shredded Chicken (Optional but Recommended): Even if you seasoned the chicken during cooking, a little extra seasoning in its final form can elevate the flavor. At this stage, I sometimes add another tiny pinch of salt, pepper, or a dash of your favorite poultry seasoning to the shredded chicken. This ensures every strand of chicken is packed with flavor, rather than relying solely on the other components. Mix gently to combine.
- Allow Chicken to Cool Completely: It’s important for the chicken to be at least lukewarm, if not completely cool, before mixing it with the avocado. Adding hot chicken to the avocado mixture can sometimes cause the avocado to oxidize faster and turn brown, and nobody wants a brown avocado sandwich! Plus, it helps the overall sandwich components stay distinct and not become a hot mess before grilling.
Crafting the Creamy Avocado Mixture
- Prepare the Avocados: Choose avocados that are perfectly ripe – they should yield slightly to gentle pressure when squeezed. Cut each avocado in half lengthwise around the pit, twist the halves apart, and carefully remove the pit. Using a spoon, scoop the creamy flesh into a medium mixing bowl.
- Mash the Avocado: With a fork or a potato masher, begin to mash the avocado. I like to leave some small chunks of avocado for texture, rather than mashing it into a completely smooth paste. This gives the sandwich a more substantial feel and a pleasant mouthfeel. Aim for a rustic, chunky texture.
- Infuse with Fresh Flavors: Now for the magic! To the mashed avocado, add the fresh lime juice, finely chopped fresh cilantro, and the very finely diced red onion.
- Lime Juice: The lime juice is not just for flavor; it’s also a fantastic natural antioxidant that helps prevent the avocado from browning. Its bright acidity cuts through the richness of the avocado and chicken, providing a zesty pop.
- Cilantro: Fresh cilantro adds a vibrant, herbaceous note that complements both the chicken and avocado beautifully. Make sure it’s finely chopped so it distributes evenly and doesn’t overwhelm.
- Red Onion: The finely diced red onion provides a subtle, pungent bite and a delightful crunch. It’s optional, but I highly recommend it for an extra layer of flavor and texture that truly elevates this “Chicken Avocado Melt Sandwich Recipe.” If you’re sensitive to raw onion, you can soak it in cold water for 10 minutes and drain thoroughly before adding, which mellows its intensity.
- Season the Avocado Mixture: Sprinkle in the salt, black pepper, and the optional pinch of cayenne pepper. The cayenne adds a very gentle warmth, not intense heat, which can be a lovely surprise. Gently fold all the ingredients together until well combined. Taste and adjust seasoning as needed – remember, seasoning to your preference is key here! You want the avocado mixture to sing with flavor on its own.
Assembling Your Chicken Avocado Melt Masterpiece
- Prepare the Bread: Lay out your eight slices of bread on a clean work surface. On one side of each slice, spread a thin, even layer of softened unsalted butter (or mayonnaise, if you prefer the tangier, crispier mayo-grilled cheese method). This buttered side will be the exterior of your sandwich, ensuring a beautiful golden-brown crust.
- Spread the Mayonnaise (Internal Layer): Flip four of the bread slices over so the unbuttered side is facing up. On this unbuttered side (the inside of the sandwich), spread a thin layer of mayonnaise. This serves multiple purposes: it adds another layer of creaminess, acts as a barrier to prevent the bread from getting soggy from the fillings, and contributes to the overall rich flavor profile. Repeat this on the remaining four slices.
- Layer the Cheese (Foundation for Melt): On four of the mayonnaise-spread bread slices, place one slice of cheese. Placing cheese directly on the bread is a critical step because it creates a “glue” when melted, holding the sandwich together and preventing the filling from spilling out. It also melts into the bread slightly, enhancing the texture. I usually tear the cheese slice to fit the bread perfectly, ensuring coverage from edge to edge.
- Add the Chicken Filling: Evenly distribute the prepared shredded or diced chicken over the cheese layers on those four slices of bread. Don’t pile it too high; we want a balanced sandwich that’s easy to eat. A good rule of thumb is about ¼ to ⅓ cup of chicken per sandwich. Spread it out evenly.
- Spoon on the Avocado Mixture: Now, spoon a generous amount of your creamy avocado mixture over the chicken layer on each of the four sandwiches. Gently spread it out, but again, don’t overfill. You want a harmonious blend of flavors and textures, not an overflowing mess. This is where the “Chicken Avocado Melt Sandwich Recipe” truly starts to come together visually and aromatically.
- Top with More Cheese: Place another slice of cheese on top of the avocado mixture. This top layer of cheese is just as important as the bottom, as it will melt down into the avocado and chicken, creating that signature “melt” gooeyness and further securing the fillings. If you’re using different cheeses, this is a great place to use your second variety for a complex flavor profile.
- Complete the Sandwich: Carefully place the remaining four slices of bread (mayonnaise-side down, buttered-side up) on top of the filled halves, completing your four sandwiches. Gently press down on each sandwich to lightly compact the fillings. This helps everything adhere together before grilling.
Grilling to Golden Perfection
- Preheat Your Pan: Heat a large non-stick skillet or a griddle over medium-low heat. This is a very important step – medium-low heat is key! If the heat is too high, the bread will burn before the cheese has a chance to fully melt and the interior heats through. Patience is a virtue when making the perfect grilled cheese or melt. Allow the pan to heat for about 3-5 minutes until it’s evenly warm. You might not need to add extra butter to the pan if your bread is generously buttered, but if you’re worried about sticking or want an extra crispy crust, you can add a small pat of butter to the pan before placing each sandwich.
- Grill the First Side: Carefully place two of the assembled sandwiches into the preheated pan. If your pan is large enough, you can grill all four at once, but avoid overcrowding as it can lower the pan temperature. Cook for 4-6 minutes on the first side.
- Visual Cues: During this time, keep an eye on the bread. You’re looking for a beautiful, even golden-brown crust.
- Melting Magic: While the bottom is browning, the heat will also begin to work its magic on the inside, slowly warming the chicken and avocado and, most importantly, starting to melt that bottom layer of cheese.
- Lid Trick: For an even faster and more complete melt, you can cover the pan with a lid during the last couple of minutes of cooking on the first side. This traps heat and steam, creating a perfect environment for the cheese to become wonderfully gooey.
- Flip and Grill the Second Side: Once the first side is perfectly golden and the cheese has started to melt, carefully and confidently flip each sandwich over using a wide spatula. Be gentle but decisive! Cook for another 4-6 minutes on the second side, or until that side is also golden brown and crispy, and the cheese is completely melted and oozing out slightly.
- Check for Melt: You can gently press down on the top of the sandwich with your spatula; if you feel a soft, yielding resistance, it’s a good sign the cheese is fully melted. You might even see a little cheese peeking out the sides. This is exactly what we want for a truly satisfying “Chicken Avocado Melt Sandwich Recipe.”
- Repeat for Remaining Sandwiches: Remove the cooked sandwiches from the pan and set them aside. Repeat the grilling process with the remaining two sandwiches, ensuring your pan maintains that perfect medium-low heat. If the pan gets too hot between batches, remove it from the heat for a minute to cool slightly before adding the next batch.
- Serve Immediately: Transfer your glorious Chicken Avocado Melt Sandwiches to a cutting board. I highly recommend slicing them diagonally before serving. There’s something inherently satisfying about a diagonally cut sandwich – it just feels more gourmet! Serve them immediately while they are warm, crispy, and the cheese is perfectly gooey. These are truly best enjoyed fresh off the griddle. I love to pair them with a simple side salad or a cup of tomato soup for a complete and utterly delightful meal. Enjoy every cheesy, creamy, savory bite!
Conclusion:
Well, friends, we’ve reached the end of our culinary journey, and I genuinely hope you’re feeling as inspired and hungry as I am right now! What we’ve explored today isn’t just another sandwich; it’s a symphony of textures and flavors that will undoubtedly become a new favorite in your repertoire. Think about it: the tender, savory chicken, the creamy, rich avocado, and that glorious, gooey melted cheese, all perfectly nestled between slices of your favorite toasted bread. It’s more than just a meal; it’s an experience, a little slice of comfort that can brighten even the busiest of days. I truly believe that once you take that first bite, you’ll understand why I’m so passionate about this creation.
This isn’t merely a suggestion; it’s practically a culinary imperative. This particular sandwich stands out for its incredible balance – it’s hearty enough to satisfy, yet fresh enough to feel wholesome. It delivers on every front: flavor, ease of preparation, and pure, unadulterated satisfaction. It’s the kind of dish that disappears quickly from plates, leaving behind only happy smiles and contented sighs. If you’ve been searching for that perfect go-to lunch that feels a little bit special, or a quick dinner solution that doesn’t compromise on taste, then your search ends here. This recipe isn’t just good; it’s a game-changer, promising to elevate your everyday meals to something truly memorable with minimal effort. The combination of ingredients just works harmoniously, creating a depth of flavor that’s hard to achieve with such simple components.
Elevate Your Meal with Perfect Pairings
Now, while this sandwich is perfectly capable of standing alone as a magnificent meal, a few thoughtful accompaniments can truly elevate the experience. For a light and refreshing counterpoint, consider serving your sandwich alongside a crisp green salad tossed with a zesty vinaigrette. The brightness of the salad will beautifully complement the richness of the sandwich. Alternatively, a warm bowl of creamy tomato soup or a hearty lentil soup makes for an incredibly comforting pairing, especially on a cooler day. The dipping potential alone is enough to make me swoon! And for those who enjoy a bit of crunch, a side of sweet potato fries or even just some good old-fashioned potato chips would hit the spot. Don’t underestimate the power of a simple pickle spear on the side – its tangy bite provides a wonderful contrast.
Unleash Your Inner Chef: Creative Variations
One of the joys of cooking is the freedom to experiment, and this recipe is wonderfully adaptable. Don’t hesitate to put your own spin on it! Feeling adventurous? Try swapping out the cheddar for a smoky provolone, a sharp Gruyère, or even a spicy pepper jack for an extra kick. For a bit more texture and flavor, consider adding a slice of crispy bacon or some sautéed onions to your sandwich. A thin slice of fresh tomato or a handful of baby spinach can also add extra layers of freshness and nutrients. If you’re a fan of a little heat, a dash of hot sauce or some thinly sliced jalapeños before toasting would be absolutely divine. Different types of bread can also completely transform the experience – sourdough offers a tangy note, while a hearty multi-grain adds a wholesome chew. The possibilities are truly endless, and I encourage you to get creative and make this recipe truly your own. This versatility is just another reason why the Chicken Avocado Melt Sandwich Recipe is destined to become a staple in your kitchen.
So, what are you waiting for? Grab your ingredients, preheat your skillet, and prepare to embark on a delicious adventure. I wholeheartedly urge you to try this recipe for yourself. Experience the magic of that perfectly golden, crispy bread, the tender chicken, the creamy avocado, and the luscious, melted cheese. And once you do, please, please, please share your creations with me! I absolutely adore seeing your culinary masterpieces and hearing about your personal twists. Did you add a secret ingredient? Did you pair it with something unexpected? Did your family rave about it? Let me know in the comments below or tag me on social media. Your feedback and shared experiences are what make this community so vibrant and inspiring. Don’t keep this delicious secret to yourself!
Cooking should be fun, rewarding, and delicious, and this recipe embodies all three. It’s an easy win that delivers big on flavor and comfort. I promise you won’t regret giving it a try. Happy cooking, and I look forward to hearing all about your amazing Chicken Avocado Melt Sandwich Recipe adventures!
Chicken Avocado Melt: Quick & Delicious Sandwich Recipe
Prepare to discover your new favorite lunch! Imagine sinking your teeth into perfectly toasted bread, yielding to a generous filling of tender, seasoned chicken, creamy avocado slices, and gloriously melted cheese. It’s a symphony of textures and flavors that transcends the ordinary sandwich.
Ingredients
Instructions
Important Information
Nutrition Facts (Per Serving)
It is important to consider this information as approximate and not to use it as definitive health advice.
Allergy Information
Please check ingredients for potential allergens and consult a health professional if in doubt.
Leave a Comment