
Peanut Butter Rice Krispie Treats – the very name conjures up images of simple joy and irresistible flavor, doesn’t it? Imagine that perfect, no-bake marriage of crisp, airy cereal, soft, gooey marshmallow, and the unmistakable, rich embrace of creamy peanut butter, all coming together in one delightful square. This isn’t just a dessert; it’s a journey back to childhood, a celebration of straightforward pleasures that truly hit the spot. While the original Rice Krispie Treat itself emerged as a beloved creation from Kellogg’s test kitchens in the 1930s, quickly becoming an American staple, the addition of peanut butter takes this classic to an entirely new level. It introduces a wonderfully complex sweet-and-savory balance that is utterly captivating.
People adore this particular rendition for countless reasons: the satisfying crunch that gives way to a chewy, sweet interior, the incredible convenience of a no-bake recipe, and the undeniable comfort that only peanut butter can provide. It’s the ideal treat for a hurried weeknight, a crowd-pleasing potluck contribution, or simply a spontaneous indulgence. Every bite of these Peanut Butter Rice Krispie Treats is a testament to how humble ingredients can create something truly extraordinary. I am excited to guide you through crafting these utterly delightful, much-loved confections that continue to bring smiles to faces of all ages.

Ingredients:
Creating truly spectacular Peanut Butter Rice Krispie Treats begins with selecting the right ingredients. Each component plays a crucial role in achieving that perfect balance of chewy, crispy, and delightfully nutty goodness that we all crave. Here’s a detailed look at what you’ll need to make these irresistible treats.
- 6 tablespoons (approximately 85g) Unsalted Butter: I always opt for unsalted butter because it gives me full control over the saltiness of the final product. If you only have salted butter on hand, you can still use it, but I’d recommend slightly reducing any added salt in other components, especially if you decide to add a chocolate topping. The butter is essential for creating that rich, gooey base and helping the marshmallows melt smoothly. It provides a foundational richness that elevates the entire treat.
- 1 (10-ounce/approximately 283g) bag Mini Marshmallows: While large marshmallows can certainly work, mini marshmallows are my go-to choice for Peanut Butter Rice Krispie Treats. They melt much more quickly and evenly, ensuring a silky-smooth, lump-free base for your treats. This quick melting time also reduces the risk of overcooking the mixture, which can lead to a harder, less chewy treat. Fresh marshmallows are key here; stale ones can be difficult to melt properly.
- 1 cup (approximately 250g) Creamy Peanut Butter: This is the star of our show! For the best texture and flavor, I highly recommend using a creamy, conventional peanut butter (like Jif or Skippy). Natural peanut butters, especially those that separate, can sometimes lead to a slightly oilier or crumblier texture in the finished treats, as their oil content and consistency differ significantly. Choose a brand you love the taste of, as its flavor will shine through prominently. This is what truly defines our Peanut Butter Rice Krispie Treats.
- 6 cups (approximately 150g) Rice Krispies Cereal: The eponymous ingredient! Fresh, crisp Rice Krispies are non-negotiable for that signature snap, crackle, and pop. Make sure your cereal hasn’t been sitting open for too long, as stale cereal will result in limp, rather than crisp, treats. This volume might seem like a lot, but it’s essential for achieving the perfect cereal-to-binder ratio, ensuring every bite has that delightful crunch.
- Optional Topping (highly recommended for ultimate Peanut Butter Rice Krispie Treats!):
- 1 ½ cups (approximately 250g) Semi-Sweet Chocolate Chips: High-quality chocolate chips will give you the best melt and flavor for your topping. You can also use milk chocolate or dark chocolate, depending on your preference. I find semi-sweet provides a nice balance against the sweetness of the treats and the richness of the peanut butter.
- 2 tablespoons (approximately 30g) Creamy Peanut Butter: A little extra peanut butter in the topping helps to create a smoother ganache-like consistency and reinforces that wonderful peanut butter flavor throughout the entire treat. It also makes the topping easier to spread and gives it a slightly softer bite once set.
- 1 tablespoon (approximately 15g) Unsalted Butter: This small amount of butter adds a lovely sheen to the chocolate topping and helps prevent it from becoming too brittle once it cools, ensuring a cleaner cut.
- Pinch of Salt (optional, but recommended): A tiny pinch of fine sea salt can truly enhance the flavors, especially if you’re using unsalted butter. It helps to balance the sweetness of the marshmallows and chocolate and brings out the nutty depth of the peanut butter.
- 9×13-inch baking pan: This size is perfect for creating a good thickness for your Peanut Butter Rice Krispie Treats. You’ll want to lightly grease it or line it with parchment paper for easy removal.
Having all your ingredients measured and ready to go before you start is a game-changer. This is what we call “mise en place,” and it ensures a smooth, stress-free cooking process, especially with a recipe like this where things move quickly once the marshmallows start melting.
Preparing Your Pan
- Prepare Your Pan for Success: First things first, let’s get our pan ready. Take your 9×13-inch baking pan and either lightly grease it with butter or cooking spray, or, my preferred method, line it with parchment paper. If you opt for parchment paper, make sure to leave an overhang on the sides. This acts as convenient “handles” later, allowing you to lift the entire slab of cooled Peanut Butter Rice Krispie Treats out of the pan with absolute ease. This step is crucial for simple removal and clean cuts. Without it, you might find yourself wrestling the sticky treats from the bottom of the pan, which is no fun at all!
Melting the Gooey Base
- Melt the Butter with Care: In a large, heavy-bottomed pot or Dutch oven, melt the 6 tablespoons of unsalted butter over low to medium-low heat. The key here is patience; we don’t want to brown the butter, just melt it until it’s completely liquid. Browning the butter can introduce a nutty flavor, which might sound good, but for classic Peanut Butter Rice Krispie Treats, a clean butter flavor is preferred to let the peanut butter truly shine. Swirl the pot occasionally to ensure even melting. Using a larger pot than you think you need is always a good idea; it provides ample space for mixing in the cereal later without making a mess.
- Introduce the Marshmallows: Once the butter has fully melted and is shimmering, add the entire bag of mini marshmallows to the pot. Stir them gently with a heat-resistant spatula or wooden spoon, ensuring they get coated in the melted butter. Continue stirring constantly over low heat. This low and slow approach is vital. High heat will cause the marshmallows to melt too quickly, potentially seizing up or becoming hard once cooled. We want a smooth, flowing, perfectly gooey marshmallow base for our Peanut Butter Rice Krispie Treats, so steady, gentle heat and continuous stirring are your best friends here. Keep stirring until the marshmallows are about 75% melted and you can see a few lumps remaining.
- Incorporate the Peanut Butter: As the marshmallows are nearing full melt (when only small lumps remain), remove the pot from the heat. This is an important trick for achieving the perfect texture. Add the 1 cup of creamy peanut butter and your optional pinch of salt directly into the warm marshmallow mixture. Stir vigorously until the peanut butter is completely melted and smoothly incorporated into the marshmallow base. You should have a glossy, uniform, and incredibly fragrant mixture. The residual heat from the melted marshmallows will be enough to melt the peanut butter without overcooking it. If you were to add the peanut butter while the pot was still on the heat, you risk scorching it or making the entire mixture too stiff. This is where the magic really starts for our Peanut Butter Rice Krispie Treats!
- Achieving the Perfect Consistency: At this stage, your marshmallow and peanut butter mixture should be wonderfully smooth, thick, and pourable. It should have a beautiful golden-brown hue from the peanut butter. Make sure there are no visible streaks of unmixed peanut butter or unmelted marshmallow lumps. A well-mixed binder ensures every single Rice Krispie will be evenly coated, leading to consistently delicious treats.
Folding in the Rice Krispies
- Add the Cereal Quickly: Now, for the crucial addition of the Rice Krispies. Immediately pour all 6 cups of Rice Krispies cereal into the pot with your warm peanut butter marshmallow mixture. Working quickly but gently, use your heat-resistant spatula or spoon to fold the cereal into the gooey base. The goal is to coat every single piece of cereal without crushing it. This requires a gentle touch and thorough mixing. Lift from the bottom of the pot and fold over, repeating until all the cereal is evenly coated.
- The Art of Gentle Mixing: Avoid mashing or pressing down on the cereal too hard as you mix. Excessive pressure can crush the delicate flakes, resulting in a dense, rather than light and crispy, treat. The mixture will be very sticky and thick, which is exactly what we want. Ensure you scrape down the sides and bottom of the pot to incorporate any stray cereal or unmixed binder. This phase is critical for the final texture of your Peanut Butter Rice Krispie Treats.
- Transfer to Prepared Pan: Once the cereal is fully coated, immediately transfer the entire mixture into your prepared 9×13-inch baking pan. The mixture will be quite warm and very sticky at this point, so speed is your ally.
- Pressing into the Pan – The Right Way: Now, for the pressing. Lightly butter your hands, or use a piece of parchment paper, waxed paper, or the back of a lightly greased spatula to gently press the mixture evenly into the pan. This is another area where a light hand is crucial. Do not compress the mixture too tightly! Over-compacting the cereal will result in dense, hard Peanut Butter Rice Krispie Treats instead of the light, airy, and chewy texture we’re aiming for. Gently press just enough to ensure an even layer across the entire pan, making sure there are no loose pieces. The goal is a uniform thickness, not a brick.
Adding the Optional Chocolate Peanut Butter Topping (Highly Recommended!)
If you’re taking your Peanut Butter Rice Krispie Treats to the next level, this chocolate peanut butter topping is a must. It adds an extra layer of flavor and a beautiful contrasting texture.
- Prepare for the Topping: While your Rice Krispie treat base is still warm (this helps the chocolate adhere better), begin preparing your chocolate topping.
- Melt Chocolate and Peanut Butter: In a microwave-safe bowl, combine the 1 ½ cups of semi-sweet chocolate chips, 2 tablespoons of creamy peanut butter, and 1 tablespoon of unsalted butter. Microwave on high for 30-second intervals, stirring thoroughly after each interval. The key here is gentle melting to prevent scorching the chocolate. Continue microwaving and stirring until the mixture is completely smooth, glossy, and lump-free. Alternatively, you can melt this mixture over a double boiler for a more controlled melt. Heat until everything is fully melted and beautifully combined into a rich, decadent sauce. This creates a luxurious finish for your Peanut Butter Rice Krispie Treats.
- Spread the Chocolate: Once the chocolate mixture is perfectly smooth, immediately pour it evenly over the top of the pressed Rice Krispie treats in the pan. Use an offset spatula or the back of a spoon to gently spread the chocolate into an even layer, reaching all the way to the edges of the pan. Work relatively quickly, as the chocolate will start to set as it cools.
Setting, Cutting, and Storing Your Peanut Butter Rice Krispie Treats
- Allow to Set: Whether you’ve opted for the chocolate topping or not, it’s essential to let your Peanut Butter Rice Krispie Treats set properly. You can leave them at room temperature for at least 1-2 hours, or for a faster set, place the pan in the refrigerator for about 30-45 minutes. If you’ve added the chocolate topping, chilling is highly recommended to ensure the chocolate sets firm enough for clean cuts. You’ll know they are ready when the treats are firm to the touch and the chocolate topping is solid.
- The Art of Cutting: Once completely set, use a sharp, lightly oiled knife to cut the treats into squares. If you used parchment paper, lift the entire slab out of the pan and place it on a cutting board for easier, cleaner cuts. The oil on the knife helps prevent sticking. For best results, run your knife under hot water, wipe it clean, and then lightly oil it before each cut. This creates those picture-perfect squares. You can cut them into standard 2×2 inch squares, or smaller bite-sized pieces for parties.
- Serving and Storage: Your homemade Peanut Butter Rice Krispie Treats are now ready to be enjoyed! They are best served within a day or two of making them for optimal freshness and chewiness. Store any leftovers in an airtight container at room temperature for up to 3-4 days. While they can be refrigerated, I find that chilling can sometimes make them a little too firm, so room temperature storage generally yields the best texture. If you did refrigerate them, let them sit at room temperature for 10-15 minutes before serving to soften them up slightly.
There you have it – incredibly delicious, perfectly chewy, and delightfully nutty Peanut Butter Rice Krispie Treats, ready to be devoured! This recipe is a fantastic crowd-pleaser and a truly satisfying no-bake dessert.
Conclusion:
These aren’t just any treats; they are a revelation! I genuinely believe that once you try this recipe, it will quickly become a cherished staple in your home. We’re talking about a confection that perfectly marries simplicity with an explosion of flavor and texture. Imagine the satisfying crunch of puffed rice cereal, now enveloped in a lusciously gooey, sweet, and distinctly nutty embrace of rich peanut butter. It’s the kind of treat that conjures up warm, comforting memories while simultaneously creating new ones. This recipe is incredibly forgiving, remarkably quick to assemble, and requires no baking whatsoever, making it an absolute dream for busy schedules or impromptu dessert cravings. Whether you’re a seasoned baker or a complete novice in the kitchen, you’ll find immense satisfaction in creating these delightful squares. They are guaranteed to be a hit at any gathering, from casual family nights to festive celebrations, appealing to every age group with their irresistible charm. The balance of salty and sweet, the chewiness, the crunch – it’s all there, making each bite an experience you’ll want to revisit again and again.
Beyond their inherent deliciousness, the versatility of these treats is truly astounding.
Serving Up Your Delicious Creations
You can serve these decadent squares as a charming accompaniment to your morning coffee or afternoon tea, providing a wonderful textural contrast and a delightful energy boost. They make fantastic additions to lunchboxes, offering a homemade surprise that beats any store-bought snack. For parties, arrange them artfully on a platter, perhaps alongside a bowl of fresh berries or a scoop of vanilla bean ice cream to elevate the dessert experience. They are utterly perfect as a standalone dessert, requiring no fuss or fancy plating. These treats are designed to bring joy and convenience to your culinary life, making every moment a little sweeter.
Creative Twists and Variations to Explore
But why stop there? The beauty of a recipe this simple is its adaptability. Feel free to get creative with your additions and toppings!
- Chocolate Drizzle: A generous drizzle of melted milk, dark, or even white chocolate can add another layer of indulgence. Just melt your favorite chocolate chips and artfully zigzag over the cooled treats before cutting. This classic combination is always a winner and adds a touch of gourmet flair.
- Sprinkle Fun: For a festive touch, especially if you’re making them for a birthday, holiday, or any celebratory occasion, colorful sprinkles pressed onto the warm, still-setting mixture add instant visual appeal and a touch of whimsy. They’re particularly fun for kids (and adults who are kids at heart!).
- Nutty Affair: For those who love extra crunch, finely chopped roasted peanuts, cashews, or even candied pecans can be sprinkled on top or lightly folded into the mixture for added texture and flavor depth. This elevates the nuttiness and provides a more complex bite.
- Sweet and Salty Edge: A tiny sprinkle of flaky sea salt over the finished treats can truly enhance the peanut butter flavor, creating that irresistible sweet and salty combination that everyone adores. It’s a simple trick that yields incredibly delicious results.
- Different Nut Butters: While peanut butter is king here, don’t shy away from experimenting with almond butter or cashew butter for a slightly different, yet equally delicious, flavor profile. Just be sure to use creamy varieties for the best texture and consistent results. Each nut butter offers its own unique nuance.
- Spice It Up: A pinch of cinnamon or even a tiny dash of cayenne pepper (for a Mexican hot chocolate vibe, especially good with a chocolate drizzle) can introduce an unexpected warmth and complexity that will surprise and delight your taste buds. Start small and adjust to your preference.
So, I truly hope I’ve convinced you that these are more than just a snack; they are a delightful experience waiting to happen in your kitchen. Don’t hesitate any longer – dive in and make your very own batch of Peanut Butter Rice Krispie Treats! You’ll be amazed at how effortlessly delicious they are. I promise you, the joy of creating something so wonderfully tasty with such minimal effort is incredibly rewarding. It’s a treat that consistently brings smiles and satisfies cravings, making it a truly invaluable recipe to have in your repertoire.
Once you’ve whipped up a batch, please don’t keep the deliciousness to yourself! I absolutely adore hearing about your culinary adventures. Share your triumphs, your clever variations, and even your funny kitchen moments with me and our community. Snap a photo of your perfectly cut squares, tell me how you served them, or what delightful toppings you added. Your feedback and creativity inspire us all to keep experimenting and enjoying the process. Let’s spread the joy of these easy, irresistible treats far and wide! Happy making!
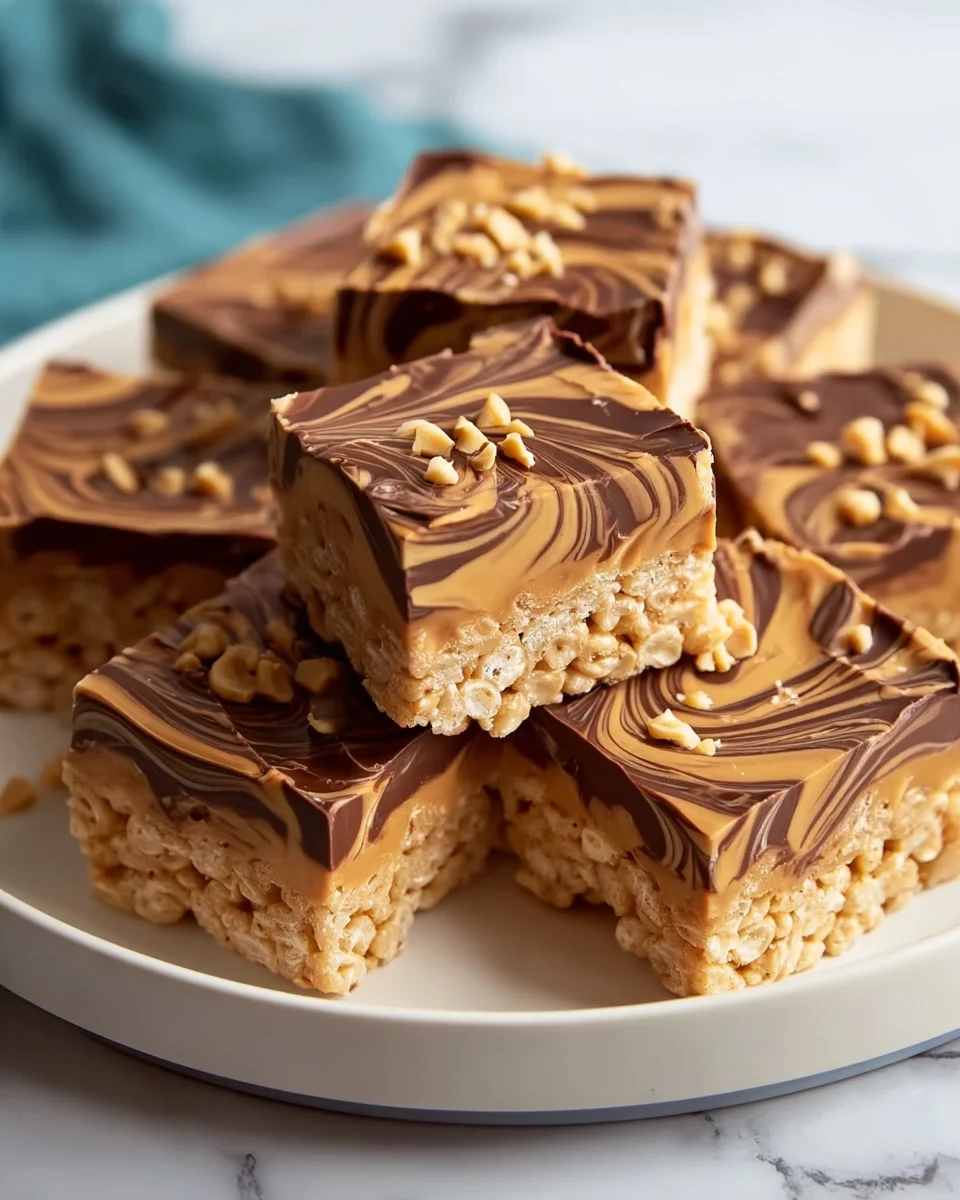
Peanut Butter Rice Krispie Treats
A quick, no-bake recipe for classic Rice Krispie Treats infused with creamy peanut butter, featuring a satisfying crunch, gooey marshmallow, and an optional rich chocolate peanut butter topping.
Ingredients
Instructions
Important Information
Nutrition Facts (Per Serving)
It is important to consider this information as approximate and not to use it as definitive health advice.
Allergy Information
Please check ingredients for potential allergens and consult a health professional if in doubt.
Leave a Comment