
Biscoff Cookie Butter Cinnamon Rolls Recipe
Oh my goodness, get ready for a taste sensation that will absolutely blow your mind! When I first dreamed up the Biscoff Cookie Butter Cinnamon Rolls Recipe, I knew I was onto something truly special. This isn’t just any cinnamon roll; we’re talking about a glorious fusion where the beloved, warm comfort of a classic cinnamon roll meets the irresistible, caramelized magic of Biscoff cookie butter. What makes it truly special? It’s that unique, speculoos-spiced cookie flavor woven right into every single bite, transforming a breakfast staple into an extraordinary dessert-like experience.
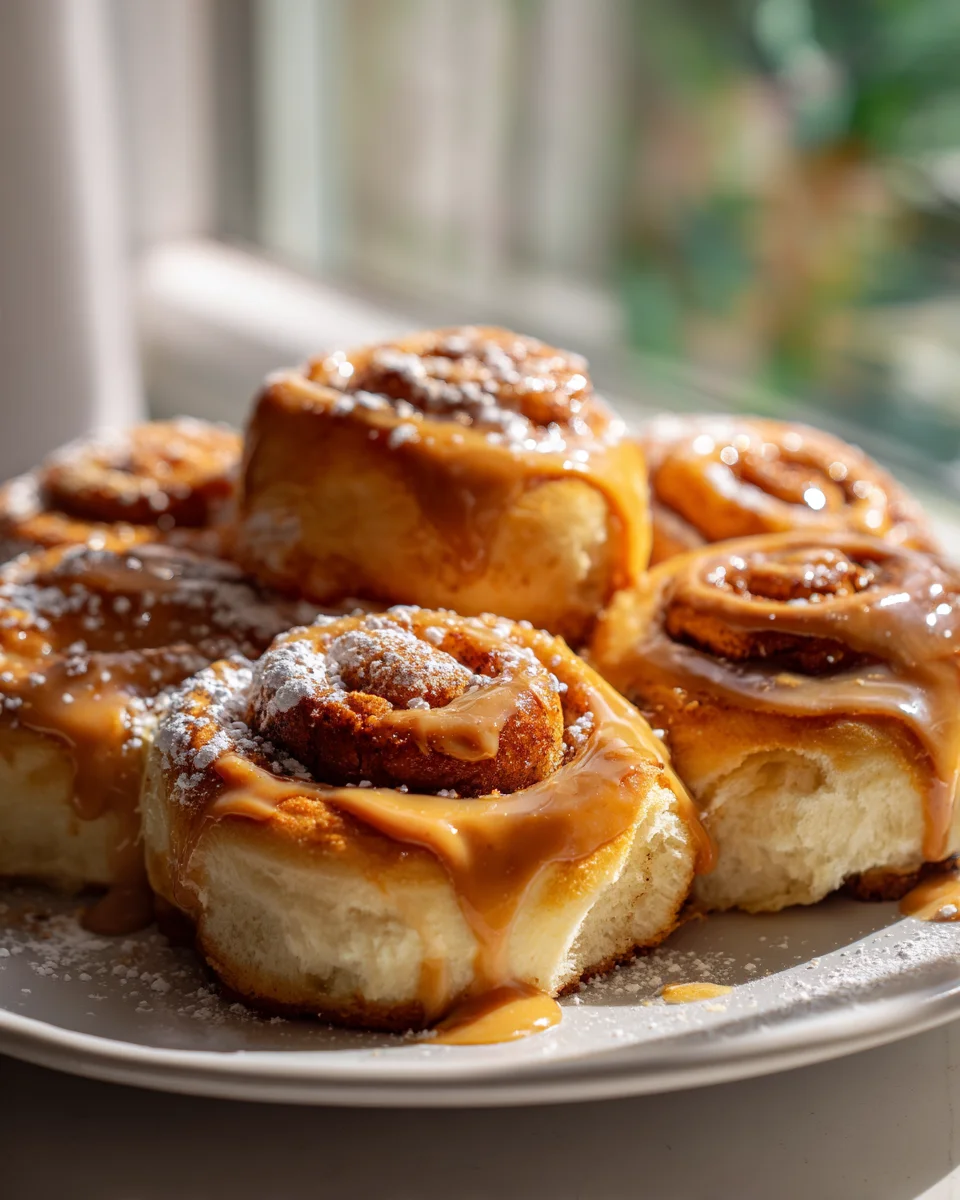
You, my friend, are going to absolutely adore these. Why? Because they take everything you love about soft, gooey cinnamon rolls and elevate it to a whole new level of decadence. Imagine biting into a fluffy, tender roll, bursting with that familiar cinnamon warmth, but then, BAM! You hit the rich, caramel-like notes of Biscoff, making each mouthful an unbelievably delightful surprise. This dish is a true showstopper – perfect for a special brunch, a cozy weekend treat, or simply when you want to impress yourself (and anyone lucky enough to be nearby!). In a nutshell, we’ll be making incredibly soft dough, swirling it generously with a creamy, spiced Biscoff filling, and then smothering it all in an unbelievably luscious Biscoff-infused glaze. Prepare for pure bliss!

Ingredient Notes
Creating these Biscoff Cookie Butter Cinnamon Rolls is truly a delightful experience, and it all starts with understanding the key players in our ingredient lineup. I’ve broken down what you’ll need and offered a few helpful substitution ideas to ensure your baking journey is smooth and successful.
For the Dough:
- All-Purpose Flour: This is the backbone of our fluffy rolls! I usually opt for unbleached all-purpose flour. You can use bread flour if you want an even chewier texture, but I find all-purpose gives a perfect balance.
- Granulated Sugar: A touch of sugar helps activate the yeast and gives our dough a lovely hint of sweetness.
- Instant Dry Yeast: My go-to! It’s super convenient because you can mix it directly with your dry ingredients without proofing first. If you only have active dry yeast, no worries! Just proof it in your warm milk (around 105-115°F or 40-46°C) for about 5-10 minutes until foamy before adding it to the rest of the wet ingredients.
- Salt: Don’t skip this! Salt balances the sweetness and enhances all the flavors in the dough.
- Whole Milk: I always recommend whole milk for its richness, which contributes to a tender, moist dough. You can definitely use 2% milk, or even a non-dairy alternative like almond or soy milk, though the richness might vary slightly. Make sure it’s warm (but not hot!) to help activate the yeast.
- Large Eggs: Eggs add richness, structure, and a beautiful golden color to our rolls. Make sure they’re at room temperature for better incorporation into the dough.
- Unsalted Butter: Melted unsalted butter adds incredible flavor and tenderness. If you only have salted butter, reduce the added salt in the recipe by about a quarter teaspoon.
For the Biscoff Filling:
- Biscoff Cookie Butter: This is the star of the show! There’s no real substitute if you want true Biscoff rolls. Make sure it’s at room temperature so it’s easy to spread.
- Light Brown Sugar: Its molasses content adds depth and moisture to our filling, creating that classic gooey center. Dark brown sugar also works if that’s what you have on hand, offering a slightly more pronounced caramel flavor.
- Ground Cinnamon: A generous amount of cinnamon is essential for that warm, comforting cinnamon roll flavor.
- Unsalted Butter: Melted butter helps bind the filling and spread beautifully over the dough.
For the Biscoff Cream Cheese Icing:
- Cream Cheese: Softened cream cheese provides a tangy counterpoint to the sweetness and makes for an incredibly rich icing. Full-fat cream cheese works best for consistency.
- Unsalted Butter: Softened butter adds creaminess and structure to our icing.
- Powdered Sugar (Confectioners’ Sugar): For a smooth, lump-free icing! Sift it if it’s lumpy to avoid any grainy texture.
- Vanilla Extract: A splash of good quality vanilla extract always elevates any sweet treat.
- Milk or Cream: Just a tablespoon or two helps achieve the perfect drizzly or spreadable consistency for your icing.
- Melted Biscoff Cookie Butter (optional): For an extra layer of Biscoff goodness in your icing, a little melted cookie butter swirled in or drizzled on top is absolutely divine!
Step-by-Step Instructions
Get ready to create some magic in your kitchen! Follow these steps, and you’ll have warm, gooey Biscoff Cookie Butter Cinnamon Rolls filling your home with an irresistible aroma.
Step 1: Prepare the Dough
- Warm the Milk and Butter: In a small saucepan or microwave-safe bowl, gently warm the milk until it’s lukewarm (about 105-115°F or 40-46°C). Melt the unsalted butter and set aside to cool slightly.
- Combine Dry Ingredients: In the bowl of a stand mixer fitted with a dough hook attachment (or a large mixing bowl if kneading by hand), whisk together the flour, granulated sugar, instant yeast, and salt.
- Add Wet Ingredients: Pour the warm milk, cooled melted butter, and room temperature eggs into the dry ingredients.
- Knead the Dough: Mix on low speed until a shaggy dough forms, then increase to medium-low and knead for 7-10 minutes. The dough should be smooth, elastic, and pull away from the sides of the bowl. If kneading by hand, turn it out onto a lightly floured surface and knead for 10-15 minutes until smooth.
- First Rise: Lightly grease a large bowl with cooking spray or a little oil. Place the dough in the bowl, turning once to coat. Cover the bowl tightly with plastic wrap or a clean kitchen towel and let it rise in a warm place for 1 to 1.5 hours, or until doubled in size.
Step 2: Make the Biscoff Filling
- Combine Ingredients: While the dough is rising, in a medium bowl, combine the room temperature Biscoff cookie butter, melted unsalted butter, light brown sugar, and ground cinnamon. Stir until thoroughly combined and smooth. Set aside.
Step 3: Assemble the Rolls
- Roll Out the Dough: Once the dough has doubled, gently punch it down to release the air. Turn it out onto a lightly floured surface. Using a rolling pin, roll the dough into a large rectangle, approximately 18×12 inches (45×30 cm).
- Spread the Filling: Evenly spread the Biscoff filling over the entire surface of the dough, leaving a small border (about 1/2 inch) along one of the long edges.
- Roll Up the Dough: Starting from the long edge opposite the border, carefully and tightly roll the dough into a log.
- Slice the Rolls: Using a sharp knife or unflavored dental floss, cut the log into 12 equally sized rolls, each about 1.5 inches thick. I find dental floss gives the cleanest cut without squishing the dough!
- Arrange in Baking Dish: Lightly grease a 9×13 inch baking dish (or two 8×8 inch dishes). Arrange the sliced rolls cut-side up in the prepared dish, leaving a little space between each roll for expansion.
Step 4: Second Rise and Bake
- Second Rise: Cover the baking dish loosely with plastic wrap or a clean kitchen towel. Let the rolls rise in a warm place for another 30-45 minutes, or until they look visibly puffy and almost doubled again.
- Preheat Oven: While the rolls are on their second rise, preheat your oven to 375°F (190°C).
- Bake the Rolls: Bake for 20-25 minutes, or until the tops are golden brown and the centers are cooked through. If they start to brown too quickly, you can loosely tent them with foil.
- Cool Slightly: Remove from the oven and let them cool in the pan for about 5-10 minutes while you prepare the icing.
Step 5: Prepare and Glaze with Icing
- Make the Icing: In a medium bowl, combine the softened cream cheese, softened butter, powdered sugar, vanilla extract, and 1 tablespoon of milk or cream. Beat with an electric mixer (or whisk by hand) until smooth and creamy. Add more milk/cream, a teaspoon at a time, until you reach your desired consistency.
- Optional Biscoff Swirl: If you’re adding extra Biscoff to the icing, melt a tablespoon or two of cookie butter and either beat it into the icing or drizzle it artistically over the top.
- Glaze the Rolls: While the rolls are still warm (but not piping hot), generously spread or drizzle the Biscoff cream cheese icing over them. Serve immediately and enjoy!
Tips & Suggestions
I’ve baked more cinnamon rolls than I can count, and I’ve picked up a few tricks along the way. Here are my top tips to ensure your Biscoff Cookie Butter Cinnamon Rolls are absolutely perfect:
- Don’t Over-Flour Your Dough: Resist the urge to add too much flour during kneading or rolling. A slightly sticky dough is often a sign of a well-hydrated, tender roll. Too much flour will result in dry, tough rolls. Just use enough flour on your surface to prevent sticking.
- Warmth is Key for Rising: Yeast loves warmth! If your kitchen is cool, you can create a warm environment for your dough. I often turn my oven on to its lowest setting (or just the oven light) for a few minutes, then turn it off and place the covered bowl inside. Just make sure it’s not too hot – you want cozy, not scorching.
- The Dental Floss Trick: For perfectly shaped, un-squished rolls, use unflavored dental floss to cut your log. Slide a piece of floss under the log, cross the ends over the top, and pull them tightly to slice through. It’s truly a game changer!
- Don’t Overbake: Overbaking is the enemy of soft, gooey cinnamon rolls. Keep an eye on them. They should be golden brown on top and feel soft to the touch. The internal temperature should be around 190-200°F (88-93°C).
- Make Ahead Option (Overnight Rise): Want fresh rolls in the morning? After arranging the sliced rolls in the baking dish, cover them tightly with plastic wrap and refrigerate overnight (up to 12-16 hours). The next morning, take them out of the fridge and let them come to room temperature and proof for about 1-1.5 hours before baking as usual.
- Bring Ingredients to Room Temperature: Especially for the dough (eggs, milk) and the icing (cream cheese, butter), room temperature ingredients incorporate more smoothly and result in a better texture for both.
- Extra Biscoff Goodness: For an ultimate Biscoff experience, consider crumbling some Biscoff cookies over the top of the icing or serving warm rolls with an extra drizzle of melted cookie butter.
- Serve Warm: These rolls are truly at their best when served warm, with the icing slightly melted into the fluffy dough. If you have leftovers, a quick reheat in the microwave or oven works wonders.
Storage
You’ve put in the effort to make these incredible Biscoff Cookie Butter Cinnamon Rolls, so let’s make sure you know how to keep them fresh and delicious for as long as possible!
At Room Temperature:
- Once cooled, store your baked and iced cinnamon rolls in an airtight container at room temperature for up to 1-2 days. The icing can soften, but the rolls will still be wonderfully soft and flavorful.
In the Refrigerator:
- For longer storage, place the rolls in an airtight container and refrigerate them for up to 5 days. I find that refrigerating helps the cream cheese icing stay firm and extends the life of the rolls.
- Reheating from Refrigerator: When you’re ready to enjoy them, reheat individual rolls in the microwave for 15-30 seconds until warm and soft, or warm them in a preheated oven at 300°F (150°C) for about 5-10 minutes.
Freezing Baked Rolls:
- Individual Freezing: Once fully cooled, you can freeze individual baked (and optionally iced) rolls. Wrap each roll tightly in plastic wrap, then place them in a freezer-safe bag or airtight container. They will keep well for up to 2-3 months.
- Thawing and Reheating: To enjoy, unwrap a frozen roll and let it thaw at room temperature for a couple of hours, or reheat it directly from frozen in the microwave (30-60 seconds, checking periodically) or in a preheated oven (300°F/150°C) for 10-15 minutes until warmed through.
Freezing Unbaked Rolls (After Second Rise):
- This is a fantastic option for fresh-baked rolls anytime! After the second rise and before baking, cover the pan tightly with plastic wrap and then aluminum foil. Freeze for up to 1 month.
- Baking from Frozen: When you’re ready to bake, remove the pan from the freezer the night before and let it thaw in the refrigerator overnight. The next morning, remove the plastic wrap and foil, let the rolls come to room temperature and proof for about 1-1.5 hours (they might not rise as much as fresh dough but will still expand) before baking as directed.
Final Thoughts
Well, there you have it! I truly believe that the Biscoff Cookie Butter Cinnamon Rolls Recipe is an absolute game-changer in the world of sweet treats. What makes this recipe a must-try isn’t just the incredible aroma that will fill your kitchen, but the unique blend of warm, spiced Biscoff cookie butter swirling through fluffy, tender cinnamon rolls. It’s a symphony of flavors and textures – the richness of the cookie butter perfectly complements the classic warmth of cinnamon, creating something truly unforgettable.
I can confidently say that if you’re looking for a show-stopping breakfast, an indulgent brunch item, or simply a comforting dessert that everyone will rave about, this Biscoff Cookie Butter Cinnamon Rolls Recipe delivers every single time. It’s more than just a roll; it’s an experience. I encourage you to whip up a batch and treat yourself and your loved ones to this little slice of heaven. You won’t be disappointed!

Biscoff Cookie Butter Cinnamon Rolls: Irresistible Recipe!
- Total Time: 55 minutes
- Yield: 12 servings 1x
Description
Indulge in the delightful fusion of soft, gooey cinnamon rolls and the rich, caramelized magic of Biscoff cookie butter. This recipe transforms a breakfast staple into an extraordinary dessert-like experience that will impress anyone lucky enough to taste it!
Ingredients
- 4 cups All-Purpose Flour
- 1/4 cup Granulated Sugar
- 2 1/4 teaspoons Instant Dry Yeast
- 1 teaspoon Salt
- 1 cup Whole Milk
- 2 Large Eggs
- 1/2 cup Unsalted Butter, melted
- 1 cup Biscoff Cookie Butter
- 1/2 cup Light Brown Sugar
- 2 teaspoons Ground Cinnamon
- 1/4 cup Unsalted Butter, melted (for filling)
- 8 oz Cream Cheese, softened
- 1/4 cup Unsalted Butter, softened (for icing)
- 2 cups Powdered Sugar (Confectioners' Sugar)
- 1 teaspoon Vanilla Extract
- 1–2 tablespoons Milk or Cream
- 1/4 cup Melted Biscoff Cookie Butter (optional)
Instructions
- Warm the Milk and Butter: In a small saucepan or microwave-safe bowl, gently warm the milk until it's lukewarm (about 105-115°F or 40-46°C). Melt the unsalted butter and set aside to cool slightly.
- Combine Dry Ingredients: In the bowl of a stand mixer fitted with a dough hook attachment (or a large mixing bowl if kneading by hand), whisk together the flour, granulated sugar, instant yeast, and salt.
- Add Wet Ingredients: Pour the warm milk, cooled melted butter, and room temperature eggs into the dry ingredients.
- Knead the Dough: Mix on low speed until a shaggy dough forms, then increase to medium-low and knead for 7-10 minutes. The dough should be smooth, elastic, and pull away from the sides of the bowl. If kneading by hand, turn it out onto a lightly floured surface and knead for 10-15 minutes until smooth.
- First Rise: Lightly grease a large bowl with cooking spray or a little oil. Place the dough in the bowl, turning once to coat. Cover the bowl tightly with plastic wrap or a clean kitchen towel and let it rise in a warm place for 1 to 1.5 hours, or until doubled in size.
- Make the Biscoff Filling: While the dough is rising, in a medium bowl, combine the room temperature Biscoff cookie butter, melted unsalted butter, light brown sugar, and ground cinnamon. Stir until thoroughly combined and smooth. Set aside.
- Roll Out the Dough: Once the dough has doubled, gently punch it down to release the air. Turn it out onto a lightly floured surface. Using a rolling pin, roll the dough into a large rectangle, approximately 18×12 inches (45×30 cm).
- Spread the Filling: Evenly spread the Biscoff filling over the entire surface of the dough, leaving a small border (about 1/2 inch) along one of the long edges.
- Roll Up the Dough: Starting from the long edge opposite the border, carefully and tightly roll the dough into a log.
- Slice the Rolls: Using a sharp knife or unflavored dental floss, cut the log into 12 equally sized rolls, each about 1.5 inches thick.
- Arrange in Baking Dish: Lightly grease a 9×13 inch baking dish (or two 8×8 inch dishes). Arrange the sliced rolls cut-side up in the prepared dish, leaving a little space between each roll for expansion.
- Second Rise: Cover the baking dish loosely with plastic wrap or a clean kitchen towel. Let the rolls rise in a warm place for another 30-45 minutes, or until they look visibly puffy and almost doubled again.
- Preheat Oven: While the rolls are on their second rise, preheat your oven to 375°F (190°C).
- Bake the Rolls: Bake for 20-25 minutes, or until the tops are golden brown and the centers are cooked through.
- Cool Slightly: Remove from the oven and let them cool in the pan for about 5-10 minutes while you prepare the icing.
- Make the Icing: In a medium bowl, combine the softened cream cheese, softened butter, powdered sugar, vanilla extract, and 1 tablespoon of milk or cream. Beat with an electric mixer (or whisk by hand) until smooth and creamy. Add more milk/cream, a teaspoon at a time, until you reach your desired consistency.
- Optional Biscoff Swirl: If you're adding extra Biscoff to the icing, melt a tablespoon or two of cookie butter and either beat it into the icing or drizzle it artistically over the top.
- Glaze the Rolls: While the rolls are still warm (but not piping hot), generously spread or drizzle the Biscoff cream cheese icing over them. Serve immediately and enjoy!
- Prep Time: 30 mins
- Cook Time: 25 mins
- Category: Dessert
- Method: Baking
- Cuisine: American
Nutrition
- Serving Size: 1 roll
- Calories: 320
- Sugar: 18 g
- Sodium: 220 mg
- Fat: 15 g
- Saturated Fat: 9 g
- Unsaturated Fat: 4 g
- Trans Fat: 0 g
- Carbohydrates: 40 g
- Fiber: 1 g
- Protein: 4 g
- Cholesterol: 60 mg
Keywords: Don't over-flour your dough, as a slightly sticky dough is often a sign of a well-hydrated, tender roll. Warmth is key for rising; if your kitchen is cool, create a warm environment for your dough. For perfectly shaped rolls, use unflavored dental floss to cut your log. Serve warm for the best experience!
Leave a Comment