
This Hawaiian Roll Grilled Cheese Recipe Is The Best, and I am absolutely thrilled to share why this delightful creation has become a staple in my kitchen and, I believe, will soon be in yours. Forget everything you thought you knew about a simple grilled cheese; we’re elevating a timeless comfort food to an entirely new level of deliciousness. The classic grilled cheese sandwich, a culinary icon cherished across generations for its sheer simplicity and heartwarming appeal, has long served as a go-to for quick lunches and cozy dinners. It embodies the essence of comfort, a golden-brown exterior yielding to a molten, cheesy interior.
Why This Twist Transforms a Classic
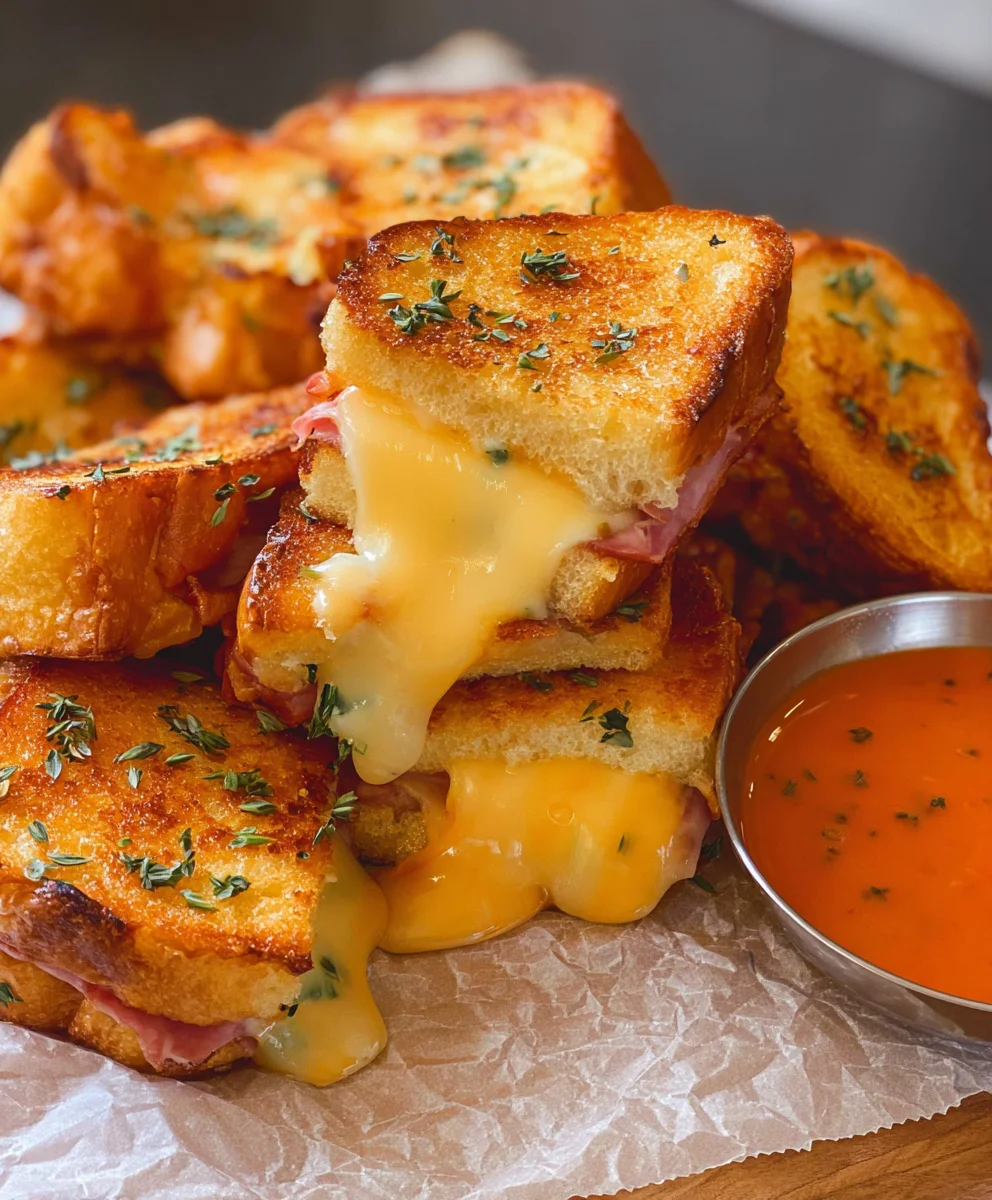
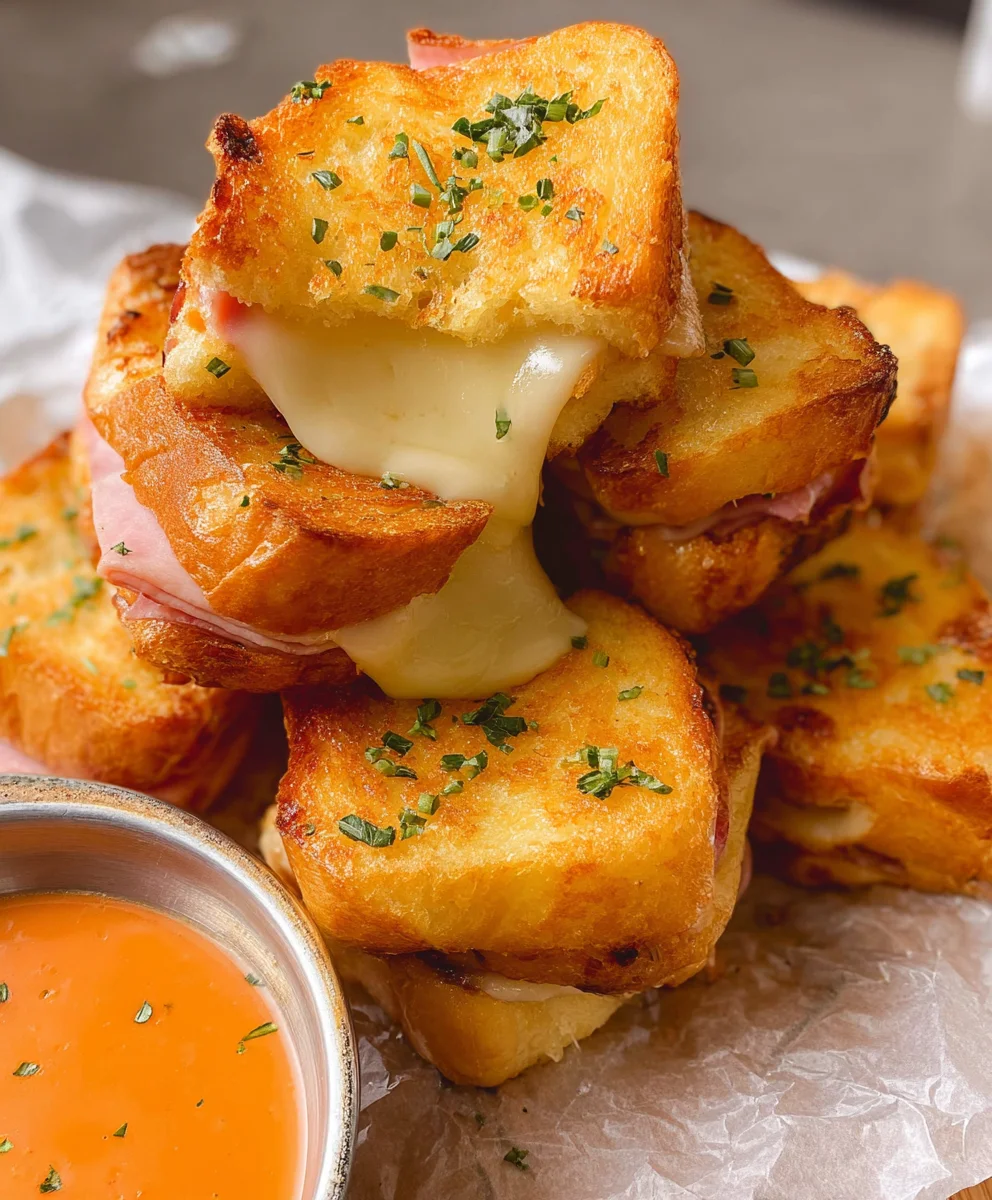
What makes this particular version stand out is the ingenious use of sweet, soft Hawaiian rolls. These diminutive, subtly sweet buns are more than just a substitute for traditional bread; they are the secret ingredient that transforms an ordinary sandwich into an extraordinary experience. The delicate sweetness of the rolls perfectly complements the savory, salty richness of the melted cheese, creating a harmonious flavor profile that is truly irresistible. Add to that the delightfully crispy, buttery crust achieved from pan-frying, and you have a textural masterpiece: crunchy on the outside, incredibly soft and gooey on the inside. It’s an easy-to-make dish that consistently delivers on taste, making it ideal for busy weeknights, delightful weekend brunches, or even a surprisingly elegant appetizer. When you taste the balance of sweet and savory, the perfect crisp-to-gooey ratio, you’ll understand why I confidently declare that This Hawaiian Roll Grilled Cheese Recipe Is The Best you’ll ever make.

Ingredients:
- One 12-count package King’s Hawaiian Sweet Rolls (the slider size is perfect!)
- 1/2 cup (1 stick) unsalted butter, softened to room temperature (trust me, softened is key!)
- 6 ounces sharp cheddar cheese, freshly grated (about 1.5 cups)
- 4 ounces Gruyere cheese, freshly grated (about 1 cup)
- 4 ounces low-moisture, part-skim mozzarella cheese, freshly grated (about 1 cup)
- 1/4 teaspoon garlic powder (optional, but highly recommended for an extra flavor kick)
- A pinch of freshly ground black pepper (to taste)
- A tiny pinch of sea salt (optional, as cheese can be salty)
Preparation Phase: Setting Up for Success
-
Unpack and Prepare Your Sweet Rolls:
First things first, let’s get those delightful King’s Hawaiian Sweet Rolls ready for their starring role. Gently remove the rolls from their packaging. The beauty of these rolls is their tender, slightly connected structure, which we’re going to leverage for easier handling. Using a serrated knife, carefully slice the entire block of rolls horizontally, aiming for the middle. You want to separate the top halves from the bottom halves while keeping the rolls themselves mostly intact as one large sheet. This makes buttering and assembly much, much simpler. Imagine you’re slicing a giant sweet bread loaf in half. This technique is one of the secrets to making “This Hawaiian Roll Grilled Cheese Recipe Is The Best” because it ensures even cooking and cheese distribution across all the sliders. Take your time with this step; a clean cut makes all the difference. -
Master the Art of Buttering:
Now for the butter – our golden ticket to a perfectly crispy, flavorful exterior! Ensure your 1/2 cup of unsalted butter is genuinely softened to room temperature. This isn’t just a suggestion; it’s a crucial step. If it’s too cold, it will tear the delicate rolls; if it’s melted, it won’t adhere properly. In a small bowl, combine your softened butter with the optional 1/4 teaspoon of garlic powder and a pinch of black pepper. Mix it well until everything is evenly incorporated. Now, generously spread this flavorful butter mixture over the cut side of both the top and bottom halves of your Hawaiian rolls. And when I say generously, I mean it! Don’t be shy. We’re aiming for edge-to-edge coverage. This butter layer is what will give us that coveted golden-brown crust and a savory counterpoint to the rolls’ inherent sweetness. This attention to detail in buttering is what elevates this simple dish into a truly gourmet experience. -
Grate Your Cheeses for Optimal Melt:
While pre-shredded cheese might seem convenient, for the absolute best grilled cheese, I always recommend grating your own. Why? Because freshly grated cheese melts far more smoothly and deliciously without the anti-caking agents found in pre-shredded varieties. For “This Hawaiian Roll Grilled Cheese Recipe Is The Best,” we’re using a blend of three incredible cheeses: sharp cheddar for its classic, robust flavor and creamy melt; Gruyere for its nutty, complex notes and fantastic stretch; and low-moisture mozzarella for that ultimate gooey, stringy cheese pull without adding excess moisture. Using a box grater or a food processor, grate all three cheeses and gently toss them together in a bowl to combine. This blend creates a symphony of flavors and textures that is simply unparalleled. -
Prepare Your Cooking Surface:
Before we start assembling, it’s wise to get your cooking surface ready. You’ll need a large non-stick skillet or an electric griddle. My personal preference leans towards a spacious electric griddle because it allows me to cook all 12 sliders at once, ensuring they’re all done around the same time and achieving a consistent level of golden perfection. Set your chosen cooking surface to medium-low heat. We want a gentle, even heat that will allow the cheese to melt slowly and thoroughly without burning the rolls. Patience is a virtue when making grilled cheese, especially when aiming for that perfect crisp without char. Let it preheat for a good 5-7 minutes to ensure it’s evenly warm across the surface.
Assembling Your Culinary Masterpiece
-
Lay the Foundation with Bottom Rolls:
Carefully transfer the buttered bottom halves of your Hawaiian rolls onto a clean cutting board or a large baking sheet. Ensure they are still connected as one large rectangle. This stable base will make the layering process much easier and cleaner. Having them grouped together minimizes handling, which is especially important with the soft texture of these rolls. Consider this the canvas for our cheesy creation. -
The First Layer of Cheese:
Now, it’s time to introduce the star of the show – our beautiful cheese blend! Take about two-thirds of your grated cheese mixture and sprinkle it evenly over the entire surface of the buttered bottom rolls. Make sure to get cheese into all the nooks and crannies, extending almost to the very edges. We want every single bite of “This Hawaiian Roll Grilled Cheese Recipe Is The Best” to be bursting with glorious melted cheese. Don’t clump it; an even layer promotes consistent melting. This initial layer will be the first wave of gooey goodness. -
Adding the Top Rolls:
Gently place the buttered top halves of the Hawaiian rolls directly on top of the cheese layer, aligning them perfectly with the bottom halves. Press down very lightly, just enough to ensure they are seated properly. You don’t want to squish out all that airiness that makes these rolls so special. The buttered side should be facing up, ready for its turn on the griddle. This creates a neat, compact package, ready for grilling.
The Grilling Process: Achieving Golden Perfection
-
Transferring to the Griddle:
With your griddle or skillet preheated to medium-low, carefully transfer the entire assembled block of Hawaiian roll sandwiches onto the hot surface. If you’re using a single skillet and it’s not large enough for all 12, you might need to work in batches. Don’t overcrowd the pan; leave a little space around the edges for even heat circulation. This step requires a bit of dexterity, but handling the rolls as one connected unit makes it surprisingly manageable. Once on the griddle, resist the urge to immediately press down hard. -
The Initial Cook: Patience for the Golden Crust:
Let the sandwiches cook undisturbed for about 5-7 minutes. This initial period is crucial for developing that beautiful golden-brown crust on the bottom and for beginning the melting process of the cheese inside. Keep a close eye on the heat; if it seems too hot and the rolls are browning too quickly, lower it slightly. The goal here is a slow, even cook. You might start to notice the edges of the cheese beginning to soften and peek out – that’s a good sign! You’ll also smell that incredible aroma of toasted sweet bread and melting cheese, a true testament to why “This Hawaiian Roll Grilled Cheese Recipe Is The Best.” -
Applying Gentle Pressure:
After the initial cook, use a spatula or two to gently press down on the entire block of sandwiches. This isn’t about squishing them flat, but rather ensuring good contact between the rolls and the hot surface, which helps the cheese melt more evenly and creates a better crust. A gentle, even pressure is all you need. You’re encouraging the cheese to spread its gooey embrace throughout the rolls. -
The Flip: A Moment of Truth:
Now for the flip! This can be the trickiest part, but with a large, wide spatula (or two spatulas working in tandem), it’s totally doable. Carefully slide your spatulas underneath the entire block of sandwiches. With confidence and a swift motion, flip the entire block over to cook on the second side. If you’re working in batches, flip each individual sandwich or smaller group. Don’t worry if a little cheese escapes; that just adds to the character and crispy bits. Once flipped, you should be greeted by a gorgeous, deeply golden-brown crust. If it’s not quite golden enough, don’t fret; the next steps will get us there. -
Cooking the Second Side and Final Melt:
After flipping, immediately sprinkle the remaining one-third of your grated cheese blend over the newly exposed tops of the rolls. This little trick is my secret weapon for adding an extra layer of cheesiness and ensuring an incredibly gooey interior. Allow the sandwiches to cook for another 5-7 minutes on this side, or until the bottom is beautifully golden-brown and, most importantly, all the cheese inside is gloriously melted and bubbly. Again, a gentle press with the spatula after a few minutes on this side helps with even cooking and melting. You should be able to see the cheese oozing slightly and feel the softness when you gently press. This is where the magic happens, transforming simple ingredients into something truly extraordinary. -
The Doneness Check:
To confirm doneness, gently lift one of the top rolls. The cheese should be completely melted, warm, and stretchy. Both the top and bottom of the rolls should be a rich, golden-brown color. If they’re not quite there, give them another minute or two, adjusting the heat as needed to prevent burning. The aroma filling your kitchen right now should be absolutely intoxicating, a clear indicator that “This Hawaiian Roll Grilled Cheese Recipe Is The Best” is well on its way to your plate! -
Off the Heat and A Moment of Rest:
Once perfectly golden and gooey, carefully transfer the entire block of grilled cheese from the griddle back to your cutting board. It’s tempting to dive right in, but allow it to rest for just 1-2 minutes. This brief resting period allows the cheese to set slightly, preventing it from oozing out excessively when you cut, and also lets the residual heat finish its work, ensuring optimal texture.
Serving Suggestions & Enjoyment
-
Slice and Serve with Pride:
Using that same serrated knife, carefully slice the large block of grilled cheese into individual Hawaiian Roll sliders. You can also slice them into halves or quarters for smaller, bite-sized portions, perfect for sharing or appetizers. Arrange them artfully on a platter. The sight of these perfectly golden, sweet, and savory sliders with cheese oozing from the sides is truly a feast for the eyes. -
The Ultimate Pairing Experience:
While “This Hawaiian Roll Grilled Cheese Recipe Is The Best” enjoyed on its own is a revelation, it truly shines when paired thoughtfully. My absolute favorite accompaniment is a warm bowl of creamy tomato soup – the classic duo for a reason! The tangy soup perfectly cuts through the richness of the cheese and the sweetness of the rolls. Other fantastic companions include a crisp green salad with a light vinaigrette, a side of crunchy pickles for a tangy contrast, or even a simple dip into a bit of extra Dijon mustard for a punch of flavor. Don’t forget, these are also phenomenal as a component of a larger brunch spread or a casual weeknight dinner. -
Enjoy the Moment:
Take a moment to savor your creation. Notice the crisp exterior giving way to the soft, sweet roll and the incredible melty, savory cheese blend. The combination of textures and flavors is what makes these grilled cheese sliders so utterly addictive and memorable. It’s comfort food elevated to an art form, a testament to simple ingredients coming together to create something truly special. -
Tips for Success and Variations:
To ensure every batch of “This Hawaiian Roll Grilled Cheese Recipe Is The Best” is a triumph, remember these key tips: always use softened butter, grate your own cheese, and maintain a medium-low heat for slow, even cooking. For variations, consider adding thinly sliced deli ham for a Hawaiian Roll Croque Monsieur twist, or a touch of caramelized onions for added sweetness and depth. A sprinkle of Everything Bagel seasoning on the buttered exterior before grilling also adds a fantastic textural and savory element. The possibilities are endless once you master this perfect base recipe.
Conclusion:
As we wrap up our culinary journey with this incredible recipe, I truly hope you’re feeling inspired to get into your kitchen and experience the magic for yourself. What makes this particular grilled cheese stand head and shoulders above the rest? It’s the delightful, unexpected fusion of sweet, pillowy Hawaiian rolls with the irresistibly gooey, savory embrace of perfectly melted cheese. The rolls don’t just hold the cheese; they transform, caramelizing slightly on the outside to form a golden, crisp crust that is utterly addictive, while remaining soft and tender within. It’s a symphony of textures and flavors that is both comforting and exciting, familiar yet refreshingly new. Trust me when I say, you won’t look at grilled cheese the same way again after trying this version. From the moment you take that first bite, you’ll understand exactly why This Hawaiian Roll Grilled Cheese Recipe Is The Best, a simple statement that truly captures the essence of its deliciousness.
This isn’t just a snack; it’s an experience. The sweetness of the bread perfectly balances the rich, salty cheese, creating a flavor profile that appeals to everyone, from the pickiest eaters to the most seasoned foodies. It’s a dish that evokes nostalgia while simultaneously offering an innovative twist. I’ve seen faces light up, heard exclamations of delight, and witnessed countless empty plates when this dish is served. It’s the kind of recipe that becomes an instant family favorite, a go-to for quick lunches, satisfying dinners, or even a fun, elevated brunch item. The simplicity belies the profound satisfaction it delivers, making it a true kitchen gem that you’ll return to again and again.
Now, while this grilled cheese is spectacular on its own, it also plays wonderfully with others. For a classic, comforting pairing, a warm bowl of creamy tomato soup is always a winner; the tangy soup beautifully cuts through the richness of the cheese. Imagine dipping a piece of that golden, crispy sandwich into a swirl of hot, flavorful tomato bisque – pure bliss! For a lighter touch, a crisp, green salad with a zesty vinaigrette provides a refreshing contrast, making it a perfect, well-rounded meal. If you’re hosting a casual get-together, consider serving them alongside some crunchy potato chips or a bowl of vibrant fruit salad for a delightful sweet and savory balance. And for those who love to dip, don’t shy away from experimenting with sauces! A sriracha mayo can add a fantastic kick, or even a classic honey mustard for a tangy-sweet complement. You could even serve them with a simple side of pickles or coleslaw to add another layer of texture and flavor to your plate. These suggestions are just starting points; your culinary imagination is the only limit!
But let’s talk about taking things to the next level with some creative variations. While the basic recipe is flawless, there’s always room to personalize and make it truly your own. Think about the cheese for a moment: while American or cheddar is classic, don’t hesitate to experiment with different varieties. A sharp provolone adds a nice bite, Monterey Jack offers a super melt, or even a smoked Gouda for a deeper, more sophisticated flavor. For those who crave a little heat, pepper jack is an excellent choice. Beyond cheese, consider adding a thin slice of deli ham or turkey for a more substantial sandwich, turning it into an elevated grilled ham and cheese. Crispy bacon bits would also be an absolute revelation here, adding a smoky, salty crunch that perfectly complements the sweet bread and gooey cheese. For veggie lovers, thinly sliced and sautéed mushrooms, caramelized onions, or a handful of fresh spinach can add wonderful depth and texture. Even a delicate smear of fig jam or a few thin apple slices can introduce an unexpected, delightful sweetness that plays beautifully with the savory cheese. Imagine a Hawaiian roll grilled cheese with brie and fig jam – a gourmet experience at your fingertips! Don’t be afraid to mix and match; that’s where the real fun begins.
So, what are you waiting for? I wholeheartedly encourage you to roll up your sleeves, gather your ingredients, and give This Hawaiian Roll Grilled Cheese Recipe Is The Best a try tonight! It’s an easy, rewarding, and undeniably delicious meal that is guaranteed to bring smiles to faces around your table. Once you’ve experienced the magic, I would absolutely love to hear about it. What variations did you try? Did you discover a new favorite cheese combination or a surprising side dish? Did your family rave about it as much as mine does? Please, share your culinary adventures with me! Your creativity and feedback are always welcome, and I can’t wait to see the incredible grilled cheese masterpieces you create. Happy cooking, and prepare to fall in love with your new favorite sandwich!
Best Hawaiian Roll Grilled Cheese Recipe – Easy & Delicious!
This Hawaiian Roll Grilled Cheese Recipe Is The Best, and I am absolutely thrilled to share why this delightful creation has become a staple in my kitchen. Forget everything you thought you knew about a simple grilled cheese; we’re elevating a timeless comfort food to an entirely new level of deliciousness.
Ingredients
-
One 12-count package King’s Hawaiian Original Hawaiian Sweet Rolls
-
12-24 slices sliced cheddar cheese
-
4 tbsp unsalted butter, softened
-
1/2 tsp oregano
-
1/2 tsp garlic powder
-
1/2 tbsp parsley
Instructions
-
Step 1
Slice the entire block of King’s Hawaiian Sweet Rolls horizontally. In a small bowl, combine 4 tbsp softened unsalted butter with 1/2 tsp oregano, 1/2 tsp garlic powder, and 1/2 tbsp parsley. Spread this flavorful butter mixture generously on the cut sides of both the top and bottom roll halves. -
Step 2
Place the buttered bottom halves of the rolls on a clean surface. Arrange the sliced cheddar cheese evenly over the entire surface of the bottom rolls. Gently place the buttered top halves of the rolls on top, aligning them and ensuring the buttered side faces up. -
Step 3
Preheat a large non-stick skillet or electric griddle to medium-low heat. Carefully transfer the assembled block of sliders onto the hot surface. Cook undisturbed for 5-7 minutes, until the bottom is beautifully golden-brown and the cheese begins to soften. -
Step 4
Gently press down on the block with a spatula, then carefully flip the entire block over. Continue cooking for another 5-7 minutes, or until the second side is golden-brown and the cheddar cheese is thoroughly melted and gooey. -
Step 5
Transfer the grilled cheese block to a cutting board. Allow it to rest for 1-2 minutes before using a serrated knife to slice it into individual sliders. Serve immediately and enjoy the sweet and savory delight!
Important Information
Nutrition Facts (Per Serving)
It is important to consider this information as approximate and not to use it as definitive health advice.
Allergy Information
Please check ingredients for potential allergens and consult a health professional if in doubt.
Leave a Comment