
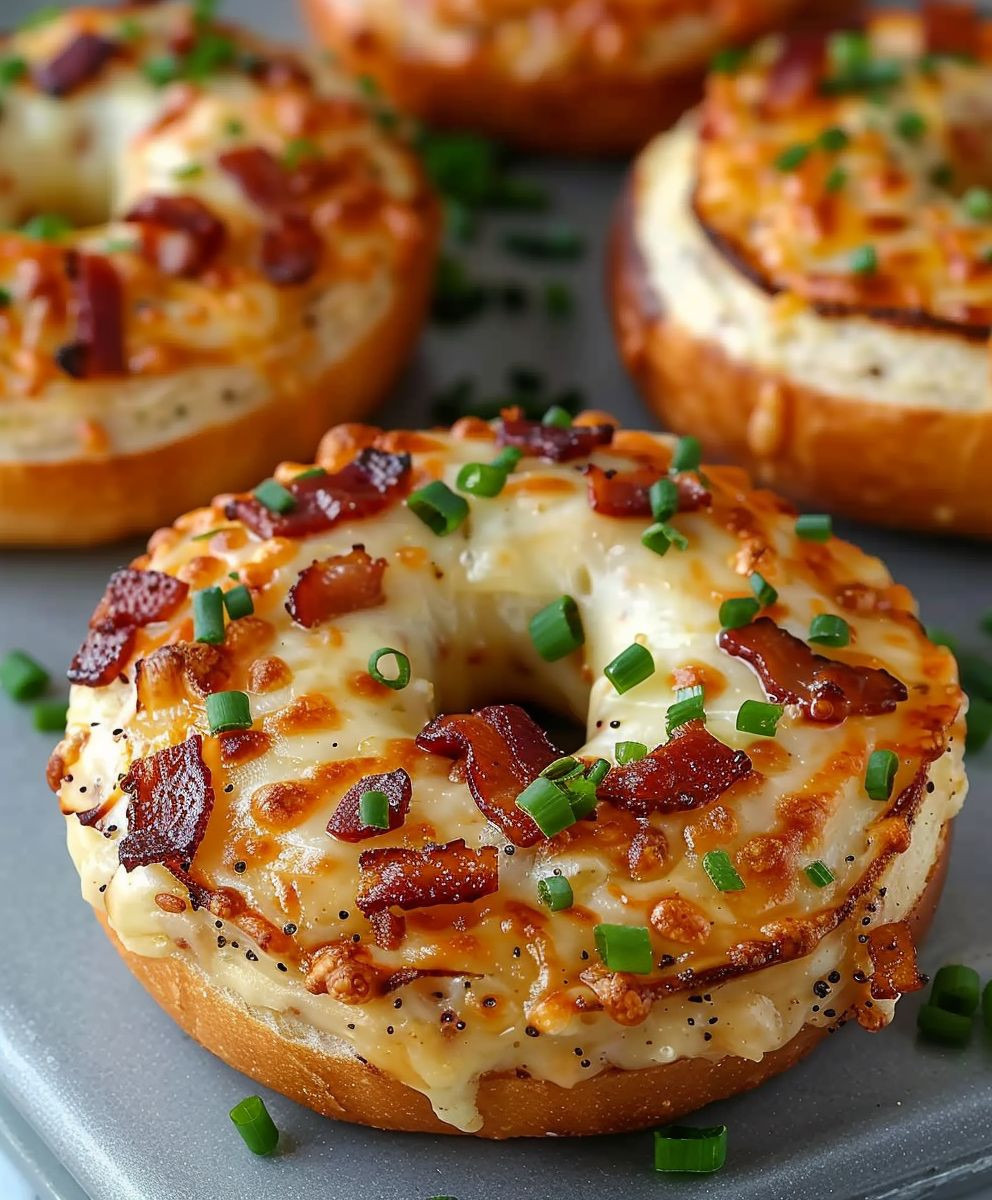
Bacon Cheddar Bagels: the ultimate breakfast indulgence that will transform your mornings from mundane to magnificent! Imagine sinking your teeth into a warm, chewy bagel, its crust giving way to a soft interior studded with crispy bacon and melted cheddar cheese. Is your mouth watering yet? Mine certainly is! This isn’t just a bagel; it’s an experience.
While the exact origins of the Bacon Cheddar Bagel are shrouded in delicious mystery (likely born from a late-night craving!), the bagel itself boasts a rich history. Brought to America by Jewish immigrants from Poland, bagels were traditionally a simple, boiled-then-baked bread. Over time, they’ve evolved into a canvas for culinary creativity, and the addition of bacon and cheddar is a testament to that evolution.
People adore this particular combination for its perfect balance of flavors and textures. The saltiness of the bacon complements the sharpness of the cheddar, while the chewy bagel provides a satisfying base. It’s a quick and easy breakfast or brunch option that’s both comforting and incredibly satisfying. Plus, who can resist the allure of bacon and cheese? It’s a classic pairing for a reason! So, let’s get baking and create some truly unforgettable Bacon Cheddar Bagels!

Ingredients:
- 6 cups all-purpose flour, plus more for dusting
- 2 teaspoons instant yeast
- 2 teaspoons salt
- 2 tablespoons sugar
- 2 1/4 cups warm water (105-115°F)
- 2 tablespoons vegetable oil, plus more for greasing
- 10 cups water
- 1/2 cup baking soda
- 1 large egg, beaten
- 1 cup shredded cheddar cheese
- 1 cup cooked bacon, crumbled
Preparing the Dough:
Alright, let’s get started! Making bagels from scratch might seem intimidating, but trust me, it’s totally doable and so worth it. The first step is creating our dough, which is the foundation of these delicious Bacon Cheddar Bagels.
- Combine Dry Ingredients: In a large bowl, whisk together the flour, instant yeast, salt, and sugar. Make sure everything is evenly distributed. This ensures that the yeast activates properly and the bagels have a consistent flavor. I like to use a whisk to really get everything mixed well.
- Add Water and Oil: Gradually add the warm water and vegetable oil to the dry ingredients. Mix with a wooden spoon or your hands until a shaggy dough forms. The dough will seem a bit sticky at this point, and that’s perfectly fine.
- Knead the Dough: Turn the dough out onto a lightly floured surface. Knead for 8-10 minutes, or until the dough becomes smooth and elastic. You can also use a stand mixer with a dough hook attachment for this step. If using a stand mixer, knead on medium speed for about 6-8 minutes. The dough should be slightly tacky but not overly sticky. If it’s too sticky, add a little more flour, one tablespoon at a time.
- First Rise: Place the dough in a lightly oiled bowl, turning to coat. Cover the bowl with plastic wrap or a clean kitchen towel. Let the dough rise in a warm place for 1-1.5 hours, or until doubled in size. This is a crucial step for developing the flavor and texture of the bagels. I usually put mine in a slightly warm oven (turned off, of course!).
Shaping the Bagels:
Now that our dough has risen beautifully, it’s time to shape those bagels! This part is actually quite fun and allows you to get creative (within bagel-shaped boundaries, of course!).
- Punch Down the Dough: Gently punch down the risen dough to release the air. Turn it out onto a lightly floured surface.
- Divide the Dough: Divide the dough into 12 equal pieces. I like to use a kitchen scale to ensure they’re all the same size, but you can eyeball it too.
- Shape into Balls: Roll each piece of dough into a smooth ball.
- Create the Hole: There are two main methods for creating the bagel hole:
- Poke and Stretch: Use your finger to poke a hole through the center of each ball. Gently stretch the hole to about 1-1.5 inches in diameter.
- Rope Method: Roll each ball into a 6-inch rope. Wrap the rope around your hand, overlapping the ends. Pinch the ends together firmly to seal.
I personally prefer the poke and stretch method, but both work great!
- Second Rise (Optional): Place the shaped bagels on a baking sheet lined with parchment paper. Cover loosely with plastic wrap and let them rest for 15-20 minutes. This allows them to puff up slightly before boiling.
Boiling and Baking:
This is where the magic happens! Boiling the bagels before baking is what gives them that signature chewy texture and shiny crust. Don’t skip this step!
- Preheat Oven: Preheat your oven to 425°F (220°C).
- Prepare Boiling Water: Bring 10 cups of water to a boil in a large pot. Add the baking soda. The baking soda helps to create that characteristic bagel texture and color.
- Boil the Bagels: Gently drop 2-3 bagels into the boiling water at a time. Boil for 1 minute per side. This short boiling time is crucial for setting the crust.
- Return to Baking Sheet: Remove the bagels from the boiling water with a slotted spoon and place them back on the prepared baking sheet.
- Egg Wash: Brush the tops of the boiled bagels with the beaten egg. This will give them a beautiful golden-brown color.
- Add Toppings: Immediately sprinkle the tops of the bagels with the shredded cheddar cheese and crumbled bacon. Press the toppings lightly into the dough to help them adhere.
- Bake: Bake for 20-25 minutes, or until the bagels are golden brown and the cheese is melted and bubbly.
Cooling and Serving:
Almost there! Now comes the hardest part: waiting for the bagels to cool slightly before devouring them. This allows the texture to set properly.
- Cool on Wire Rack: Transfer the baked bagels to a wire rack to cool for at least 15-20 minutes.
- Slice and Enjoy: Slice the bagels in half and enjoy them warm. They’re delicious on their own, or you can add your favorite toppings like cream cheese, avocado, or even more bacon!
Tips and Variations:
- Flavor Variations: Feel free to experiment with different cheeses and toppings. Jalapeño cheddar, everything bagel seasoning, or even a sweet cinnamon sugar topping would be delicious!
- Freezing Bagels: These bagels freeze well. Let them cool completely, then wrap them individually in plastic wrap and place them in a freezer bag. They can be stored in the freezer for up to 2 months. To reheat, thaw them overnight in the refrigerator or microwave them briefly. Then, toast them until warm and crispy.
- Dough Consistency: The dough should be slightly tacky but not overly sticky. If it’s too sticky, add a little more flour, one tablespoon at a time. If it’s too dry, add a little more water, one tablespoon at a time.
- Boiling Time: Don’t overboil the bagels, as this can make them tough. One minute per side is usually sufficient.
- Baking Time: The baking time may vary depending on your oven. Keep an eye on the bagels and adjust the baking time as needed. They should be golden brown and sound hollow when tapped on the bottom.
- Make Ahead: You can prepare the dough the night before and let it rise in the refrigerator overnight. This will slow down the rising process and develop even more flavor. In the morning, let the dough come to room temperature for about 30 minutes before shaping and boiling.
Troubleshooting:
- Bagels are too dense: This could be due to not kneading the dough enough or not allowing it to rise properly. Make sure to knead the dough for at least 8-10 minutes and let it rise until doubled in size.
- Bagels are too flat: This could be due to over-proofing the dough or not boiling them long enough. Make sure to boil the bagels for 1 minute per side.
- Toppings are falling off: Make sure to press the toppings lightly into the dough after brushing with the egg wash.
I hope you enjoy making these Bacon Cheddar Bagels as much as I do! They’re a perfect weekend breakfast or brunch treat. Happy baking!
Conclusion:
And there you have it! These Bacon Cheddar Bagels are more than just a breakfast item; they’re a flavor explosion waiting to happen. I truly believe this recipe is a must-try for anyone who loves the savory combination of smoky bacon and sharp cheddar, all nestled within the chewy goodness of a homemade bagel. Forget store-bought bagels that lack character and taste; these are packed with flavor and made with love (and a generous helping of bacon, of course!).
Why is this recipe a must-try? Because it’s surprisingly simple to make, even for beginner bakers. The satisfaction of pulling a warm, golden-brown bagel from your oven, knowing you created it from scratch, is unparalleled. Plus, the aroma that fills your kitchen while these are baking is simply divine – a tantalizing mix of yeasty dough, crispy bacon, and melted cheddar that will have everyone clamoring for a taste. It’s a guaranteed crowd-pleaser, perfect for weekend brunches, quick breakfasts on the go, or even a savory snack any time of day.
But the best part? The versatility! While these Bacon Cheddar Bagels are fantastic as is, there are endless possibilities for customization.
Serving Suggestions and Variations:
* Breakfast Sandwich Extravaganza: Slice one of these bagels in half and load it up with scrambled eggs, avocado, and a drizzle of hot sauce for the ultimate breakfast sandwich.
* Lunchtime Delight: Use it as the base for a gourmet sandwich with sliced turkey, lettuce, tomato, and your favorite condiments.
* Pizza Bagel Upgrade: Spread with pizza sauce, top with pepperoni and mozzarella cheese, and bake until bubbly for a grown-up version of a childhood classic.
* Cream Cheese Dream: Simply spread with your favorite cream cheese – plain, chive, or even a jalapeno cream cheese for an extra kick.
* Spice it Up: Add a pinch of red pepper flakes to the dough for a subtle heat.
* Herbaceous Twist: Incorporate fresh herbs like rosemary or thyme into the dough for an aromatic and flavorful variation.
* Everything Bagel Topping: Before baking, sprinkle the bagels with everything bagel seasoning for added texture and flavor.
* Different Cheeses: Experiment with different types of cheese! Gruyere, pepper jack, or even a smoked gouda would be delicious alternatives to cheddar.
I’m confident that once you try this recipe, you’ll be hooked. The combination of textures and flavors is simply irresistible. The slight chewiness of the bagel, the crispy bacon, and the melted cheddar create a symphony of deliciousness in every bite.
So, what are you waiting for? Gather your ingredients, preheat your oven, and get ready to embark on a bagel-making adventure! I promise you won’t regret it. And most importantly, don’t be afraid to experiment and make these bagels your own.
I’m so excited for you to try this recipe! Once you’ve made your own batch of Bacon Cheddar Bagels, please come back and share your experience in the comments below. I’d love to hear about your variations, your serving suggestions, and any tips or tricks you discovered along the way. Happy baking! Let me know what you think! I’m eager to hear how they turned out for you and what creative twists you added. Your feedback helps me improve and inspires other bakers to try this fantastic recipe. Enjoy!
Bacon Cheddar Bagels: The Ultimate Guide to Baking Delicious Bagels
Chewy, delicious bagels packed with savory bacon and cheddar cheese. Perfect for breakfast, brunch, or a satisfying snack!
Ingredients
Instructions
Recipe Notes
- Flavor Variations: Experiment with different cheeses and toppings.
- Freezing Bagels: Freeze cooled bagels individually wrapped in plastic wrap for up to 2 months. Thaw overnight or microwave briefly, then toast.
- Dough Consistency: Adjust flour or water as needed to achieve a slightly tacky dough.
- Boiling Time: Don’t overboil the bagels.
- Baking Time: Adjust baking time as needed based on your oven.
- Make Ahead: Prepare the dough the night before and let it rise in the refrigerator overnight.
Leave a Comment