
Wisconsin Apple Kringle – just the mention of it conjures images of cozy mornings, steaming coffee, and the comforting embrace of a truly exceptional pastry. There’s something uniquely special about this elongated, pretzel-shaped delight, which isn’t merely a dessert but a cherished culinary experience, eagerly anticipated by many.
A Legacy Baked into Every Layer
Tracing its origins back to 13th-century Denmark, the Kringle made its way to the United States with Danish immigrants, finding its most passionate embrace in Racine, Wisconsin. It’s no wonder that this flaky, tender pastry was officially designated the State Pastry of Wisconsin in 2013, a testament to its profound cultural significance and beloved status among locals and visitors alike. It’s more than just a sweet treat; it’s a symbol of heritage, community, and expert baking craftsmanship passed down through generations.
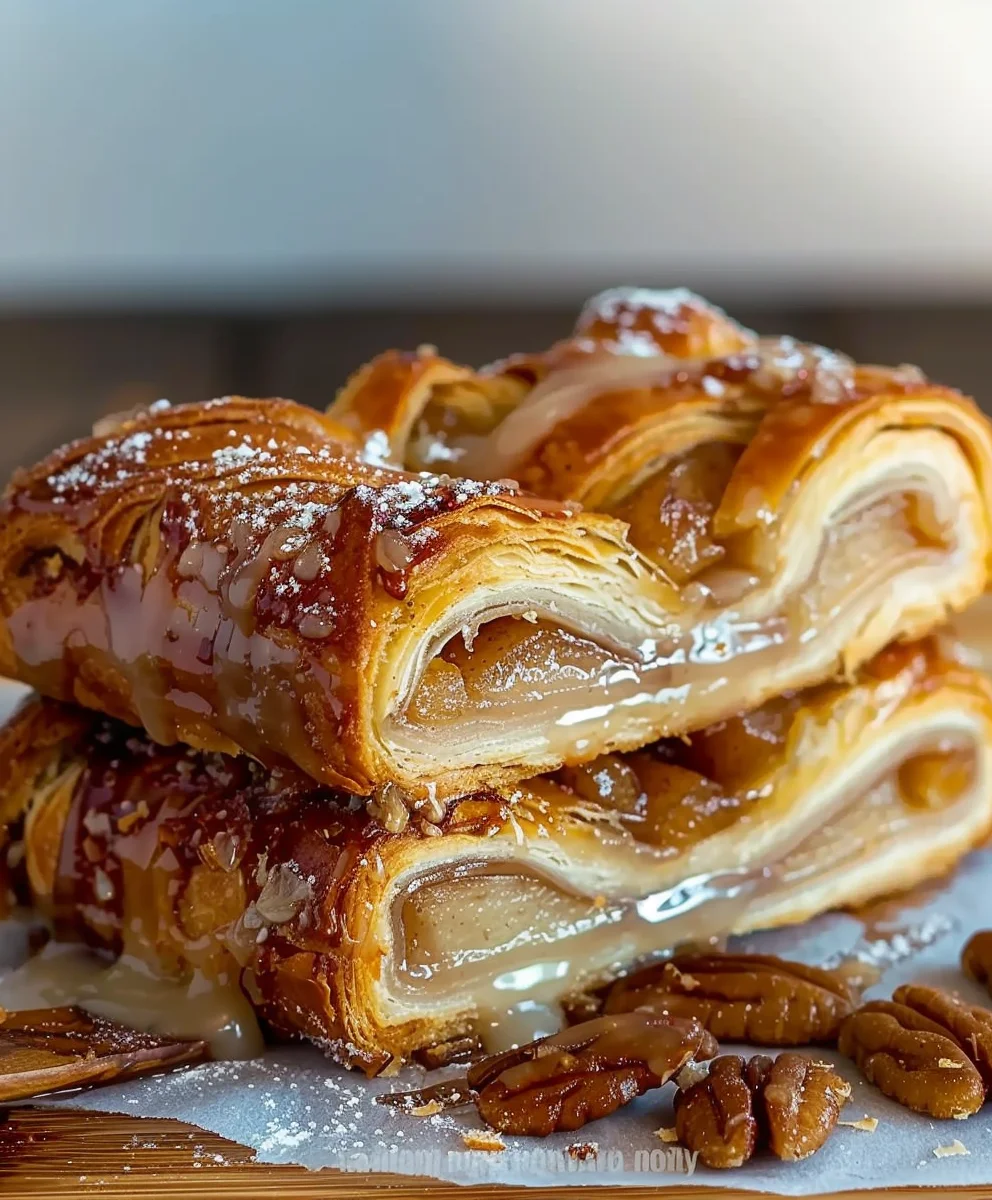
What makes our homemade Wisconsin Apple Kringle so utterly irresistible? It’s the harmonious blend of a light, buttery, multi-layered pastry shell that shatters beautifully with each bite, encasing a generous, perfectly spiced apple filling. The balance of sweet and tart, often enhanced by a delicate icing drizzle, creates a symphony of flavors and textures that satisfies the soul. Whether enjoyed for a festive breakfast, a sophisticated brunch, or a comforting evening dessert, this Kringle offers a slice of pure joy and tradition, making any occasion feel a little more special. I’m thrilled to guide you through creating this iconic pastry in your own kitchen!

Ingredients:
-
For the Kringle Dough:
- 2 ½ teaspoons (1 packet) active dry yeast
- ¼ cup warm water (105-115°F / 40-46°C)
- ½ cup granulated sugar, divided
- ½ cup warm milk (105-115°F / 40-46°C)
- 1 large egg, lightly beaten
- 1 teaspoon pure vanilla extract
- ½ teaspoon salt
- 3 ½ cups all-purpose flour, plus extra for dusting
- 1 cup (2 sticks) unsalted butter, very cold and cut into ½-inch cubes
- 1 large egg, for egg wash (beaten with 1 tablespoon water)
-
For the Wisconsin Apple Kringle Filling:
- 4-5 medium-sized tart apples (like Honeycrisp, Granny Smith, or Gala), about 4 cups peeled, cored, and sliced
- ½ cup granulated sugar (adjust to your preference and apple sweetness)
- ¼ cup packed light brown sugar
- 1 tablespoon all-purpose flour or cornstarch (for thickening)
- 1 teaspoon ground cinnamon
- ½ teaspoon ground nutmeg
- ¼ teaspoon ground cloves (optional, but highly recommended for depth)
- 1 tablespoon fresh lemon juice
- 1 tablespoon unsalted butter, melted
-
For the Vanilla Glaze:
- 1 ½ cups powdered sugar (confectioners’ sugar)
- 2-3 tablespoons milk (or heavy cream, for a richer glaze)
- ½ teaspoon pure vanilla extract
Preparing the Kringle Dough (Danish Pastry Base)
- Activate the Yeast: In a large mixing bowl, I start by combining the warm water and 1 tablespoon of the granulated sugar. Then, I gently sprinkle the active dry yeast over the mixture. It’s important to let this sit for 5-10 minutes, or until the yeast becomes delightfully foamy and gives off a fragrant, yeasty aroma. This tells me that the yeast is active and ready to create the beautiful rise and texture we want for our homemade Wisconsin Apple Kringle.
- Combine Wet Ingredients: To the bowl with the activated yeast, I carefully add the warm milk, the remaining granulated sugar, the lightly beaten egg, a touch of pure vanilla extract, and the salt. I whisk all of these ingredients together until they are thoroughly combined. The warmth of the liquids here is quite crucial, as it aids in fully activating the yeast and ensures that the resulting dough will be wonderfully smooth and pliable.
- Add Flour and Mix: I gradually incorporate the all-purpose flour into the wet mixture, mixing with either a sturdy wooden spoon or, more often, a stand mixer fitted with a dough hook on a low speed. I mix just until a shaggy, somewhat rough dough forms. It’s really important not to overmix at this initial stage; my goal is simply to get all the ingredients loosely incorporated.
- Incorporate Cold Butter: Now comes one of the most exciting parts for achieving that classic flakiness! I add the very cold butter cubes to the dough. Using my hands (which I find works best to feel the consistency), a pastry blender, or the stand mixer on low, I work the butter into the dough. The key here is to distribute the butter so it’s in visible pieces – think pea-sized to small walnut-sized chunks. This step is absolutely critical for developing the signature flaky layers of your Wisconsin Apple Kringle. It’s essential not to fully incorporate the butter; those distinct, cold pieces are precisely what will create those wonderful pockets of steam during baking, leading to a perfectly layered pastry.
- First Chill: I turn the dough out onto a lightly floured surface and gently shape it into a neat rectangular form, aiming for about 8×10 inches. Then, I wrap the dough very tightly in plastic wrap and refrigerate it for at least 2 hours, though I honestly prefer to let it chill overnight. This thorough chilling not only makes the dough much easier to handle in the subsequent steps but is also utterly crucial for allowing the butter to firm up and the gluten to relax, which are both vital for developing those characteristic Danish pastry layers.
- First Roll and Fold (Turn): After the first chill, I lightly flour my work surface and the top of the now-firm dough. I then roll the dough into a large rectangle, typically around 12×24 inches. I always try to maintain an even thickness across the entire surface. Once I have my large rectangle, I perform what’s known as a “letter fold”: I fold one-third of the dough over the middle section, and then fold the other third over that, much like folding a business letter. This initial fold effectively creates three distinct layers within the dough.
- Second Chill: After the first fold, I rotate the folded dough 90 degrees. I wrap it tightly in plastic wrap once more and refrigerate it for another 30-45 minutes. This chilling period is so important, as it gives the gluten a chance to relax after being worked and, more importantly, keeps the butter nice and cold. This prevents the butter from melting into the dough, which would ruin those precious, separate layers we’re trying so hard to create.
- Second Roll and Fold: I repeat the rolling and folding process exactly as I did in step 6. I roll the dough into another 12×24-inch rectangle, ensuring even thickness, and then perform the letter fold again. Each fold adds more layers and further develops the incredible flakiness of the pastry.
- Third Chill: You’re probably sensing a pattern by now – and yes, patience truly is a virtue when making a truly magnificent Wisconsin Apple Kringle! I wrap and refrigerate the dough for yet another 30-45 minutes. These intermittent chilling steps are non-negotiable for success.
- Third Roll and Fold: For the final turn, I repeat the rolling and folding process one last time. This ensures maximum flakiness and really builds up all those wonderful, delicate layers that we associate with a high-quality Danish pastry.
- Final Chill: After the third and final fold, I wrap the dough securely one last time and refrigerate it for at least 1 hour, or until I am completely ready to assemble my kringle. This extensive chilling and meticulous folding process is precisely what transforms simple ingredients into the incredibly flaky, buttery base that defines an authentic Wisconsin Apple Kringle. Seriously, do not rush these steps if you want to achieve that perfect, authentic texture!
Crafting the Apple Filling for Your Wisconsin Apple Kringle
- Prepare the Apples: I start by washing, peeling, coring, and then slicing my chosen apples into thin, even pieces, ideally about ¼-inch thick. I aim for around 4 cups of prepared apples. It’s important to make them thin enough so they soften beautifully during baking, but not so thin that they turn into an applesauce-like mush. I often like to use a mix of tart and slightly sweet apples, as this combination gives the Wisconsin Apple Kringle filling a wonderfully complex and balanced flavor profile.
- Combine Filling Ingredients: In a medium bowl, I combine the prepared sliced apples with the granulated sugar, light brown sugar, all-purpose flour (or cornstarch, whichever I have on hand for thickening), ground cinnamon, ground nutmeg, and the optional (but highly recommended for depth) ground cloves. I then add the fresh lemon juice – this not only brightens the overall flavor of the filling but also helps quite a bit in preventing the apples from browning too quickly.
- Add Melted Butter: I drizzle the melted unsalted butter over the apple mixture and gently toss everything. My goal here is to ensure that the apples are evenly coated with all the delicious sugars, spices, and the thickener, preparing them for their sweet destiny inside the kringle.
- Brief Sauté (Optional, but Recommended): For a truly cohesive filling and to guarantee that the apples are perfectly tender, I almost always briefly sauté the mixture. I heat a large skillet over medium heat, add the apple mixture, and cook it for about 5-7 minutes, stirring occasionally. I look for the apples to soften just slightly and for their juices to begin thickening. After this, it’s crucial to let the filling cool completely before I even think about assembling my Wisconsin Apple Kringle. This brief sauté step, I’ve found, is a real game-changer; it concentrates the flavors beautifully and significantly reduces the chance of ending up with a watery filling, thereby ensuring my kringle maintains its perfect shape and delightful texture.
Assembling the Iconic Wisconsin Apple Kringle
- Preheat Oven and Prepare Baking Sheet: I preheat my oven to 375°F (190°C) and then line a large baking sheet with parchment paper. This simple step prevents any sticking and makes the cleanup process so much easier afterward.
- Roll Out the Dough: On a lightly floured surface, I take my beautifully chilled kringle dough and roll it out into a long rectangle, aiming for dimensions of approximately 12×18 inches. It’s really important to try and achieve an even thickness, about ¼-inch, across the entire rectangle. This large, consistent surface area is absolutely essential for forming the traditional and elegant kringle shape.
- Position the Filling: I carefully spoon the now-cooled apple filling down the center third of the dough rectangle. I make sure to leave about an inch of dough clear on the short ends and, crucially, leave a generous two-thirds of the dough empty on either side of the filling. Picture a strip of filling about 4-5 inches wide running neatly down the middle of the 12-inch width of the dough.
- Fold the Dough: I gently take one long side of the dough and carefully fold it over the apple filling, stretching it ever so slightly if needed to ensure the filling is fully covered. Then, I bring the other long side of the dough over the top, allowing it to overlap slightly with the first fold. At this point, I should have a long, beautifully filled log of dough.
- Seal the Seams: This part requires a bit of attention to detail. I firmly pinch the seams along the entire length of the dough to securely seal the apple filling inside. I also make sure to pinch and seal the short ends of the log, which is vital to ensure that absolutely no filling escapes during the baking process. This careful sealing is crucial for keeping your Wisconsin Apple Kringle perfectly intact and wonderfully delicious.
- Shape the Kringle: With utmost care, I transfer the sealed dough log to my prepared baking sheet. I then gently form the log into its characteristic oval or ring shape, carefully bringing the two ends together. I press the ends together very firmly to seal them, aiming to create a seamless ring. Sometimes, I might need to gently stretch or compress the dough a little to achieve a really good, secure seal. This distinctive oval or pretzel-like shape is what makes a Wisconsin Apple Kringle so immediately recognizable and charming.
- Egg Wash: In a small bowl, I whisk the remaining large egg with 1 tablespoon of water to create a lovely egg wash. I then generously brush the entire surface of the kringle with this wash. This step is key, as it will give your Wisconsin Apple Kringle a stunning golden-brown, glossy finish after baking.
- Optional Slashes: For a truly traditional appearance and to allow steam to escape gracefully during baking, I often make several diagonal slashes across the top of the kringle using a very sharp knife. I space these slashes about 2-3 inches apart, being very careful not to cut all the way through to the filling.
Baking Your Homemade Wisconsin Apple Kringle
- Bake the Kringle: I place the baking sheet with my beautifully assembled Wisconsin Apple Kringle into the preheated oven. I bake it for 30-45 minutes, or until the kringle achieves a deep, rich golden brown color and sounds satisfyingly hollow when gently tapped. It’s important to remember that exact baking times can vary quite a bit depending on your specific oven, so I always keep a close eye on it, particularly after about 30 minutes. My goal is a robust golden color, which reliably indicates a fully cooked and wonderfully flaky pastry.
- Cooling: Once it’s baked to perfection, I carefully transfer the Wisconsin Apple Kringle to a wire rack to cool completely before I even think about glazing it. While it might be incredibly tempting to glaze it while it’s still warm and fragrant, waiting until it’s fully cooled allows the glaze to set properly, ensuring it doesn’t just melt right off the warm pastry.
Whipping Up the Perfect Glaze
- Combine Glaze Ingredients: In a medium bowl, I whisk together the powdered sugar, 2 tablespoons of milk (or heavy cream, which I prefer for a richer glaze), and the pure vanilla extract until the mixture is beautifully smooth. The consistency I’m aiming for is thick but still easily pourable. If it feels too thick, I add more milk, just a teaspoon at a time, until I reach that perfect consistency. Conversely, if it’s too thin, a little more powdered sugar usually does the trick.
- Glaze the Kringle: Once the Wisconsin Apple Kringle has cooled completely and is ready for its crowning glory, I drizzle or spread the vanilla glaze generously over the entire top surface. I often use the back of a spoon or a small offset spatula to spread it evenly and artistically. I then allow the glaze to set for about 15-20 minutes before serving. This sweet, creamy vanilla glaze is truly the perfect finishing touch, elevating your delightful Wisconsin Apple Kringle to a new level of deliciousness.
Serving Your Delightful Wisconsin Apple Kringle
- Slice and Serve: Once the glaze has fully set, I carefully slice my Wisconsin Apple Kringle into individual servings. I always use a serrated knife for this, as it helps create beautiful, clean cuts through all those flaky layers without crushing them.
- Enjoy: There’s nothing quite like serving warm slices of your homemade Wisconsin Apple Kringle alongside a steaming cup of coffee or a comforting mug of tea. It truly is a special treat, absolutely perfect for breakfast, brunch, or a wonderful afternoon snack. The effort you put into it shines through in every bite.
- Storage: Any leftover Wisconsin Apple Kringle can be stored in an airtight container at room temperature for up to 2-3 days, or refrigerated for up to a week. For longer storage, I often individually wrap slices and freeze them for up to a month. When I want to enjoy a frozen piece, I simply thaw it at room temperature or gently warm it in a low oven for that wonderful, fresh-baked taste experience.
- Variations: While this recipe focuses on the classic and beloved apple filling, once you’ve truly mastered the intricate dough, feel free to experiment with other fruit fillings or even savory cheese fillings! The true beauty of a Wisconsin Apple Kringle lies not just in its traditional form but also in its versatility. However, I must confess, there’s truly nothing quite like the authentic, traditional apple version.
Making a Wisconsin Apple Kringle from scratch is undoubtedly a labor of love, requiring patience and a gentle touch. However, the immensely rewarding layers of flaky, buttery pastry combined with the warm, perfectly spiced apple filling are, in my humble opinion, absolutely worth every single moment of effort. I genuinely hope you enjoy the entire process and savor the incredible results of your very own homemade bakery masterpiece!
Conclusion:
So, after journeying through the steps of crafting this truly delightful pastry, I truly believe you’ll understand why this recipe for Wisconsin Apple Kringle is not just another baked good; it’s an experience. It’s the kind of treat that transforms an ordinary morning into something truly special, a simple get-together into a memorable occasion. I’ve poured my heart into perfecting this particular version, ensuring that every single bite delivers that quintessential balance of a beautifully flaky, tender pastry, a warm, spiced apple filling that isn’t overly sweet, and a delicate, creamy glaze that ties everything together with a flourish. It’s a labor of love, yes, but one that rewards you tenfold with every fragrant waft from your oven and every satisfied smile at the breakfast table. This isn’t just about following instructions; it’s about creating something profoundly comforting and utterly delicious right in your own kitchen, a true testament to the simple joys of baking from scratch. The aroma alone is enough to bring everyone to the kitchen, eager for a taste of your homemade masterpiece.
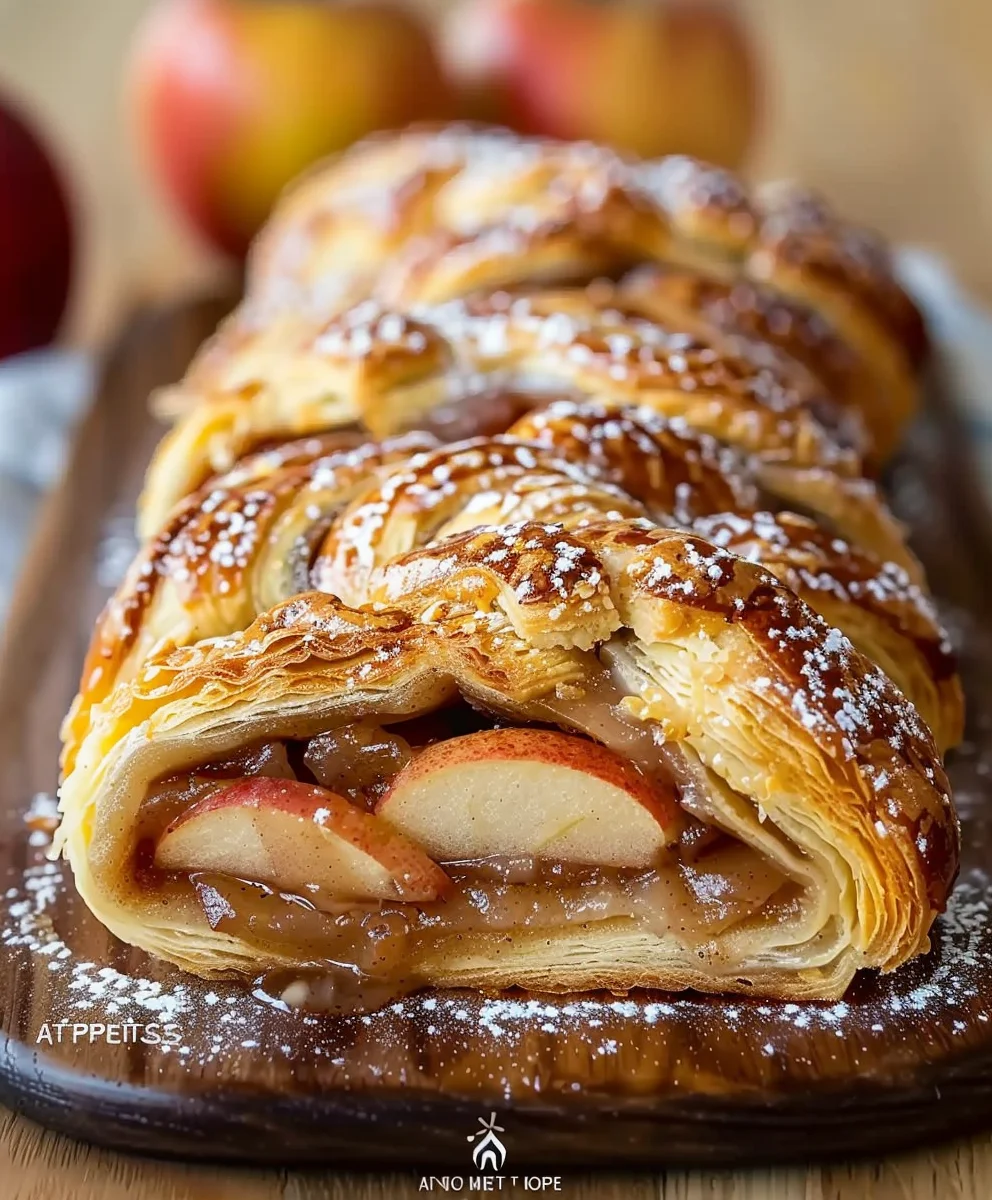
What truly makes this particular Kringle a standout, in my opinion? It’s the careful, intentional lamination of the dough, which results in those ethereal, feather-light layers that practically melt in your mouth, providing a delightful contrast to the soft filling. It’s also the generous, fresh apple filling, seasoned just right with warming spices to let the natural sweetness and tartness of the fruit truly shine through, without being overwhelmed by excessive sugar. We’re not masking flavors here; we’re enhancing them, celebrating the quality of each ingredient. I promise you, the effort involved in creating those layers and that perfect filling is absolutely worth it for that glorious moment you slice into your homemade Kringle, revealing its intricate structure and the glistening, fragrant apple filling within. It’s a genuine testament to the joy of baking from scratch, a celebration of traditional techniques combined with the freshest, most wholesome ingredients. You’ll feel a sincere sense of accomplishment, and your home will smell absolutely divine for hours, filling every corner with an inviting, cozy warmth.
Now, for serving, while this Kringle is utterly divine on its own, I’ve found that a warm slice pairs perfectly with a robust cup of freshly brewed coffee or a comforting mug of hot tea. Imagine a lazy Sunday morning, the sun streaming through the window, a generous slice of this warm Kringle, and your favorite brew in hand – pure bliss! It also makes an exceptional, elegant addition to any brunch spread, perhaps alongside some fresh seasonal berries and a dollop of freshly whipped cream. But please, don’t limit this masterpiece to just breakfast; I’ve successfully served it as a sophisticated dessert after dinner, sometimes accompanied by a scoop of premium vanilla bean ice cream that slowly melts into the warm pastry, creating a delightful contrast of temperatures and textures. It’s surprisingly versatile, equally at home at a casual family gathering or a more formal holiday event, always impressing guests with its beauty and taste.
Feeling adventurous and want to make it truly your own? While the classic Wisconsin Apple Kringle, as I’ve presented it, is a masterpiece in itself, there are always wonderful ways to put your unique spin on it. For the filling, consider experimenting with a mix of different apple varieties, perhaps Granny Smith for tartness combined with Honeycrisp or Fuji for sweetness and texture, for an even more complex flavor profile. A sprinkle of finely chopped toasted walnuts or pecans added to the apple mixture before baking can introduce a lovely textural crunch and a nutty aroma. And for the glaze, instead of plain vanilla, try incorporating a hint of maple extract for a subtle autumnal twist, or even a touch of softened cream cheese into the icing for a richer, tangier, and incredibly decadent finish. You could even drizzle a little warm caramel sauce over the top before serving for an extra layer of indulgence and visual appeal. These small tweaks can truly personalize your Kringle, making it uniquely yours and reflecting your own culinary creativity.
So, my dear fellow bakers, I truly hope you feel inspired to roll up your sleeves and give this wonderful recipe a try. Don’t be intimidated by the steps; think of it as a delightful, rewarding baking adventure. There’s an unparalleled satisfaction that comes from mastering a pastry like this, a true sense of pride, and I genuinely believe you’ll be incredibly proud of the beautiful and delicious Kringle you create. Once you’ve baked your own, I would absolutely love to hear about your experience! What apples did you choose? Did you try any of my suggested variations, or perhaps invent one of your own? Did it become an instant family favorite, a new tradition? Please, share your stories, your photos, and your invaluable tips with me and our wonderful community. Your baking journey is just beginning, and this homemade Wisconsin Apple Kringle is an excellent, truly rewarding step along the way, promising delicious memories with every bite. Happy baking, my friends – I can’t wait to see and hear about what you create!
Authentic Wisconsin Apple Kringle
Wisconsin Apple Kringle – a beloved, flaky Danish pastry, officially the State Pastry of Wisconsin. This recipe features a buttery, multi-layered dough with a generous, spiced apple filling and a delicate vanilla glaze, offering a slice of pure joy and tradition.
Ingredients
-
2 cups all-purpose flour
-
1 tsp kosher salt
-
3 tbsp granulated sugar
-
1 cup unsalted butter, cold and cubed
-
2 tsp active dry yeast
-
1/3 cup whole milk, warm
-
2 tsp water
-
1 egg
-
2 oz apple pie filling
-
1/4 tsp ground cardamom
-
1 cup powdered sugar
-
1 tsp vanilla extract
-
2–3 tsp water (for glaze)
Instructions
-
Step 1
Combine 2 tsp warm water, 1 tbsp granulated sugar, and yeast. Let sit 5-10 min until foamy. Add warm milk, remaining granulated sugar, 1 egg, vanilla, and salt; whisk. Gradually add 2 cups flour to form a shaggy dough. Incorporate cold, cubed butter until pea-sized chunks remain. Form dough into an 8×10″ rectangle, wrap, and chill for 2 hours (or overnight). -
Step 2
On a lightly floured surface, roll chilled dough to a 12×24″ rectangle. Perform a letter fold (fold one-third over the middle, then the other third over that). Rotate 90 degrees, wrap, and chill for 30-45 minutes. Repeat this rolling, folding, and chilling sequence two more times. After the final fold, wrap and chill for at least 1 hour until ready for assembly. This process creates the flaky layers. -
Step 3
Combine 2 oz apple pie filling with ¼ tsp ground cardamom. Mix well. (Note: The provided ingredient list for filling is minimal; this step adapts from the detailed article instructions to match the given ‘2 oz apple pie filling’ ingredient). -
Step 4
Preheat oven to 375°F (190°C). Line a baking sheet with parchment paper. Roll the final chilled dough into a 12×18″ rectangle, ¼-inch thick. Spoon the apple filling down the center third of the dough, leaving margins. Fold one long side of the dough over the filling, then the other long side over the top, overlapping slightly. Pinch all seams firmly to seal the filling inside. Transfer the sealed log to the baking sheet and form it into an oval or ring shape, pressing the ends firmly together to seal. Whisk 1 egg with 1 tbsp water for an egg wash; brush generously over the kringle. Optionally, make several diagonal slashes on top. -
Step 5
Bake for 30-45 minutes, or until the kringle is deep golden brown and sounds hollow when tapped. Transfer to a wire rack and cool completely before glazing. -
Step 6
In a medium bowl, whisk 1 cup powdered sugar, 1 tsp vanilla extract, and 2–3 tsp water (or milk/heavy cream) until smooth and pourable. Adjust consistency as needed. -
Step 7
Once the kringle is completely cool, drizzle or spread the vanilla glaze generously over the top. Let the glaze set for 15-20 minutes. Slice with a serrated knife and serve. Store leftovers in an airtight container at room temperature for 2-3 days, or refrigerate for up to a week. For longer storage, freeze individual slices.
Important Information
Nutrition Facts (Per Serving)
It is important to consider this information as approximate and not to use it as definitive health advice.
Allergy Information
Please check ingredients for potential allergens and consult a health professional if in doubt.
Leave a Comment