
Oatmeal Cream Pies That Taste Like The Origin extractal
Oh my goodness, do I have a treat for you today! Remember those iconic Oatmeal Cream Pies from your childhood? The ones that were always the perfect pick-me-up? Well, I’m absolutely thrilled to share my recipe for Oatmeal Cream Pies That Taste Like The Origin extractal.
This isn’t just any oatmeal cream pie recipe. This is the recipe you’ve been dreaming of, the one that perfectly captures that beloved, comforting taste we all grew up with. I’ve spent ages perfecting this to ensure every bite transports you right back to simpler times. Forget the store-bought versions; once you try these, you’ll never go back. They’re soft, chewy, incredibly flavorful, and have that unmistakable, melt-in-your-mouth cream filling that makes them utterly irresistible. You’re going to adore how easy it is to recreate that magical flavor right in your own kitchen.
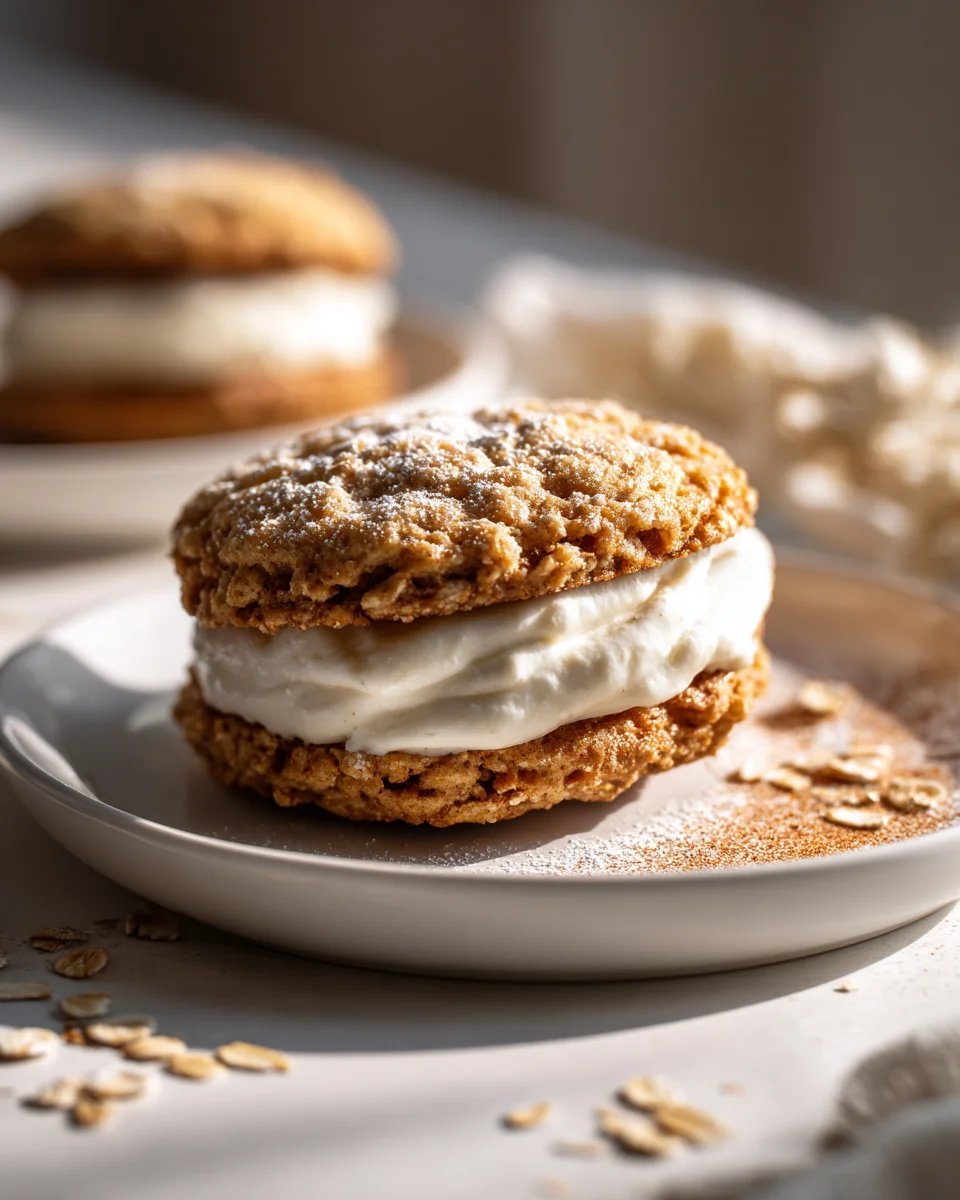
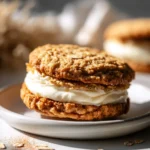
So, what exactly are we making? Imagine two perfectly baked, slightly spiced oatmeal cookies – golden brown with just the right amount of chew – generously filled with a fluffy, sweet, and unbelievably smooth vanilla cream. They’re a sandwich cookie dream come true, bursting with nostalgic flavor and pure comfort. Get ready to bake some happiness!

Ingredient Notes
To truly capture the nostalgic essence of “The Original” Oatmeal Cream Pies, the ingredients we choose and how we treat them are paramount. I’ve found that a few key elements make all the difference, ensuring our homemade version isn’t just good, but remarkably reminiscent of that beloved classic.
- Oats: This is an oatmeal cream pie, after all! I swear by a blend of old-fashioned rolled oats and quick-cooking oats. The old-fashioned oats give that classic chewy texture and hearty presence, while the quick oats melt into the dough a bit more, contributing to a smoother, softer crumb that’s closer to the original’s delicate texture. Don’t use instant oats; they tend to disappear too much.
- Flour: Good old all-purpose flour is perfect here. Nothing fancy needed, just ensure it’s unbleached for the best results.
- Sweeteners: We’re going for a combination of light brown sugar and granulated sugar. The brown sugar is non-negotiable for that signature chewiness, moisture, and molasses-like depth that is so characteristic of these cookies. Granulated sugar helps with spread and crisp edges, balancing the chew.
- Fats for the Cookies: Here’s a little secret for that “original” texture – a blend of unsalted butter and shortening. The butter provides incredible flavor, but shortening gives the cookies a wonderfully soft, tender crumb and helps them spread just enough without becoming too thin or greasy. If you only use butter, your cookies might be a bit too crispy or spread too much. Make sure both are at room temperature.
- Eggs: Large eggs, at room temperature, act as our binder and add richness to the cookie dough.
- Leavening: Baking soda is our go-to here. It reacts with the brown sugar’s acidity (and any molasses you might add) to give the cookies their characteristic lift and soft texture. A pinch of salt also helps balance the sweetness and enhances all the flavors.
- Spices: Cinnamon is absolutely essential. It’s the warming heart of any great oatmeal cookie. I also love to add a tiny pinch of nutmeg for an extra layer of warmth and complexity, deepening that nostalgic flavor profile.
- Molasses: A tablespoon of unsulphured dark molasses is optional but highly recommended if you want to push that “original” flavor even further. It adds a deeper color, chewiness, and a more pronounced, almost gingerbread-like background note that many associate with classic oatmeal cookies.
- Vanilla Extract: Pure vanilla extract, please! It’s crucial for both the cookies and the filling, adding warmth and depth of flavor.
- For the Cream Filling: This is where the magic really happens to make them taste like the “original.” You’ll need powdered sugar (sifted!), unsalted butter, and a good quality vegetable shortening. The shortening in the filling is key for that distinct, stable, yet incredibly fluffy and slightly less buttery texture of the store-bought pies. Vanilla extract and a splash of milk or non-dairy beverage (like almond or oat milk) bring it all together. Some folks love to add a tablespoon or two of marshmallow fluff for an even lighter, sweeter, and more authentic “fluff” factor, which I highly recommend trying!
Step-by-Step Instructions
Getting these Oatmeal Cream Pies just right is a delightful process, and I’m here to guide you through each step to ensure your pies taste wonderfully like the original.
Part 1: The Chewy Oatmeal Cookies
- Prepare Your Workspace: Start by preheating your oven to 350°F (175°C). Line two baking sheets with parchment paper or silicone baking mats. This is vital for even baking and easy removal.
- Cream the Fats and Sugars: In a large mixing bowl, using an electric mixer, cream together the softened unsalted butter and vegetable shortening until light and fluffy. This usually takes about 2-3 minutes. Then, add the light brown sugar and granulated sugar, beating on medium speed until the mixture is pale and fluffy – really incorporate air here! Scrape down the sides of the bowl as needed.
- Add Wet Ingredients: Beat in the large egg until just combined, then stir in the pure vanilla extract and the optional molasses. Don’t overmix at this stage; we just want everything incorporated.
- Combine Dry Ingredients: In a separate medium bowl, whisk together the all-purpose flour, quick-cooking oats, old-fashioned rolled oats, baking soda, ground cinnamon, optional ground nutmeg, and salt. Make sure there are no lumps of baking soda.
- Combine Wet and Dry: Gradually add the dry ingredient mixture to the wet ingredients, mixing on low speed until just combined. Be careful not to overmix; overmixing can lead to tough cookies. Stop as soon as you no longer see streaks of dry flour.
- Chill the Dough (Crucial!): Cover the bowl with plastic wrap and refrigerate the dough for at least 30 minutes. I find 1 hour is ideal. This chilling step helps the flavors meld, prevents the cookies from spreading too much, and results in a chewier texture that’s true to the original.
- Scoop and Bake: Once chilled, use a small cookie scoop (about 1.5 tablespoons) to portion out the dough onto your prepared baking sheets, leaving about 2 inches between each mound. Gently flatten each dough ball slightly with your palm or the back of a spoon.
- Bake to Perfection: Bake for 8-10 minutes, or until the edges are lightly golden brown and the centers are still slightly soft and puffy. The cookies will continue to set as they cool. Avoid overbaking if you want that classic soft chew!
- Cool Completely: Let the cookies cool on the baking sheets for 5 minutes before carefully transferring them to a wire rack to cool completely. They must be entirely cool before filling, otherwise, your cream will melt!
Part 2: The Fluffy Cream Filling
- Beat Fats for Filling: In a clean large mixing bowl, combine the softened unsalted butter and vegetable shortening for the filling. Beat with an electric mixer on medium-high speed until incredibly light and fluffy, about 3-4 minutes. This really whips air into the fats, creating that airy, almost mousse-like texture.
- Add Powdered Sugar: Gradually add the sifted powdered sugar, about half a cup at a time, beating well after each addition. Start on low speed to avoid a sugar cloud, then increase to medium. Continue until all the sugar is incorporated and the mixture is thick.
- Flavor and Lighten: Beat in the pure vanilla extract. If using, now is the time to add the marshmallow fluff and beat until smooth. Next, add the milk or non-dairy beverage, starting with 1 tablespoon and adding more, a teaspoon at a time, until the filling reaches your desired light and fluffy consistency. Beat on high for another 2 minutes to ensure it’s super smooth and airy.
Part 3: Assembly
- Match Them Up: Once the cookies are completely cool, find cookies of similar size and shape to create pairs.
- Fill ‘Em Up: Take one cookie, flat side up, and generously spread about 1-2 tablespoons of cream filling over it, leaving a small border.
- Top It Off: Gently place another cookie on top, flat side down, and press lightly until the filling spreads almost to the edges. Repeat with the remaining cookies and filling.
Tips & Suggestions
I’ve learned a few tricks over the years that really elevate these Oatmeal Cream Pies to that “taste like the original” level. Here are my favorite suggestions for you:
- Don’t Skip the Chill: I know it’s tempting to rush, but chilling the cookie dough is absolutely non-negotiable for achieving that perfect chewy texture and preventing excessive spreading. It also deepens the flavors, making them taste richer and more complex.
- Uniform Cookie Size: For beautiful, evenly matched pies, use a cookie scoop to portion your dough. Consistency is key here. If you don’t have a scoop, aim for roughly 1.5-inch balls and gently flatten them slightly before baking.
- Do Not Overbake: This is crucial for soft, chewy cookies. They should look slightly underdone in the center when you pull them out; the residual heat will finish cooking them as they cool. Overbaked cookies will be dry and crumbly, losing that essential “original” chewiness.
- Cool Completely: Seriously, be patient! If your cookies are even slightly warm when you add the cream filling, it will melt, making a messy situation. Give them ample time to cool on a wire rack.
- Shortening in the Filling is Key: While butter provides flavor, the vegetable shortening in the cream filling is what gives it that incredibly stable, yet light and fluffy texture, so reminiscent of the store-bought pies. It helps the filling hold its shape beautifully without being overly greasy.
- Sift Your Powdered Sugar: For the smoothest, lump-free cream filling, always sift your powdered sugar before adding it. Trust me, it makes a difference!
- Adjust Filling Consistency: If your filling is too thick, add more milk (or non-dairy alternative) a teaspoon at a time. If it’s too thin, you can beat in a tablespoon or two more sifted powdered sugar.
- Consider Marshmallow Fluff: As mentioned in the ingredient notes, adding a couple of tablespoons of marshmallow fluff to your cream filling takes the texture and sweetness even closer to that iconic “original” taste. It makes it extra light and airy.
- Embrace the Spices: Don’t be shy with the cinnamon, and definitely try that tiny pinch of nutmeg. These warming spices are what give the oatmeal cookies their comforting, nostalgic flavor that pairs so perfectly with the sweet cream.
- Storage Strategy: If you’re making these ahead, you can bake the cookies and prepare the filling separately. Store them and then assemble closer to serving time for the freshest pies.
Storage
You’ve put in the effort to create these incredible Oatmeal Cream Pies that taste just like the original, so let’s make sure they stay fresh and delicious for as long as possible!
- At Room Temperature (Assembled Pies): For optimal freshness and that classic soft cookie texture, I recommend storing your assembled Oatmeal Cream Pies in an airtight container at cool room temperature for up to 2-3 days. If your kitchen is particularly warm, you might want to consider refrigerating them to prevent the filling from softening too much.
- In the Refrigerator (Assembled Pies): If you need to store them longer, or if your home is warm, place the assembled pies in an airtight container in the refrigerator for up to 5 days. Just be aware that refrigeration can slightly firm up the cookies. For the best eating experience, I like to let them sit out at room temperature for 15-20 minutes before serving to allow the cookies and filling to soften slightly.
- Storing Unassembled Cookies: The baked, unfrosted cookies can be stored in an airtight container at room temperature for up to 5 days, or in the refrigerator for up to a week.
- Storing the Cream Filling: The prepared cream filling can be stored in an airtight container in the refrigerator for up to 1 week. When you’re ready to use it, let it come to room temperature for about 30 minutes, then give it a quick whip with your electric mixer for a minute or two to restore its light and fluffy consistency.
- Freezing Assembled Pies: These pies freeze beautifully! To freeze, place the assembled pies on a baking sheet and freeze until solid (about 1-2 hours). Once solid, transfer them to a freezer-safe airtight container or a heavy-duty freezer bag, layering them with parchment paper if needed to prevent sticking. They can be frozen for up to 2 months.
- Thawing Frozen Pies: To enjoy, simply remove the desired number of pies from the freezer and let them thaw at room temperature for 1-2 hours, or in the refrigerator overnight. They’ll taste just as fresh as the day you made them!
Final Thoughts
I truly believe you’re going to fall in love with these Oatmeal Cream Pies That Taste Like The Origin extractal. There’s a certain magic that happens when that perfectly spiced, tender oatmeal cookie meets the incredibly smooth, sweet cream filling, and this recipe absolutely nails it. It’s not just another dessert; it’s a faithful recreation of that iconic treat we all remember, bringing the authentic taste and texture right to your home. I promise you, the joy of biting into one of these, experiencing that familiar, comforting flavor, is an experience you won’t want to miss. Give it a try, and prepare for a delightful journey back to a beloved classic!
Authentic Oatmeal Cream Pies – Tastes Like the Original!
- Total Time: 40 minutes
- Yield: 12 servings 1x
Description
These Oatmeal Cream Pies capture the nostalgic essence of the beloved classic treat with their soft, chewy oatmeal cookies and fluffy cream filling. Perfect for any occasion, they will transport you back to simpler times with every bite.
Ingredients
- 1 cup old-fashioned rolled oats
- 1 cup quick-cooking oats
- 1 1/2 cups all-purpose flour (unbleached)
- 1 cup light brown sugar
- 1/2 cup granulated sugar
- 1/2 cup unsalted butter (softened, at room temperature)
- 1/2 cup vegetable shortening (at room temperature)
- 1 large egg (at room temperature)
- 1 teaspoon baking soda
- 1/2 teaspoon ground cinnamon
- a pinch of ground nutmeg (optional)
- 1/4 teaspoon salt
- 1 tablespoon unsulphured dark molasses (optional)
- 1 teaspoon pure vanilla extract
- 2 cups powdered sugar (sifted)
- 1/2 cup unsalted butter (softened)
- 1/2 cup vegetable shortening
- 1 teaspoon pure vanilla extract (for filling)
- 1–2 tablespoons milk or non-dairy beverage (like almond or oat milk)
- 1–2 tablespoons marshmallow fluff (optional)
Instructions
- Preheat your oven to 350°F (175°C). Line two baking sheets with parchment paper or silicone baking mats.
- In a large mixing bowl, cream together the softened unsalted butter and vegetable shortening until light and fluffy, about 2-3 minutes. Then, add the light brown sugar and granulated sugar, beating on medium speed until pale and fluffy.
- Beat in the large egg until just combined, then stir in the pure vanilla extract and the optional molasses.
- In a separate medium bowl, whisk together the all-purpose flour, quick-cooking oats, old-fashioned rolled oats, baking soda, ground cinnamon, optional ground nutmeg, and salt.
- Gradually add the dry ingredient mixture to the wet ingredients, mixing on low speed until just combined.
- Cover the bowl with plastic wrap and refrigerate the dough for at least 30 minutes, ideally 1 hour.
- Once chilled, use a small cookie scoop to portion out the dough onto your prepared baking sheets, leaving about 2 inches between each mound. Gently flatten each dough ball slightly.
- Bake for 8-10 minutes, or until the edges are lightly golden brown and the centers are still slightly soft and puffy.
- Let the cookies cool on the baking sheets for 5 minutes before transferring them to a wire rack to cool completely.
- In a clean large mixing bowl, combine the softened unsalted butter and vegetable shortening for the filling. Beat until incredibly light and fluffy, about 3-4 minutes.
- Gradually add the sifted powdered sugar, about half a cup at a time, beating well after each addition.
- Beat in the pure vanilla extract. If using, add the marshmallow fluff and beat until smooth. Add the milk or non-dairy beverage until the filling reaches your desired consistency.
- Once the cookies are completely cool, match cookies of similar size and shape to create pairs.
- Take one cookie, flat side up, and spread about 1-2 tablespoons of cream filling over it. Leave a small border.
- Gently place another cookie on top, flat side down, and press lightly until the filling spreads almost to the edges.
- Prep Time: 30 mins
- Cook Time: 10 mins
- Category: Dessert
- Method: Baking
- Cuisine: American
Nutrition
- Serving Size: 1 pie
- Calories: 200
- Sugar: 15 g
- Sodium: 150 mg
- Fat: 8 g
- Saturated Fat: 3 g
- Unsaturated Fat: 4 g
- Trans Fat: 0 g
- Carbohydrates: 30 g
- Fiber: 1 g
- Protein: 2 g
- Cholesterol: 20 mg
Keywords: Chilling the cookie dough is essential for achieving the perfect chewy texture. Use a cookie scoop for uniform cookie sizes, and be careful not to overbake to maintain that classic soft chew.
Leave a Comment