
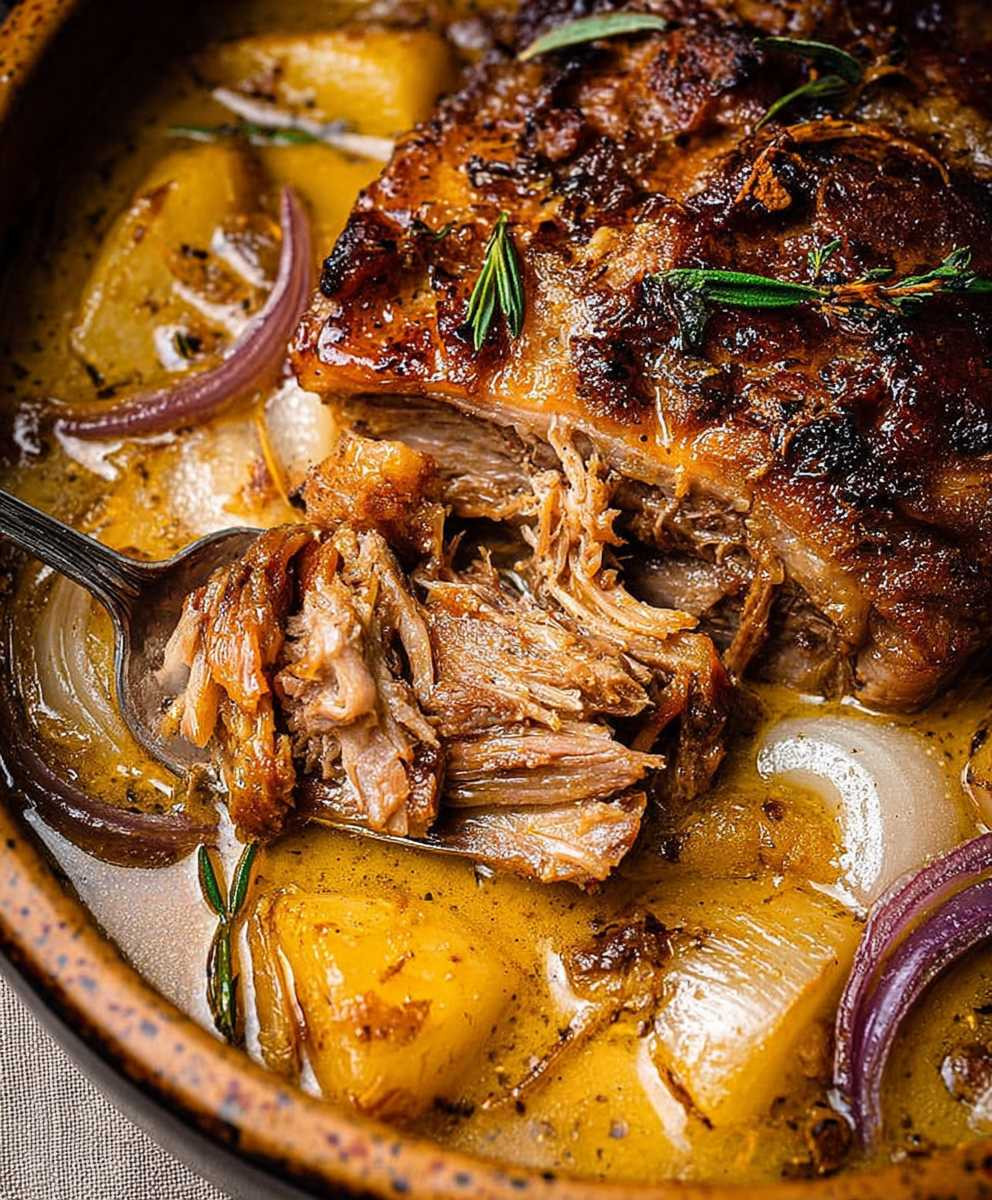
Apple Cider Braised Pork Shoulder: Imagine sinking your teeth into fall-apart tender pork, infused with the sweet and tangy flavors of apple cider, warm spices, and a hint of savory herbs. This isn’t just dinner; it’s an experience, a culinary hug on a chilly evening. Are you ready to transform a humble cut of pork into a show-stopping centerpiece?
Braised meats have a rich history, dating back to times when slow cooking was the only way to tenderize tougher cuts. This method, perfected over generations, coaxes out incredible flavor and creates a melt-in-your-mouth texture. While the specific combination of apple cider and pork might be a more modern twist, the underlying principle of slow, flavorful braising remains timeless.
People adore Apple Cider Braised Pork Shoulder for its incredible depth of flavor. The sweetness of the apple cider beautifully complements the richness of the pork, while the braising process ensures that every bite is incredibly tender and juicy. Plus, it’s surprisingly convenient! A little prep work in the morning, and your oven does the rest, filling your home with an irresistible aroma that will have everyone eagerly anticipating dinner. The versatility of this dish also makes it a winner. Serve it over creamy mashed potatoes, polenta, or even tucked into soft rolls for delicious sandwiches. No matter how you choose to enjoy it, this Apple Cider Braised Pork Shoulder is guaranteed to become a family favorite.

Ingredients:
- Pork Shoulder: 4-5 pound boneless pork shoulder, excess fat trimmed
- Apple Cider: 4 cups (1 quart) good quality apple cider, not apple juice
- Yellow Onion: 1 large, chopped
- Carrots: 2 large, peeled and chopped
- Celery: 2 stalks, chopped
- Garlic: 4 cloves, minced
- Fresh Thyme: 4 sprigs
- Fresh Rosemary: 2 sprigs
- Bay Leaves: 2
- Apple Cider Vinegar: 2 tablespoons
- Dijon Mustard: 2 tablespoons
- Brown Sugar: 1 tablespoon, packed
- Olive Oil: 2 tablespoons
- All-Purpose Flour: 2 tablespoons
- Salt: To taste
- Black Pepper: Freshly ground, to taste
- Chicken Broth: 1 cup (optional, for extra sauce if needed)
Preparing the Pork Shoulder:
Okay, let’s get started! First things first, we need to prep our pork shoulder. This is a crucial step for developing that amazing flavor we’re after.
- Pat the Pork Dry: Take your pork shoulder and pat it completely dry with paper towels. This is super important because dry meat browns better. We want a nice, deep sear on all sides.
- Season Generously: Now, season the pork shoulder liberally with salt and freshly ground black pepper. Don’t be shy! This is your chance to build a flavorful foundation. I like to use a coarse sea salt and freshly cracked black pepper for the best results. Make sure you get every nook and cranny.
Searing the Pork:
Next, we’re going to sear the pork. This step is all about building flavor and creating a beautiful crust. Don’t skip it!
- Heat the Oil: In a large Dutch oven or heavy-bottomed pot (the one you’ll be braising in), heat the olive oil over medium-high heat. You want the oil to be shimmering hot, but not smoking.
- Sear the Pork: Carefully place the pork shoulder in the hot Dutch oven. Sear it on all sides until it’s deeply browned, about 5-7 minutes per side. Don’t overcrowd the pot; if your pork shoulder is too large, sear it in batches. Overcrowding will lower the temperature of the pot and prevent proper browning. You’re looking for a rich, golden-brown crust. This is where the magic happens!
- Remove the Pork: Once the pork is beautifully seared, remove it from the Dutch oven and set it aside on a plate. Don’t worry about it being cooked through at this point; we’re just focusing on the exterior.
Building the Flavor Base:
Now it’s time to create the aromatic base for our braise. This is where the vegetables and herbs come in to play, adding layers of flavor to the final dish.
- Sauté the Vegetables: Add the chopped onion, carrots, and celery to the Dutch oven. Cook over medium heat, stirring occasionally, until the vegetables are softened and slightly caramelized, about 8-10 minutes. This step is important for developing sweetness and depth of flavor. Don’t rush it!
- Add the Garlic: Add the minced garlic to the pot and cook for another minute, until fragrant. Be careful not to burn the garlic, as it can become bitter.
- Deglaze the Pot: Pour in the apple cider vinegar and scrape up any browned bits from the bottom of the pot. These browned bits, called fond, are packed with flavor and will add richness to the sauce.
Braising the Pork:
This is the heart of the recipe – the slow braising process that transforms the pork shoulder into a tender, flavorful masterpiece.
- Add the Cider and Seasonings: Pour in the apple cider, Dijon mustard, and brown sugar. Stir to combine. Add the thyme sprigs, rosemary sprigs, and bay leaves.
- Return the Pork: Return the seared pork shoulder to the Dutch oven, nestling it into the cider mixture. The liquid should come about halfway up the side of the pork. If it doesn’t, you can add a little chicken broth to bring the liquid level up.
- Bring to a Simmer: Bring the liquid to a simmer over medium heat.
- Cover and Braise: Cover the Dutch oven tightly with a lid. Reduce the heat to low and braise for 3-4 hours, or until the pork is fork-tender and easily shreds. The exact braising time will depend on the size and thickness of your pork shoulder. Check it periodically and add more chicken broth if the liquid is evaporating too quickly. You want the pork to be submerged in the liquid for most of the braising time.
Shredding and Serving:
Almost there! Now we just need to shred the pork and get ready to serve this deliciousness.
- Remove the Pork: Carefully remove the pork shoulder from the Dutch oven and place it on a cutting board. Let it rest for about 10-15 minutes before shredding. This will allow the juices to redistribute, resulting in a more tender and flavorful final product.
- Shred the Pork: Using two forks, shred the pork shoulder into bite-sized pieces. Discard any large pieces of fat or gristle.
- Strain the Braising Liquid: While the pork is resting, strain the braising liquid through a fine-mesh sieve into a saucepan. Discard the solids (vegetables, herbs, and bay leaves).
- Reduce the Sauce: Bring the strained braising liquid to a simmer over medium heat and cook until it has reduced and thickened slightly, about 10-15 minutes. This will concentrate the flavors and create a delicious sauce. You can add a cornstarch slurry (1 tablespoon cornstarch mixed with 2 tablespoons cold water) to thicken the sauce further if desired.
- Combine and Serve: Return the shredded pork to the Dutch oven or saucepan with the reduced sauce. Toss to coat the pork evenly with the sauce. Taste and adjust seasonings as needed. Serve hot!
Serving Suggestions:
This Apple Cider Braised Pork Shoulder is incredibly versatile. Here are a few of my favorite ways to serve it:
- Pulled Pork Sandwiches: Pile the shredded pork onto toasted buns with your favorite toppings, such as coleslaw, pickles, and barbecue sauce.
- Tacos or Burritos: Use the pork as a filling for tacos or burritos, topped with salsa, guacamole, and sour cream.
- Over Mashed Potatoes or Polenta: Serve the pork over creamy mashed potatoes or polenta for a comforting and satisfying meal.
- With Roasted Vegetables: Pair the pork with roasted root vegetables, such as carrots, parsnips, and sweet potatoes.
- As a Main Course: Simply serve the pork as a main course with a side salad and some crusty bread for soaking up the delicious sauce.
Tips and Variations:
- Use a Meat Thermometer: For the most accurate results, use a meat thermometer to check the internal temperature of the pork shoulder. It should reach an internal temperature of around 200-205°F (93-96°C) for optimal tenderness.
- Slow Cooker Option: This recipe can also be adapted for the slow cooker. Sear the pork shoulder as directed, then transfer it to the slow cooker along with the vegetables, herbs, and apple cider mixture. Cook on low for 6-8 hours, or until the pork is fork-tender.
- Add Apples: For an extra layer of apple flavor, add diced apples to the Dutch oven during the last hour of braising.
- Spice it Up: Add a pinch of red pepper flakes to the braising liquid for a touch of heat.
- Make it Ahead: This dish can be made ahead of time and reheated. The flavors actually develop and deepen overnight.
Enjoy your delicious Apple Cider Braised Pork Shoulder! I hope you love it as much as I do.
Conclusion:
And there you have it! This Apple Cider Braised Pork Shoulder is more than just a recipe; it’s an experience. It’s the kind of dish that fills your kitchen with the warm, comforting aroma of fall, even if it’s the middle of summer. The tender, fall-apart pork, infused with the sweet and tangy notes of apple cider and aromatic spices, is simply irresistible. I truly believe this is a must-try recipe for anyone who loves flavorful, hearty meals that are surprisingly easy to prepare.
Why is it a must-try? Because it delivers maximum flavor with minimal effort. The slow braising process does all the work, transforming a humble pork shoulder into a culinary masterpiece. It’s also incredibly versatile. Serve it as is, shredded on crusty rolls for amazing sandwiches, or piled high on creamy polenta for a truly decadent treat. The possibilities are endless!
Speaking of serving suggestions, don’t be afraid to get creative! For a classic pairing, serve the braised pork with mashed sweet potatoes and roasted Brussels sprouts. The sweetness of the potatoes and the slight bitterness of the sprouts complement the richness of the pork perfectly. Or, for a more casual meal, shred the pork and use it as a filling for tacos or burritos. Top with your favorite salsa, guacamole, and a dollop of sour cream for a fiesta in your mouth!
Looking for variations? You can easily adapt this recipe to suit your own taste preferences. If you prefer a spicier dish, add a pinch of red pepper flakes to the braising liquid. For a sweeter flavor, use a sweeter variety of apple cider or add a tablespoon of maple syrup. You can also experiment with different herbs and spices. Thyme, rosemary, and sage all work beautifully with pork and apple cider.
Another great variation is to add some root vegetables to the braising pot along with the pork. Carrots, parsnips, and potatoes will soak up all the delicious flavors and become incredibly tender. Just be sure to cut them into large chunks so they don’t overcook.
Don’t forget about the braising liquid! Once the pork is cooked, strain the liquid and reduce it over medium heat to create a rich and flavorful sauce. This sauce is the perfect finishing touch for the pork and will take your dish to the next level.
I’m so confident that you’ll love this Apple Cider Braised Pork Shoulder that I urge you to try it as soon as possible. It’s perfect for a cozy weeknight dinner or a special weekend gathering. It’s also a great make-ahead dish, as the flavors only get better with time. Simply braise the pork a day or two in advance and reheat it before serving.
Once you’ve tried this recipe, I’d love to hear about your experience! Did you make any variations? What did you serve it with? Share your photos and comments with me – I’m always eager to see your culinary creations. Happy cooking, and enjoy every delicious bite! I hope this recipe becomes a new favorite in your household, bringing warmth and flavor to your table for years to come. Let me know how it turns out!
Apple Cider Braised Pork Shoulder: The Ultimate Fall Comfort Food
Tender and flavorful pork shoulder braised in apple cider with aromatic vegetables and herbs. Perfect for sandwiches, tacos, or served over mashed potatoes.
Ingredients
Instructions
Recipe Notes
- Use a meat thermometer to check the internal temperature of the pork shoulder. It should reach an internal temperature of around 200-205°F (93-96°C) for optimal tenderness.
- This recipe can also be adapted for the slow cooker. Sear the pork shoulder as directed, then transfer it to the slow cooker along with the vegetables, herbs, and apple cider mixture. Cook on low for 6-8 hours, or until the pork is fork-tender.
- For an extra layer of apple flavor, add diced apples to the Dutch oven during the last hour of braising.
- Add a pinch of red pepper flakes to the braising liquid for a touch of heat.
- This dish can be made ahead of time and reheated. The flavors actually develop and deepen overnight.
Leave a Comment