
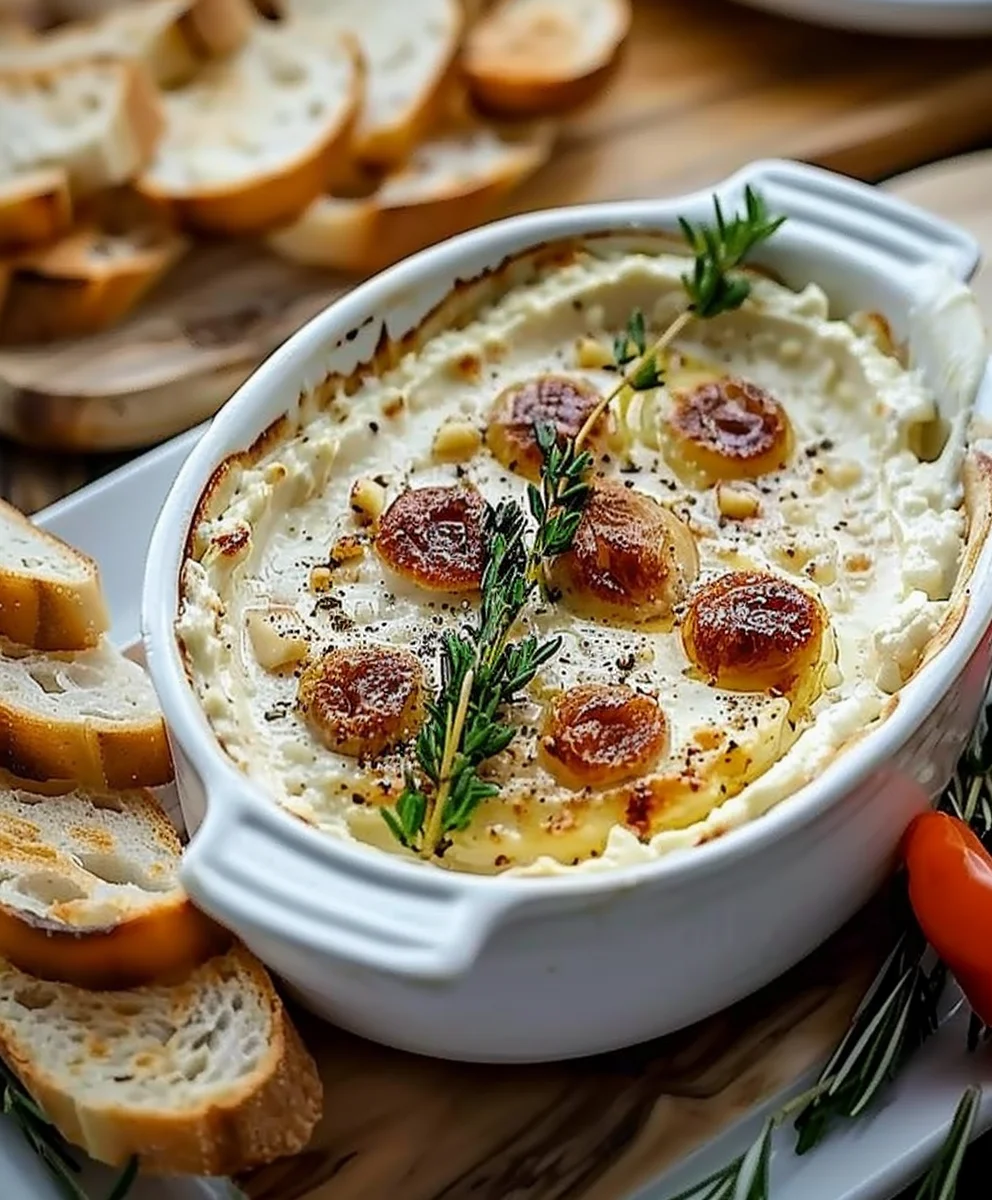
Roasted Garlic Goat Cheese Dip An Amazing Ultimate Recipe – just hearing those words evokes images of warmth, comfort, and irresistible flavor. There’s something truly magical about a creamy, savory dip, especially one that brings together the robust sweetness of slowly roasted garlic with the distinctive, tangy richness of goat cheese. It’s a combination that tantalizes the taste buds and elevates any gathering, transforming a simple appetizer into a memorable culinary experience. This isn’t just a snack; it’s an invitation to savor.
Goat cheese, with its ancient roots tracing back to the Mediterranean and Middle East, has long been cherished for its unique profile. When paired with garlic, a staple in cuisines worldwide and utterly transformed into a mellow, caramelized delight through roasting, the result is nothing short of extraordinary. I find that this particular dish offers a modern twist on classic, beloved ingredients, creating a dip that feels both sophisticated and wonderfully approachable. People consistently rave about the luxurious texture and the harmonious blend of savory, sweet, and tangy notes that make this dip so incredibly addictive.
Why This Dip Will Be Your New Favorite
Beyond its incredible flavor, its appeal lies in its versatility and convenience. It’s the perfect companion for a crusty baguette, crisp crudités, or your favorite crackers, making it an ideal choice for entertaining or simply treating yourself. I am confident that once you experience the sheer delight of preparing and sharing this Roasted Garlic Goat Cheese Dip An Amazing Ultimate Recipe, it will quickly become a cherished staple in your culinary repertoire, earning its place as your ultimate go-to appetizer for any occasion.

Ingredients:
- For the Roasted Garlic:
- 2 large heads of garlic: I always choose plump, firm heads.
- 2 tablespoons (30ml) good quality olive oil: Extra virgin is my go-to for its rich flavor.
- 1/4 teaspoon sea salt: Just a pinch to enhance the garlic’s sweetness as it roasts.
- A few grinds of freshly cracked black pepper: For a subtle warmth.
- For the Goat Cheese Dip:
- 8 ounces (226g) fresh goat cheese: Look for a creamy, plain chèvre. This is the star of our show, providing that signature tangy brightness.
- 4 ounces (113g) cream cheese: Full-fat and softened at room temperature for at least 30 minutes. This provides a wonderfully smooth, rich base and helps stabilize the dip, giving it that luxurious, scoopable texture we crave.
- 2 tablespoons (30ml) good quality olive oil: Again, extra virgin for that fruity, peppery note. This also aids in achieving a silky consistency.
- 1 tablespoon (15ml) fresh lemon juice: The squeeze of fresh lemon is absolutely crucial! It brightens all the flavors and provides a much-needed counterpoint to the richness of the cheeses and the deep, savory notes of the roasted garlic. Don’t skip this.
- 1/2 teaspoon sea salt: Or to taste. Start with this amount and adjust; goat cheese can vary in saltiness.
- 1/4 teaspoon freshly cracked black pepper: Again, adjust to your preference.
- A pinch of red pepper flakes (optional): If you enjoy a very subtle hint of heat, this adds a lovely layer of flavor without being overpowering. I often add it.
- For Garnishing and Serving:
- Fresh chives or parsley: Finely chopped, for a pop of color and fresh herbaceousness.
- A drizzle of extra virgin olive oil: Just before serving, it adds an appealing sheen and an extra layer of flavor.
- More red pepper flakes (optional): For an added visual appeal and kick.
- Assortment of dippers: Think crisp crackers, crusty baguette slices (toasted or fresh), pita chips, carrot sticks, cucumber slices, bell pepper strips, or even sturdy endive leaves. The possibilities are endless for this amazing dip!
Phase 1: Roasting the Garlic to Perfection – The Heart of Our Dip
This is where the magic truly begins for our Roasted Garlic Goat Cheese Dip An Amazing Ultimate Recipe. Roasting transforms raw garlic’s pungent bite into a sweet, mellow, almost buttery spreadable delight. It’s an essential first step and truly sets the foundation for the incredible depth of flavor in this dip.
- Preheat Your Oven and Prepare the Garlic: First things first, I always preheat my oven to a moderate 400°F (200°C). While the oven warms up, I grab my two large heads of garlic. With a sharp knife, I carefully slice about a quarter-inch off the top of each head, exposing the individual cloves. This allows the heat to penetrate evenly and the wonderful olive oil to seep in, aiding in that glorious caramelization we’re aiming for. It’s a small step, but it makes a big difference in the final flavor profile. I make sure not to cut too much off, just enough to see the cloves.
- Season and Wrap for Roasting: Next, I place each garlic head, cut-side up, onto a piece of aluminum foil large enough to completely enclose it. I drizzle about 1 tablespoon (15ml) of olive oil over the exposed cloves of each head, making sure it coats them well. Then, I sprinkle a small pinch of sea salt and a few grinds of black pepper over each one. The oil helps them soften and brown beautifully, while the salt enhances their natural sweetness. I then carefully wrap each garlic head tightly in its foil, forming a secure little packet. Ensuring a good seal is important; it essentially steams the garlic while it roasts, making it incredibly tender.
- Roast Until Golden and Soft: I place the foil-wrapped garlic heads directly onto a baking sheet. This makes them easier to handle and catches any potential drips, though if wrapped well, there shouldn’t be any. I slide the baking sheet into the preheated oven and let the garlic roast for about 40 to 50 minutes. The exact time can vary slightly depending on your oven and the size of your garlic heads. I know they’re done when the cloves feel incredibly soft when squeezed gently through the foil, and the kitchen is filled with an intoxicatingly sweet, savory aroma. When I peek inside, the cloves should be beautifully golden brown and very tender. This deep caramelization is key for that signature sweet and savory complexity in our dip.
- Cool and Extract the Roasted Garlic: Once roasted, I carefully remove the garlic from the oven and let the packets cool down on the counter for about 10 to 15 minutes. They’ll be very hot, so patience here is a virtue! Once they’re cool enough to handle, I unwrap the foil. Now for the satisfying part: I gently squeeze the bottom of each garlic head, and the soft, sweet, roasted cloves will easily pop out. Sometimes I use a small spoon to help scoop out any stubborn bits. I collect all these wonderfully tender cloves and discard the papery skins. You should have a good amount of roasted garlic paste, probably around 2 to 3 tablespoons, depending on the size of your heads.
Phase 2: Crafting the Luxurious Goat Cheese Dip Base
With our glorious roasted garlic ready, it’s time to bring all the elements together to create the incredibly creamy and flavorful base for this Roasted Garlic Goat Cheese Dip An Amazing Ultimate Recipe. Achieving that perfect smooth, scoopable texture is my main goal here, and I’ll walk you through how I get it every time.
- Begin with the Star Ingredients: I typically use a food processor for this step, as it creates the smoothest, most homogenous dip, but a hand mixer or even a sturdy whisk and a lot of elbow grease will work if your cream cheese is very soft. I add the 8 ounces (226g) of fresh goat cheese, broken into a few pieces, and the 4 ounces (113g) of softened cream cheese to the bowl of my food processor. Ensuring the cream cheese is truly at room temperature is non-negotiable; cold cream cheese will result in a lumpy dip, and we definitely don’t want that!
- Add the Roasted Garlic and Begin Blending: Now, I add all of our precious roasted garlic cloves to the food processor with the cheeses. I pulse a few times to start breaking everything down. The aroma that fills the kitchen at this point is just incredible – a promise of the deliciousness to come! I continue to process, scraping down the sides of the bowl with a rubber spatula as needed, until the mixture is fairly smooth.
- Introduce the Liquids and Seasoning: With the processor running, I slowly drizzle in the 2 tablespoons (30ml) of good quality olive oil and the 1 tablespoon (15ml) of fresh lemon juice. The olive oil contributes to the richness and mouthfeel, while the lemon juice is absolutely vital for balancing the richness and adding that bright, zesty counterpoint. I also add the initial seasoning: 1/2 teaspoon of sea salt and 1/4 teaspoon of freshly cracked black pepper. If I’m adding a pinch of red pepper flakes, this is the moment I’d toss them in as well.
- Blend Until Velvety Smooth: I continue to process the mixture for several minutes, stopping frequently to scrape down the sides. I’m looking for a consistency that is incredibly smooth, light, and almost airy. It should be thick enough to hold its shape but still easily scoopable. If it seems too thick, I might add another half-teaspoon of olive oil or a tiny splash more lemon juice, just a little at a time, until I reach that perfect, luxurious texture. Don’t rush this step; thorough blending ensures all the flavors are perfectly incorporated and the dip is gloriously smooth.
- Taste and Adjust Seasoning: This is a crucial step! I always take a small spoonful and taste the dip. Does it need more salt? A little more pepper? Perhaps another tiny squeeze of lemon to brighten it further? Goat cheese varies in saltiness, and personal preference plays a huge role. Trust your palate here. Adjust the seasoning as needed, then give it one final quick pulse in the food processor to incorporate any additions.
Phase 3: Assembling, Flavor Infusion, and Serving Your Ultimate Roasted Garlic Goat Cheese Dip
We’re on the home stretch! Our Roasted Garlic Goat Cheese Dip An Amazing Ultimate Recipe is almost ready to dazzle your taste buds. The final touches are simple but elevate it from delicious to absolutely unforgettable.
- Chilling for Optimal Flavor (Highly Recommended!): Once I’m happy with the flavor and consistency, I transfer the dip from the food processor to a beautiful serving bowl. While it’s certainly tempting to dig right in, I find that the flavors meld and deepen significantly if the dip is allowed to chill in the refrigerator for at least 30 minutes to an hour. This resting period really allows the roasted garlic to infuse fully into the creamy goat cheese, creating a more harmonious and robust flavor profile. If I’m preparing this for an event, I often make it a few hours ahead or even the day before; it only gets better with a little time. Just make sure to cover the bowl tightly with plastic wrap to prevent any skin from forming on top.
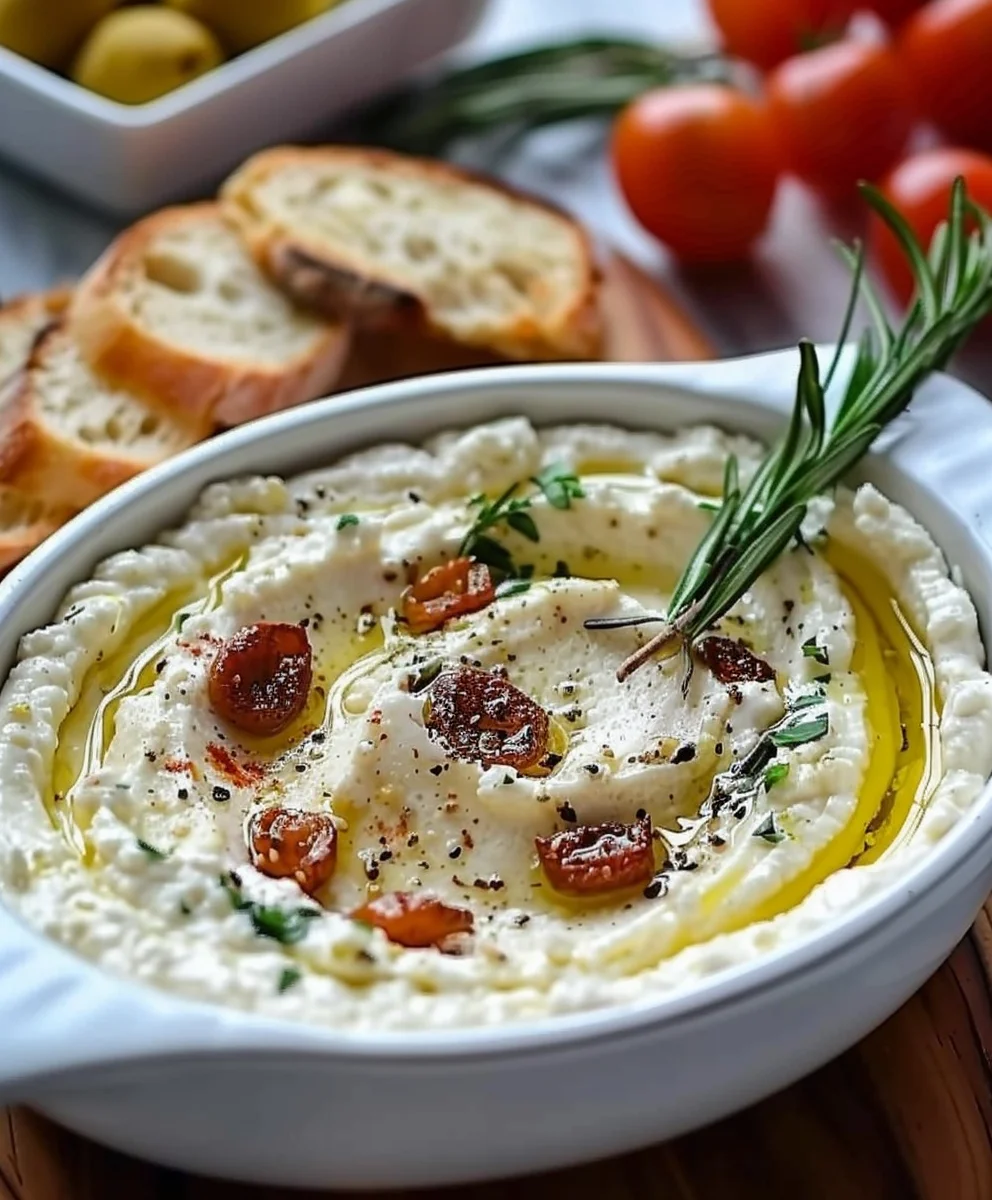
- The Final Flourish – Garnishing: Just before serving, I pull the dip from the fridge. If it’s too firm, I let it sit at room temperature for 10-15 minutes to soften slightly. Then, for that perfect presentation and an extra layer of flavor, I like to add some garnishes. I sprinkle generously with freshly chopped chives or parsley – these bright green herbs not only add a lovely color contrast but also a fresh, herbaceous note that complements the richness of the dip beautifully. A final, generous drizzle of extra virgin olive oil over the top adds an irresistible sheen and an additional layer of fruity flavor. If I’m feeling adventurous or want a little more visual pop, I’ll sometimes add another light sprinkle of red pepper flakes. Presentation really does make a difference, and these small touches make this dip look as incredible as it tastes.
- Serve with a Selection of Dippers: This is the moment we’ve all been waiting for! I arrange a delightful assortment of dippers around the bowl of our magnificent Roasted Garlic Goat Cheese Dip An Amazing Ultimate Recipe. My personal favorites include crisp, buttery crackers, slices of a freshly toasted baguette (the crusty texture is perfect for scooping), crunchy pita chips, and a vibrant array of fresh vegetables like carrot sticks, cucumber slices, bell pepper strips, or even sturdy endive leaves. The contrast of the cool, crisp vegetables with the warm, creamy dip is truly a delight.
- Storage (If There’s Any Left!): In the rare event that you have any leftover dip – which is highly unlikely, given how incredibly addictive this is! – you can store it in an airtight container in the refrigerator for up to 3-4 days. If the dip seems a little too firm directly from the fridge, simply let it sit at room temperature for about 15-20 minutes or give it a quick stir to bring back its ideal, creamy consistency. I sometimes add a tiny splash of olive oil and stir it in if it feels a bit dry after chilling. This dip is truly a fantastic make-ahead option, making it ideal for entertaining or just having a gourmet snack ready to go!
Enjoying Your Ultimate Creation:
There you have it – my tried-and-true method for making the most incredible Roasted Garlic Goat Cheese Dip. Every step is designed to maximize flavor and create an absolutely unforgettable experience. This dip is rich, tangy, savory, and subtly sweet, with an utterly irresistible creamy texture. It’s truly an ultimate recipe, perfect for any gathering or just a luxurious treat for yourself. I hope you love making and sharing this as much as I do!
Conclusion:
Why This Roasted Garlic Goat Cheese Dip is Your Next Must-Try:
Well, my friends, we’ve reached the exciting end of our culinary journey with what I truly believe is one of the most irresistible dips you’ll ever create. If you’ve been following along, you now hold the key to a recipe that transcends the ordinary, transforming simple ingredients into something truly spectacular. This isn’t just another dip; it’s an experience. The magic truly lies in the slow, patient roasting of garlic, which mellows its sharpness into a sweet, nutty, almost caramelized essence. This deeply flavorful garlic then perfectly marries with the creamy, tangy notes of fresh goat cheese, creating a symphony of flavors that is both sophisticated and incredibly comforting. Every single spoonful delivers that luxurious texture and vibrant taste that will have everyone clamoring for more. It’s incredibly easy to make, yet it presents as something much more complex and gourmet. I’ve made this countless times, and without fail, it vanishes from the serving bowl in record time. It’s a testament to how simple, quality ingredients, when treated with a little love and patience, can yield such extraordinary results. So, when you’re looking for that show-stopping appetizer, or just a delightful treat for yourself, remember this exceptional creation. It’s a guaranteed crowd-pleaser and a culinary delight!
Endless Possibilities: Serving Suggestions and Creative Variations:
Now, let’s talk about how to truly make this amazing dip shine, beyond just a bowl with crackers. While it’s absolutely divine served warm with a crusty baguette, crunchy pita chips, or an assortment of fresh crudités like vibrant carrot sticks, crisp celery, and colorful bell pepper strips, its versatility knows no bounds. Think beyond the appetizer spread! Imagine slathering a generous dollop onto a warm, fluffy baked potato, allowing it to melt into a creamy, savory sauce. It’s also an incredible spread for sandwiches and wraps, adding a gourmet twist to your everyday lunch. For a delightful brunch, try it spread on a toasted bagel under a fried egg, or incorporated into an omelette. You can even use it as a dollop over grilled chicken or stirred into warm pasta for a quick, luxurious sauce.
But why stop there? Let’s explore some delightful variations to keep things fresh and exciting. Feel free to experiment with different herbs – a sprinkle of fresh thyme or rosemary added during the blending process can elevate the aroma, while a garnish of chopped chives or parsley adds a lovely freshness and pop of color. For a touch of heat, a tiny pinch of red pepper flakes can provide a gentle warmth without overpowering the delicate flavors. You could even swirl in a tablespoon of sun-dried tomato pesto or a spoonful of finely chopped caramelized onions for an extra layer of sweetness and umami. Don’t be afraid to mix and match; perhaps a small amount of cream cheese alongside the goat cheese for an even richer, smoother consistency, or a touch of feta for a sharper, saltier kick. A final drizzle of good quality balsamic glaze or a sprinkle of toasted pine nuts before serving will add a professional touch and an extra textural dimension. This truly is a recipe that invites your creativity and personal touch!
Your Turn to Create and Share:
My dear readers, I genuinely hope I’ve convinced you to try this incredible recipe. This isn’t just any dip; it’s truly a must-make for any gathering or just a treat for yourself. I promise you, the moment you taste this Roasted Garlic Goat Cheese Dip An Amazing Ultimate Recipe, you’ll understand why I rave about it so much. It offers that perfect blend of creamy texture, tangy goat cheese, and the irreplaceable sweetness of roasted garlic that sets it apart. Please, go ahead, give it a whirl in your own kitchen. You’ll find that it comes together effortlessly, yet tastes like something you’d order at a five-star restaurant. And when you do, I would absolutely love to hear about your experience! Share your photos, your thoughts, and any creative variations you come up with in the comments below. Your feedback and culinary adventures inspire me, and I can’t wait to see your delicious creations come to life. Happy dipping!
Amazing Ultimate Roasted Garlic Goat Cheese Dip
Indulge in the irresistible flavor of this Amazing Ultimate Roasted Garlic Goat Cheese Dip. Combining the robust sweetness of slowly roasted garlic with the distinctive, tangy richness of goat cheese, this creamy, savory dip is a tantalizing culinary experience. Perfect for entertaining or a luxurious treat, it’s both sophisticated and wonderfully approachable.
Ingredients
-
2 large heads garlic
-
2 tbsp (30ml) olive oil
-
1/4 tsp sea salt
-
Few grinds black pepper
-
8 oz (226g) fresh goat cheese
-
4 oz (113g) cream cheese, softened
-
2 tbsp (30ml) olive oil
-
1 tbsp (15ml) fresh lemon juice
-
1/2 tsp sea salt
-
1/4 tsp black pepper
-
Pinch red pepper flakes (optional)
-
Fresh chives or parsley, chopped (for garnish)
-
Drizzle of extra virgin olive oil (for garnish)
-
Red pepper flakes (optional, for garnish)
-
Assorted dippers (crackers, baguette, crudités, pita chips)
Instructions
-
Step 1
Preheat oven to 400°F (200°C). Slice about a quarter-inch off the top of each garlic head, exposing the cloves. Place each head on a piece of aluminum foil. Drizzle each with 1 tablespoon olive oil, a pinch of sea salt, and a few grinds of black pepper. Wrap each garlic head tightly in foil to form secure packets. -
Step 2
Place foil-wrapped garlic heads on a baking sheet and roast for 40 to 50 minutes, or until cloves are incredibly soft and golden brown. Remove from oven and let cool for 10 to 15 minutes. Once cool enough to handle, squeeze out the soft roasted garlic cloves and discard skins. -
Step 3
Add 8 ounces (226g) fresh goat cheese and 4 ounces (113g) softened cream cheese to a food processor. Add all the roasted garlic cloves. Pulse a few times to start breaking down the mixture. -
Step 4
With the processor running, slowly drizzle in 2 tablespoons (30ml) olive oil and 1 tablespoon (15ml) fresh lemon juice. Add 1/2 teaspoon sea salt, 1/4 teaspoon black pepper, and an optional pinch of red pepper flakes. Process for several minutes, stopping to scrape down the sides as needed, until the mixture is incredibly smooth, light, and airy. Adjust with a tiny splash more olive oil or lemon juice if needed for desired consistency. -
Step 5
Taste the dip and adjust seasoning (salt, pepper, lemon) to your preference. Give it a final quick pulse to incorporate any additions. -
Step 6
Transfer the dip to a serving bowl. For optimal flavor melding and deepening, cover tightly with plastic wrap and chill in the refrigerator for at least 30 minutes to an hour. This step is highly recommended. -
Step 7
Just before serving, sprinkle generously with freshly chopped chives or parsley. Drizzle with extra virgin olive oil and optionally add more red pepper flakes for visual appeal and a hint of heat. Serve with an assortment of dippers such as crisp crackers, toasted baguette slices, pita chips, carrot sticks, or cucumber slices. -
Step 8
Store any leftover dip in an airtight container in the refrigerator for up to 3-4 days. If too firm from chilling, let it sit at room temperature for 15-20 minutes or stir in a tiny splash of olive oil to restore its creamy consistency.
Important Information
Nutrition Facts (Per Serving)
It is important to consider this information as approximate and not to use it as definitive health advice.
Allergy Information
Please check ingredients for potential allergens and consult a health professional if in doubt.
Leave a Comment