
Every time I think of Butterfinger Cookies, I’m transported back to my childhood kitchen, where my mom would whip up a batch on rainy Saturday afternoons. The sound of the mixer whirring was like music to my ears, and the sweet, nutty aroma of melting butter and chocolate wafted through the air, wrapping me in a warm embrace. I can still see the vibrant orange and yellow of crushed Butterfinger bars scattered on top, like a sprinkle of sunshine on a cloudy day.
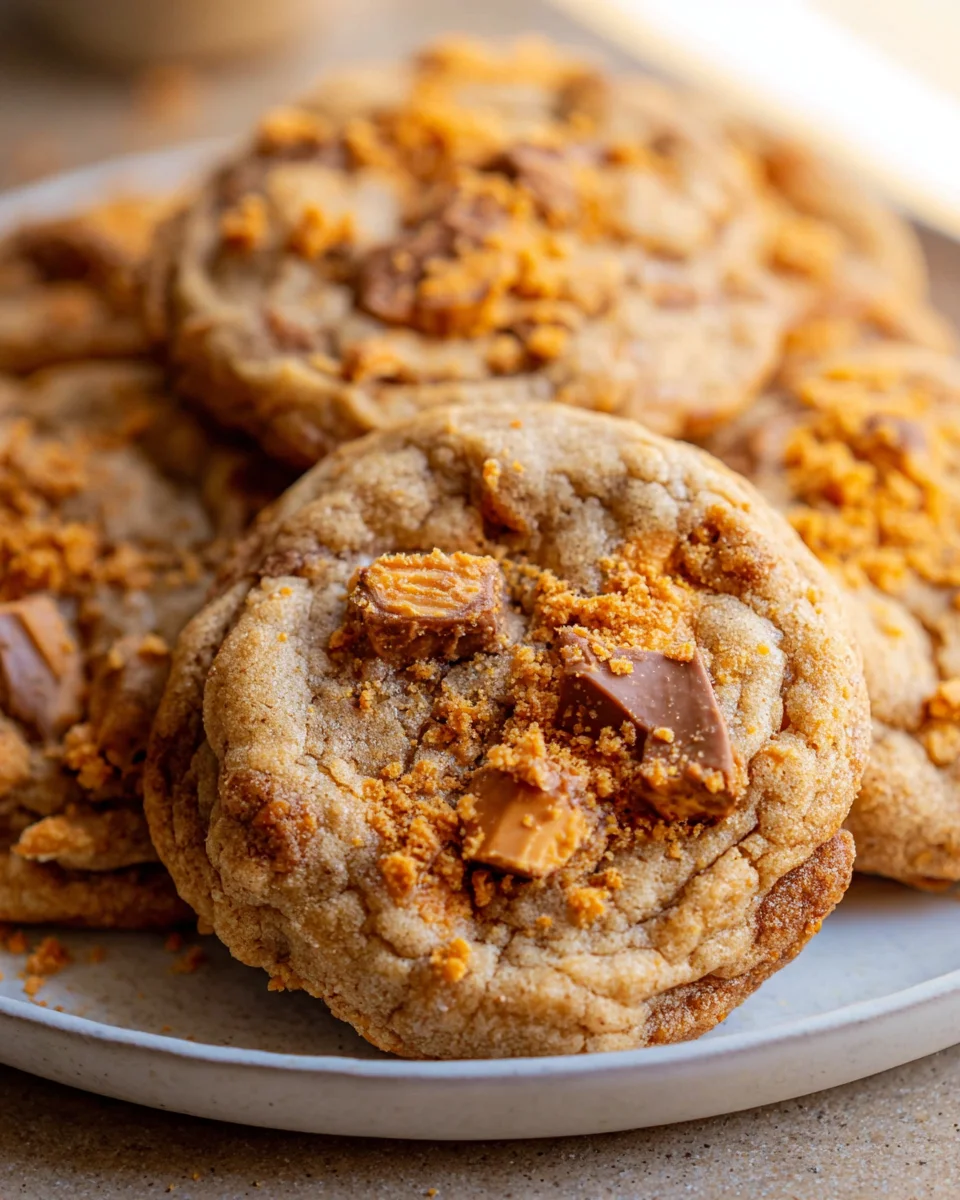
These cookies are a delightful dance of textures and flavors. As you bite into one, the crispness of the edges gives way to a soft, chewy center, bursting with chunks of chocolate and those iconic Butterfinger bits. They have that perfect balance of sweet and salty, with a satisfying crunch that keeps you coming back for more. Each cookie is a nostalgic treat that brings a smile to your face, reminding you of simpler times.
What makes my version of Butterfinger Cookies special is the addition of a hint of sea salt, enhancing the chocolate and caramel flavors and making each bite even more irresistible. Plus, I’ve mastered the technique of chilling the dough, which helps to create a thicker, more decadent cookie that’s impossible to resist.
So, if you’re ready to experience a little slice of nostalgia, let me show you exactly how to make these delicious Butterfinger Cookies!

Why You’ll Love This Recipe
- These Butterfinger Cookies are incredibly thick and soft, delivering a delightful chewy texture that contrasts perfectly with the crunchy bits of Butterfinger.
- With a prep time of only 15 minutes and a total time of 40 minutes, you can whip up a batch of these cookies in no time, making them perfect for last-minute dessert cravings.
- This recipe is budget-friendly, requiring common pantry ingredients while elevating classic peanut butter cookies to new heights with the addition of Butterfinger candy.
- Each cookie bursts with flavor, offering a unique blend of sweet, salty, and nutty notes that will keep you coming back for more.
- The dough can be chilled or even frozen, allowing you to make the cookies whenever you want, without compromising on taste or texture.
Ingredients
- 3/4 cup butter (softened (1 and 1/2 sticks))
- 1/2 cup granulated sugar
- 1/2 cup brown sugar (packed)
- 1 cup peanut butter (don’t use natural pb)
- 1 large egg
- 1 & 1/2 teaspoons vanilla
- 1 & 1/2 cups all-purpose flour (spooned and leveled)
- 1/2 teaspoon baking soda
- 1/2 teaspoon baking powder
- 1/4 teaspoon kosher salt
- 16 ounces butterfinger (chopped, see note*)
In this recipe, each ingredient plays a crucial role in achieving the perfect Butterfinger Cookies. The softened butter not only adds richness but also aids in creating a tender texture. When selecting your butter, opt for unsalted to control the salt content in your cookies. Granulated sugar contributes to the cookie’s crisp edges, while brown sugar adds moisture and a hint of caramel flavor.
Peanut butter is the backbone of this recipe—make sure to choose a creamy, non-natural peanut butter like Jif for the best texture. Natural peanut butter can alter the consistency and spread of your cookies. The egg acts as a binder, ensuring everything holds together beautifully. The combination of baking soda and baking powder provides the perfect rise, while the kosher salt enhances the overall flavors. Finally, the star ingredient, chopped Butterfinger, adds that unmistakable crunch and sweetness. If you can’t find Butterfinger Bits, you can chop regular Butterfinger bars into small pieces to achieve a similar effect.
Step-by-Step Instructions
- In a large bowl or stand mixer, beat 3/4 cup softened butter until it is smooth and creamy, about 2 minutes. You should see no lumps of butter; this ensures a uniform texture in your cookies.
- Add 1/2 cup granulated sugar and 1/2 cup packed brown sugar. Beat well for another 2 minutes until the mixture is fluffy and light. The color should lighten as air is incorporated.
- Mix in 1 cup of peanut butter, ensuring it’s well combined. I recommend using a non-natural peanut butter for the best results. If using a measuring cup, an adjustable one can make this much easier!
- Add 1 large egg and 1 and 1/2 teaspoons of vanilla. Beat until fully combined, scraping down the sides of the bowl to ensure everything is mixed well.
- Pour in 1 and 1/2 cups of all-purpose flour, but don’t stir yet. Top the flour with 1/2 teaspoon baking soda, 1/2 teaspoon baking powder, and 1/4 teaspoon kosher salt. Use a teaspoon to gently combine the dry ingredients without overmixing.
- Now, turn on the mixer to low speed to incorporate the dry ingredients. Stop as soon as the dough comes together but there are still some visible flour streaks. Overmixing can lead to tough cookies!
- Add in 16 ounces of chopped Butterfinger and mix until just barely incorporated. The goal is to have chunks of Butterfinger throughout the dough; don’t overdo it here.
- Cover the bowl and chill the dough for 15 minutes up to an hour. If you’re patient, letting it chill for longer can help deepen the flavors.
- Preheat your oven to 350 degrees F. Line two baking sheets with parchment paper or silicone baking mats for easy cleanup.
- Shape the dough into 2-inch balls and place them on the baking sheets at least 1-2 inches apart. I usually fit 12 cookies on a standard half baking sheet.
- Bake the cookies in the preheated oven for about 10 minutes. They should look puffy and the edges will be set, while the center might still look a bit shiny.
- If the cookies haven’t spread much, gently press down on each cookie with a spatula right after you take them out of the oven. If you have extra Butterfinger bits, sprinkle them on top for added flair.
- Let the cookies rest on the pan for at least 5 minutes before transferring them to a wire rack to cool completely. This waiting period is crucial as it allows them to set properly.
- Believe it or not, I find these cookies taste better when they’re almost at room temperature. The melted Butterfinger can be chewy right out of the oven!
- This recipe yields about 25 cookies. Store any leftovers in a tightly sealed container for up to 3 days to keep them fresh.
- If you want to freeze the cookie dough, shape it into balls and place them in a ziplock bag. They can be frozen for up to 3 months. Bake them straight from frozen, adding a minute or two to the baking time.
Pro Tips for the Best Butterfinger Cookies
- One common mistake is overmixing the dough. This can lead to tough cookies instead of the soft, chewy texture we all love. Mix just until combined!
- Using a cookie scoop ensures uniform cookie sizes, which helps them bake evenly. If you don’t have one, a heaping tablespoon can work, but consistency is key for even baking.
- The ratio of peanut butter to flour is crucial for the perfect balance of flavor and texture. Stick to the measurements for the best results—don’t be tempted to add more flour!
- Consider chilling the dough for at least 30 minutes before baking. This will help the cookies retain their shape and give them a thicker, chewier texture.
- If you want to enhance the peanut butter flavor, try adding a pinch of cinnamon or a splash of peanut butter extract. It adds a delightful depth to the cookies!
Variations & Serving Ideas
For a fun twist on these Butterfinger Cookies, consider trying these variations:
- Nut-Free Version: Substitute the peanut butter with sun butter or almond butter for a nut-free cookie that’s still delicious.
- Chocolate Drizzle: After the cookies cool, drizzle melted chocolate over the top for an extra indulgent treat.
- Seasonal Spices: Add a dash of pumpkin spice or gingerbread spices during the fall or winter for a seasonal flair.
- Mini Cookies: Make smaller cookies by using a teaspoon to scoop the dough, perfect for bite-sized treats!
These cookies pair wonderfully with a glass of cold milk, which helps balance the sweetness. Serve them alongside a scoop of vanilla ice cream for an epic dessert sundae. A warm cup of coffee also complements the rich peanut butter flavor, enhancing your cookie experience. Finally, consider serving them at a gathering with a platter of assorted cookies for a delightful treat that everyone will love!
Storage, Make-Ahead & Reheating
Store your Butterfinger Cookies in a tightly sealed container at room temperature for up to 3 days. They tend to taste even better the next day as the flavors meld together. If you want to keep them longer, the dough freezes exceptionally well; just shape it into balls, place them in a ziplock bag, and store for up to 3 months. To bake, pull them directly from the freezer and add an extra minute or two to the baking time. If you have leftover baked cookies, they can also be frozen in a sealed container for up to 4 weeks. Let them thaw at room temperature before enjoying.
Frequently Asked Questions
Can I make Butterfinger Cookies ahead of time?
Yes! In fact, the flavors of these cookies develop nicely overnight. You can prepare the dough in advance and refrigerate it for up to 24 hours or freeze it for future baking.
What can I substitute for peanut butter?
If
Final Thoughts
These Butterfinger Cookies are a delightful twist on classic treats, perfectly blending the rich, buttery flavor of cookies with the irresistible crunch and sweetness of Butterfinger candy. Each bite offers a satisfying combination of textures that will leave you craving more.
This is the kind of recipe I come back to again and again, especially when I want to impress friends at gatherings or just indulge in a sweet moment at home. The joy of baking—and sharing—these cookies creates memories that last far beyond the last crumb.
So why not give this recipe a try? I encourage you to whip up a batch and experience the magic for yourself. And don’t forget to share your results or put your own spin on it—I’d love to hear what delicious variations you come up with!

Delicious Butterfinger Cookies Recipe for Sweet Treat Lovers
- Total Time: 40 minutes
- Yield: 25 cookies 1x
Description
These Butterfinger Cookies are a delightful blend of sweet and salty flavors, featuring a chewy center and crunchy Butterfinger bits. Perfect for satisfying your sweet tooth and evoking nostalgic memories.
Ingredients
- 3/4 cup butter (softened (1 and 1/2 sticks))
- 1/2 cup granulated sugar
- 1/2 cup brown sugar (packed)
- 1 cup peanut butter (don't use natural pb)
- 1 large egg
- 1 and 1/2 teaspoons vanilla
- 1 and 1/2 cups all-purpose flour (spooned and leveled)
- 1/2 teaspoon baking soda
- 1/2 teaspoon baking powder
- 1/4 teaspoon kosher salt
- 16 ounces butterfinger (chopped, see note*)
Instructions
- In a large bowl or stand mixer, beat 3/4 cup softened butter until it is smooth and creamy, about 2 minutes.
- Add 1/2 cup granulated sugar and 1/2 cup packed brown sugar. Beat well for another 2 minutes until the mixture is fluffy and light.
- Mix in 1 cup of peanut butter, ensuring it’s well combined.
- Add 1 large egg and 1 and 1/2 teaspoons of vanilla. Beat until fully combined, scraping down the sides of the bowl.
- Pour in 1 and 1/2 cups of all-purpose flour, but don’t stir yet. Top the flour with 1/2 teaspoon baking soda, 1/2 teaspoon baking powder, and 1/4 teaspoon kosher salt.
- Use a teaspoon to gently combine the dry ingredients without overmixing.
- Turn on the mixer to low speed to incorporate the dry ingredients. Stop as soon as the dough comes together but there are still some visible flour streaks.
- Add in 16 ounces of chopped Butterfinger and mix until just barely incorporated.
- Cover the bowl and chill the dough for 15 minutes up to an hour.
- Preheat your oven to 350 degrees F. Line two baking sheets with parchment paper or silicone baking mats.
- Shape the dough into 2-inch balls and place them on the baking sheets at least 1-2 inches apart.
- Bake the cookies in the preheated oven for about 10 minutes.
- If the cookies haven’t spread much, gently press down on each cookie with a spatula right after you take them out of the oven.
- Let the cookies rest on the pan for at least 5 minutes before transferring them to a wire rack to cool completely.
- These cookies taste better when they’re almost at room temperature.
- This recipe yields about 25 cookies. Store any leftovers in a tightly sealed container for up to 3 days.
- If you want to freeze the cookie dough, shape it into balls and place them in a ziplock bag.
- Prep Time: 15 mins
- Cook Time: 25 mins
- Category: Dessert
- Method: Baking
- Cuisine: American
Nutrition
- Serving Size: 1 cookie
- Calories: 150
- Sugar: 10 g
- Sodium: 100 mg
- Fat: 7 g
- Saturated Fat: 3 g
- Unsaturated Fat: 3 g
- Trans Fat: 0 g
- Carbohydrates: 20 g
- Fiber: 1 g
- Protein: 3 g
- Cholesterol: 15 mg
Keywords: Be careful not to overmix the dough to maintain a soft and chewy texture. You can substitute peanut butter with sun butter or almond butter for a nut-free version.
Leave a Comment