

Healthy Apple & Carrot Dog Snack Sticks. If you’re anything like me, your furry best friend is more than just a pet – they’re family! And just like with any family member, I always want to make sure they’re eating the very best. That’s why I’m so excited to share this recipe for Healthy Apple & Carrot Dog Snack Sticks with you. These aren’t just any dog treats; they’re a labor of love packed with wholesome, natural goodness.
What makes these special? For starters, we’re ditching the mystery ingredients found in many store-bought options and embracing the power of real food: fresh apples and carrots. I love knowing exactly what goes into my dog’s belly, and with these homemade sticks, you get that peace of mind too. They’re a fantastic, nutritious alternative to processed treats, free from questionable additives and full of vitamins your pup needs.
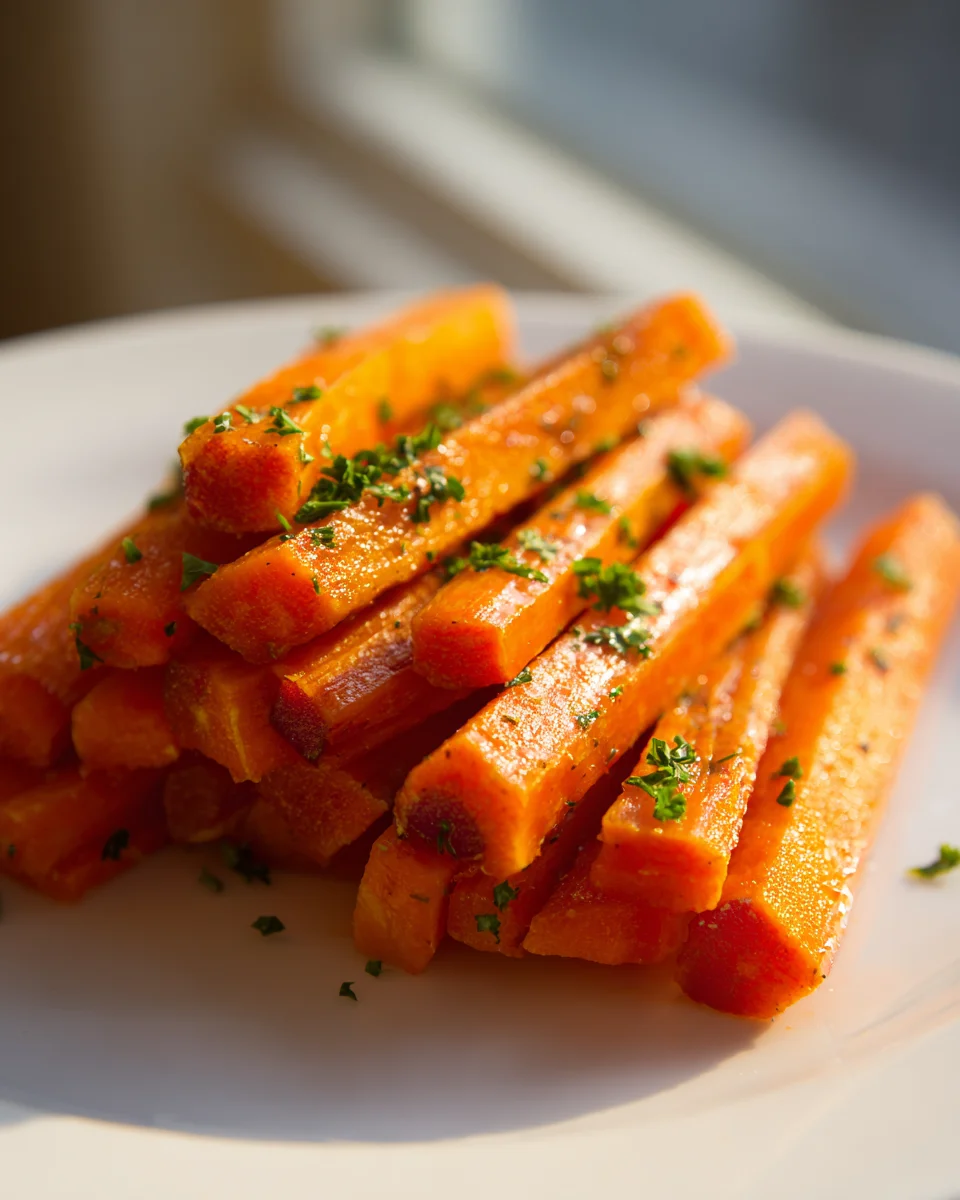
I truly believe you and your canine companion will adore these. You’ll love how incredibly easy they are to whip up in your own kitchen, saving you money and giving you complete control over the ingredients. Plus, the look of pure joy on your dog’s face when they crunch into one of these delicious, slightly chewy sticks is absolutely priceless! Imagine a perfect little portable snack, ideal for training, car rides, or just a daily ‘good boy/girl’ reward. We’re talking about delicious, healthy sticks that dogs simply go wild for – a perfect blend of sweet apple and earthy carrot, baked until perfectly firm and ready for happy chomping.
Ingredient Notes
Crafting these Healthy Apple & Carrot Dog Snack Sticks for my furry friend is always a joy, and it starts with selecting the right ingredients. I focus on wholesome, dog-safe items that contribute to both taste and nutrition. Here’s a look at the star ingredients and some handy substitutions I’ve discovered:
-
Apples (Fuji or Gala work wonderfully): These provide natural sweetness, fiber, and important vitamins like A and C. I always make sure to core them thoroughly and remove all seeds, as apple seeds contain small amounts of cyanide and are not safe for dogs. Peeling is optional; I often leave the peel on for extra fiber and nutrients, as long as it’s organic and well-washed.
- Substitution: Pears (cored and deseeded) can be a good alternative, offering similar sweetness and fiber. Bananas can also be used for a softer stick, but they’ll alter the texture significantly. For a less sweet option, you could reduce the apple and slightly increase the carrot, or introduce a small amount of pumpkin puree.
-
Carrots: A powerhouse of beta-carotene, which converts to Vitamin A, excellent for vision and immune health. They add a lovely vibrant color and a subtly sweet, earthy flavor that dogs adore. Plus, their natural crunch contributes to the desired stick texture. I grate them finely to ensure they blend well into the dough.
- Substitution: Sweet potatoes (cooked and mashed, or grated raw) are a fantastic alternative, packed with vitamins and fiber. Pumpkin puree (canned, 100% pumpkin, not pie filling) is another great choice, adding moisture and nutrients, though it will make the sticks softer. Green beans (finely chopped) could also be incorporated for added greens.
-
Oat Flour: My go-to binder for these sticks. Oat flour is naturally gluten-free (ensure it’s certified GF if your dog has sensitivities) and provides soluble fiber, which is great for digestion. It gives the sticks a pleasant, slightly chewy texture and helps hold everything together without being too dense.
- Substitution: Whole wheat flour is a perfectly acceptable substitute if your dog isn’t sensitive to gluten; it adds fiber and nutrients. If you’re looking for another grain-free option, chickpea flour or brown rice flour can work, though they might absorb liquids differently, so you might need to adjust the amount of water or broth.
-
Egg (Large): This acts as a primary binder, helping to emulsify the ingredients and provide structure to the sticks. It also adds a good boost of protein.
- Substitution: For an egg-free recipe, a “flax egg” (1 tablespoon ground flaxseed mixed with 3 tablespoons warm water, left to sit for 5 minutes) can often work, though the texture of the final stick might be slightly denser. Applesauce (unsweetened) or a small amount of mashed banana can also provide binding moisture, but might require slight adjustments to the flour amount to maintain consistency.
-
Water or Low-Sodium Beef Broth: This is crucial for achieving the right dough consistency. I prefer using low-sodium beef broth because it adds a savory flavor that dogs absolutely love, enhancing the overall appeal of the snack sticks. Always ensure it’s specifically a low-sodium version and free of onions, garlic, or other harmful ingredients.
- Substitution: Plain water is always a safe and simple option. You could also use low-sodium chicken or vegetable broth, again making sure there are no harmful additives.
- Optional additions (a pinch of cinnamon or turmeric): I sometimes add a tiny pinch of ground cinnamon for its anti-inflammatory properties and delightful aroma, or a touch of turmeric, also known for its anti-inflammatory benefits. These are purely optional but can offer an extra health boost. Always use in very small quantities suitable for dogs.
I always recommend using organic ingredients when possible, especially for fruits and vegetables that might have pesticide residues. And, as with any new treat, I introduce these snack sticks gradually to my dog’s diet to ensure they agree with him.
Step-by-Step Instructions
Making these Apple & Carrot Dog Snack Sticks is a straightforward and rewarding process. I love how simple it is to whip up a batch of healthy treats I know my dog will adore. Here’s how I do it:
- Preheat & Prep: First things first, I preheat my oven to 325°F (160°C). This ensures it’s ready to go once the sticks are formed. While the oven heats, I line a large baking sheet with parchment paper. This prevents sticking and makes for easy cleanup.
- Prepare the Produce: I start by thoroughly washing the apple and carrot. For the apple, I core it completely, ensuring no seeds remain, and then either grate it finely or chop it into very small pieces. If I’m leaving the peel on, I make sure it’s an organic apple. For the carrot, I simply grate it finely. The goal is small pieces that will integrate smoothly into the dough.
- Combine Wet Ingredients: In a large mixing bowl, I crack the egg and lightly whisk it. Then, I add the grated apple and carrot to the bowl. If I’m using low-sodium beef broth, I’ll add about half a cup at this stage. I give it a good stir to combine everything evenly.
- Add Dry Ingredients: Next, I gradually add the oat flour to the wet mixture, a half-cup at a time, mixing well after each addition. If I’m adding a pinch of cinnamon or turmeric, this is when it goes in. I continue adding flour until a firm, but still manageable, dough forms. The exact amount of flour can vary depending on the moisture content of your apple and carrot, so I always trust my instincts here – I’m looking for a dough that’s not too sticky, but not dry and crumbly either. If the dough seems too dry, I’ll add a tablespoon more of broth or water; if too wet, a little more oat flour.
- Form the Sticks: Now for the fun part! I lightly flour my clean countertop or a large cutting board with a bit of extra oat flour. I take about a quarter of the dough and roll it out with a rolling pin until it’s about ¼-inch thick. Then, using a pizza cutter or a sharp knife, I cut the dough into long, slender sticks, roughly ½-inch wide and 3-4 inches long. The “stick” shape is key for easy handling by dogs and makes them a fun treat.
- Arrange & Bake: I carefully transfer the shaped sticks to my prepared baking sheet, making sure to leave a little space between each one for even baking. I usually get two full baking sheets out of one batch. I then place the baking sheets in the preheated oven.
- Bake & Dry: I bake the sticks for about 20-25 minutes, or until they are firm to the touch and slightly golden around the edges. For a chewier stick, I’ll stop here. However, to achieve a crispier, crunchier stick that lasts longer, I’ll reduce the oven temperature to 200°F (95°C) and continue to bake (or rather, “dry”) them for another 1 to 2 hours, flipping them halfway through. This low-and-slow drying process removes more moisture, giving them that satisfying crunch and extending their shelf life.
- Cool Completely: Once baked to my desired texture, I remove the baking sheets from the oven and transfer the Apple & Carrot Dog Snack Sticks to a wire rack to cool completely. This is a crucial step! They need to be completely cool and dry before storage to prevent mold.
My dog usually starts sniffing around the kitchen as soon as the smell of baking apples and carrots fills the air. It’s truly a labor of love, and seeing his happy face makes it all worthwhile!
Tips & Suggestions
Over time, I’ve gathered a few tricks that make preparing these Healthy Apple & Carrot Dog Snack Sticks even better, ensuring they’re always a hit with my dog and easy for me to make:
- Texture is Key: Pay close attention to the baking and drying process. If your dog prefers a softer, chewier treat, bake them for the initial 20-25 minutes until firm but still pliable. For a satisfying crunch that’s great for dental health, definitely go for the longer, low-temperature drying phase. I often make a mixed batch – some chewy, some crunchy – to give my dog variety!
- Get Creative with Shapes: While “sticks” are in the name and a great shape for dog treats, don’t feel limited. You can use cookie cutters to make fun bone shapes, paw prints, or even small squares. Just adjust baking times slightly for thicker or thinner shapes. Remember that uniform thickness helps them bake evenly.
- Finely Grate for Best Results: Whether it’s apples or carrots, I find that finely grating them ensures they blend seamlessly into the dough. This prevents large chunks, which can make the sticks crumbly or uneven, and helps with consistent texture. A food processor with a grating attachment makes this super quick.
- Test for Doneness (and Coolness): For crunchy sticks, they should feel completely dry and firm when removed from the oven and after cooling. If there’s any residual moisture, they’ll be prone to mold. Always ensure they are absolutely cool before storing them, especially if you’re aiming for a longer shelf life.
- Introduce Other Dog-Safe Veggies: Feel free to experiment with other dog-friendly vegetable purees or finely grated options. A small amount of spinach, pureed pumpkin (not pie filling!), or even a little bit of finely chopped parsley can add extra nutrients and variety. Always research new ingredients to ensure they are safe for canine consumption.
- Consider a Dehydrator: If you’re serious about making very dry, shelf-stable, crunchy treats, a food dehydrator is an excellent investment. It allows for very low and consistent drying temperatures, often yielding superior results for crunchy dog snacks. Just follow the dehydrator’s instructions for fruit and vegetable leathers or dog treats.
- Batch Baking for Convenience: These snack sticks freeze wonderfully, so I often make a double or triple batch. This saves time in the long run and ensures I always have a healthy treat option on hand.
- Adjust to Your Dog’s Needs: Every dog is different. If your dog has a sensitive stomach, start with a very small portion. If they love a particular flavor, you can slightly increase that ingredient in future batches. Always consult your vet if you have concerns about introducing new foods or ingredients to your dog’s diet, especially if they have pre-existing health conditions.
These tips help me create the best Apple & Carrot Dog Snack Sticks every time, tailored perfectly to my dog’s preferences and my schedule.
Storage
Proper storage is essential to keep these Healthy Apple & Carrot Dog Snack Sticks fresh, safe, and appealing for your canine companion. Since they are homemade and preservative-free, they don’t have the same shelf life as commercially produced treats. Here’s my go-to storage advice:
- Room Temperature (for very dry, crunchy sticks): If you’ve baked the sticks until they are very dry and crunchy (using the low-temperature drying method for 1-2 hours), they can often be stored in an airtight container at cool room temperature for up to 1 week. The key here is “very dry.” Any residual moisture will invite mold growth, so I always make sure they’re completely cooled and crispy before storing this way. A glass jar with a tight-fitting lid or a sealed container works perfectly.
- Refrigerator (for chewier or slightly softer sticks): For sticks that are a bit chewier or if you’re unsure about their dryness, the refrigerator is your best friend. Store them in an airtight container in the fridge for up to 2 weeks. This significantly extends their shelf life compared to room temperature storage, as the cooler environment slows down bacterial growth.
-
Freezer (for long-term storage): This is my preferred method, especially when I make a large batch. The Apple & Carrot Dog Snack Sticks freeze beautifully! I place them in a single layer on a baking sheet to flash freeze them for about an hour – this prevents them from sticking together. Once frozen solid, I transfer them to a freezer-safe, airtight bag or container. They will last for up to 3 months in the freezer.
- To Thaw: Simply take out a few sticks as needed and let them thaw at room temperature for 15-30 minutes, or overnight in the refrigerator. I avoid microwaving them as it can alter their texture.
- Checking for Spoilage: Always inspect the treats before giving them to your dog. Look for any signs of mold, unusual odors, or changes in texture. If anything seems off, it’s best to discard them. Trust your nose and your eyes!
- Avoid Humidity: Humidity is the enemy of baked goods, especially homemade ones without preservatives. Always ensure your storage containers are truly airtight and stored in a cool, dry place away from direct sunlight or heat sources.
By following these storage guidelines, I can ensure my dog always has access to fresh, healthy, and delicious Apple & Carrot Dog Snack Sticks, whenever he deserves a special treat!

Final Thoughts
There you have it! I truly hope you give these Healthy Apple & Carrot Dog Snack Sticks a try. This recipe is a must-try because it offers a simple, heartwarming way to provide your beloved canine companion with a treat that’s not just delicious, but genuinely good for them. Forget the mystery ingredients of store-bought options; with these Healthy Apple & Carrot Dog Snack Sticks, you’re giving a homemade snack packed with natural vitamins and fiber from wholesome apples and carrots. The joy and tail wags you’ll receive in return are priceless, making the small effort entirely worth it. Go on, show your furry friend some extra love with a batch of these irresistible, healthy delights!
Healthy Apple & Carrot Dog Snack Sticks: Homemade Delight
- Total Time: 13 minute
- Yield: 2 baking sheets of snack sticks 1x
Description
Treat your furry friend to these nutritious and delicious Healthy Apple & Carrot Dog Snack Sticks. Packed with wholesome ingredients, these homemade snacks are a perfect blend of sweet apple and earthy carrot, ideal for training or rewarding your dog.
Ingredients
- 2 Apples (Fuji or Gala, cored and deseeded)
- 2 Carrots (grated finely)
- 2 cups Oat Flour
- 1 Large Egg
- 1/2 cup Water or Low-Sodium Beef Broth
- Optional: a pinch of cinnamon or turmeric
Instructions
- Preheat your oven to 325°F (160°C) and line a large baking sheet with parchment paper.
- Wash the apple and carrot thoroughly. Core the apple and grate or chop it into small pieces. Grate the carrot finely.
- In a large mixing bowl, crack the egg and lightly whisk it. Add the grated apple and carrot, along with the low-sodium beef broth, and stir to combine.
- Gradually add the oat flour to the wet mixture, mixing well after each addition. If using, add the pinch of cinnamon or turmeric. Adjust the dough consistency as needed.
- Lightly flour your countertop and roll out about a quarter of the dough to ¼-inch thick. Cut the dough into long, slender sticks.
- Transfer the sticks to the prepared baking sheet, leaving space between each one.
- Bake the sticks for about 20-25 minutes until firm and slightly golden. For a crispier texture, reduce the oven temperature to 200°F (95°C) and dry for an additional 1 to 2 hours.
- Once baked to your desired texture, cool the sticks completely on a wire rack before storing.
- Prep Time: 15 mins
- Cook Time: 30-40 mins
- Category: Dog Treats
- Method: Baking
- Cuisine: Homemade
Nutrition
- Serving Size: 1 stick
- Calories: 50
- Sugar: 2 g
- Sodium: 10 mg
- Fat: 1 g
- Saturated Fat: 0 g
- Unsaturated Fat: 1 g
- Trans Fat: 0 g
- Carbohydrates: 10 g
- Fiber: 1 g
- Protein: 2 g
- Cholesterol: 20 mg
Keywords: Use organic ingredients when possible. Introduce these treats gradually to your dog's diet. For substitutions, pears can replace apples, and sweet potatoes can replace carrots. Ensure all ingredients are dog-safe.
Leave a Comment