
Homemade Chalupa
Oh my goodness, get ready to experience a taste sensation that will blow any fast-food imitation out of the water! I’m so excited to share my recipe for Homemade Chalupa with you. Forget everything you thought you knew about chalupas, because this homemade version is a revelation.
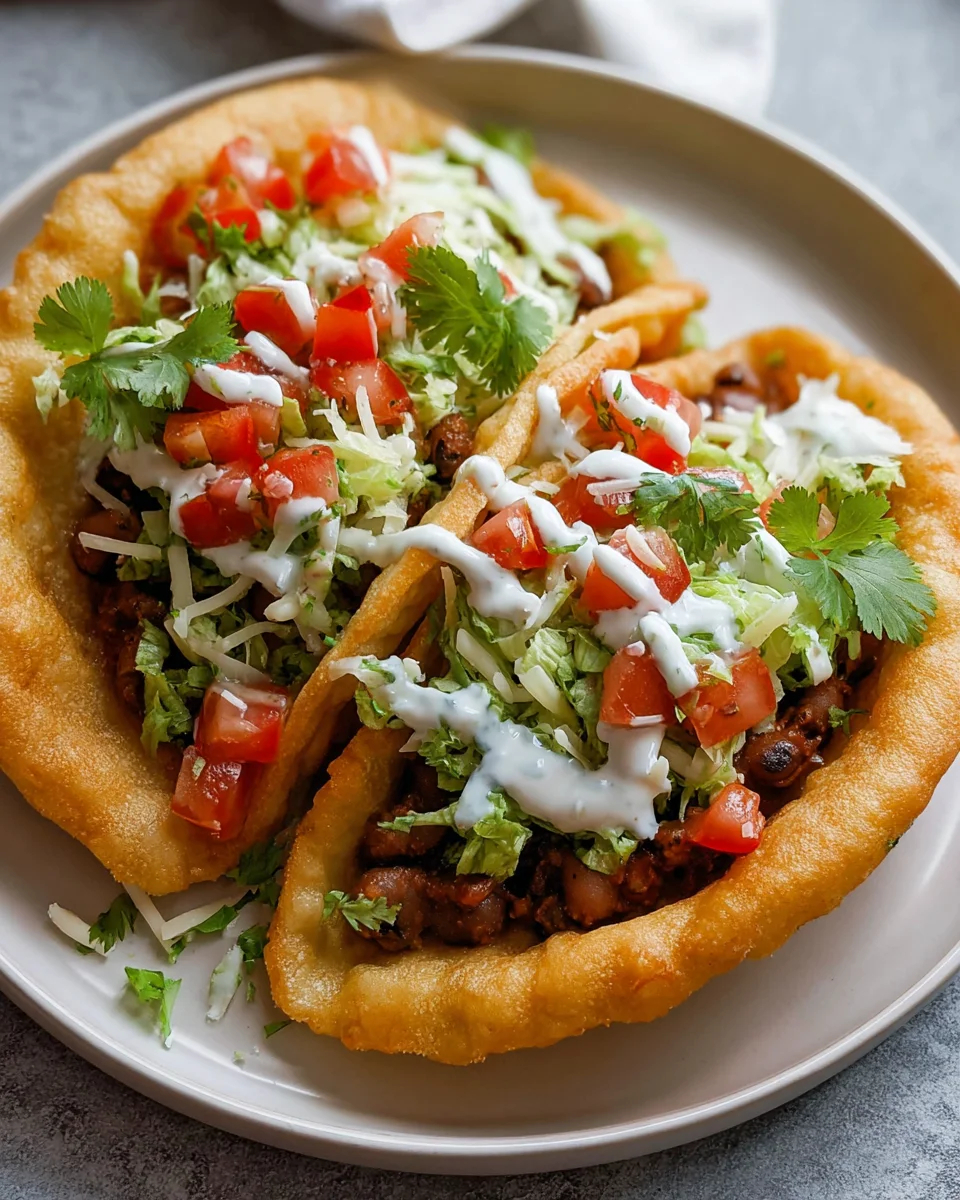
What makes my Homemade Chalupa truly special? It all starts with that incredible shell. We’re talking about a perfectly fried masa “boat” that’s crispy on the outside, tender on the inside, and just begging to be filled with something delicious. And oh, the filling! I’ve crafted a rich, savory, and tender shredded beef filling that cooks down with aromatic spices and some fantastic non-alcohol alternatives to really deepen those complex flavors. This isn’t just about assembling ingredients; it’s about building layers of taste and texture that sing together in harmony.
You are absolutely going to love making and devouring these chalupas! There’s such a satisfying feeling that comes from creating something so incredibly flavorful from scratch. Imagine biting into that warm, slightly crispy masa shell, followed by the juicy, seasoned beef, and then topped with your favorite fresh garnishes like crisp lettuce, tangy crema, and vibrant salsa. It’s a complete meal, a culinary adventure, and pure comfort food all rolled into one. Get ready to impress yourself, your family, and anyone lucky enough to try a bite of these incredible homemade beauties!

I’m so excited to share my favorite recipe for homemade chalupas with you today! When I say chalupas, I’m talking about those delicious, thick, boat-shaped masa shells that are crispy on the outside and soft on the inside, piled high with incredible fillings. Forget the fast-food version – making them from scratch is a labor of love that’s truly worth it. It’s a fantastic way to bring authentic Mexican flavors right into your kitchen, and I promise, once you try these homemade beauties, you’ll never look back. There’s something incredibly satisfying about transforming simple ingredients into a meal that’s bursting with fresh taste and texture.
Making homemade chalupas might seem a little intimidating at first, especially if you’re new to working with masa, but I’ve broken it down into easy, manageable steps. The key to a great chalupa is that perfect shell – light, slightly chewy, and sturdy enough to hold all those wonderful toppings. We’ll be making a classic seasoned beef filling, but feel free to get creative with your preferred proteins or even make them vegetarian. This recipe is fantastic for a family dinner, a fun gathering with friends, or whenever you’re craving something truly special and flavorful. Let’s get cooking!
Ingredient Notes
Creating truly delicious homemade chalupas starts with understanding your ingredients. Here’s a breakdown of the key components and some helpful substitutions:
- Masa Harina: This is the heart of your chalupa shells. Masa harina is a special type of corn flour that has been nixtamalized (cooked and soaked in an alkaline solution), which gives it a unique flavor and makes it pliable for dough. Do not substitute with regular cornmeal or cornstarch; the results will be completely different. Look for brands like Maseca or Bob’s Red Mill.
- Warm Water: Essential for hydrating the masa harina and forming a workable dough. The temperature should be warm to the touch, not hot, which helps activate the masa properly.
- Salt: A crucial ingredient for both the masa dough and the beef filling. It enhances all the other flavors.
- Neutral Oil for Frying: You’ll need about 1-2 inches of oil in your pan for frying the chalupa shells. Vegetable oil, canola oil, or grapeseed oil are all excellent choices due to their high smoke points and neutral flavor.
- Ground Beef: For our savory filling, I recommend using lean ground beef (80/20 or 90/10). Leaner beef means less fat to drain, but a little fat adds flavor.
- Aromatics (Onion & Garlic): Freshly chopped yellow onion and minced garlic are the flavor base for our beef filling. Don’t skip these!
- Chalupa Seasoning Blend: For the beef, a simple blend of chili powder, ground cumin, dried oregano, garlic powder, and onion powder creates a robust, authentic flavor. Feel free to adjust to your spice preference.
- Tomato Paste or Diced Tomatoes: A small amount of tomato paste adds depth and richness to the beef filling. If you don’t have paste, a few tablespoons of finely diced canned tomatoes can work as well.
- Beef Broth: This helps to simmer the beef filling, ensuring it’s tender and juicy, and allows the flavors to meld beautifully. You can also use water if broth isn’t available.
- Toppings: This is where you can truly customize! My favorites include shredded iceberg lettuce, diced fresh tomatoes, crumbled cotija cheese (a salty, crumbly Mexican cheese), crema mexicana (a thin, tangy cream), and your favorite salsa.
Substitutions:
- Ground Beef: Feel free to substitute with ground chicken, turkey, or even a vegetarian option like seasoned black beans, lentils, or sautéed mushrooms for the filling.
- Cotija Cheese: If cotija is hard to find, crumbled feta cheese offers a similar salty, crumbly texture. Shredded mild cheddar or Monterey Jack also work wonderfully for a melty, cheesy topping.
- Crema Mexicana: You can easily make a homemade version by thinning sour cream with a little milk or water and a squeeze of fresh lime juice until it reaches a pourable consistency.
Step-by-Step Instructions
Let’s get down to the fun part – making these incredible homemade chalupas! Follow these steps for a truly rewarding culinary experience.
- Prepare the Beef Filling:
- Heat a large skillet over medium-high heat. Add the ground beef and cook, breaking it up with a spoon, until browned. Drain any excess fat.
- Add the chopped onion to the skillet with the beef and cook until softened, about 5 minutes. Stir in the minced garlic and cook for another minute until fragrant.
- Stir in the chili powder, cumin, oregano, garlic powder, onion powder, salt, and pepper. Cook for 1 minute, allowing the spices to toast.
- Add the tomato paste and beef broth. Bring to a simmer, then reduce heat to low, cover, and let it cook for at least 15-20 minutes for the flavors to meld. Stir occasionally. Keep warm.
- Make the Masa Dough:
- In a large bowl, combine the masa harina and salt.
- Gradually add the warm water, about 1/2 cup at a time, mixing with your hands until a soft, pliable dough forms. The dough should be moist but not sticky, similar to play-dough consistency. If it’s too dry, add a little more water; if too wet, add a tablespoon of masa harina.
- Knead the dough gently for about 2-3 minutes until smooth. Cover the bowl with a damp cloth or plastic wrap and let the dough rest for at least 15-20 minutes. This allows the masa harina to fully hydrate.
- Shape the Chalupa Shells:
- Divide the masa dough into golf-ball sized portions (about 1.5 to 2 ounces each).
- Line a tortilla press with two pieces of plastic wrap (cut from a resealable plastic bag works perfectly). Place one dough ball between the plastic, slightly off-center towards the hinge.
- Press gently to flatten the dough into an oval or oblong shape, about 1/4-inch thick. You want them thicker than a regular tortilla to achieve that signature chalupa texture.
- Carefully peel the plastic wrap off the shaped masa. If you want a slightly boat-like shape, you can gently pinch the sides upwards or create a slight indentation in the center with your thumb.
- Fry the Chalupa Shells:
- Heat 1 to 2 inches of neutral oil in a deep skillet or Dutch oven over medium-high heat to about 350-375°F (175-190°C).
- Carefully place one or two chalupa shells into the hot oil (don’t overcrowd the pan). Fry for 2-3 minutes per side, or until golden brown and crispy. They should puff up slightly as they cook.
- Using tongs, transfer the fried shells to a plate lined with paper towels to drain excess oil. Repeat with the remaining dough.
- Assemble and Serve:
- Immediately fill each warm chalupa shell with a generous scoop of the seasoned beef filling.
- Top with shredded lettuce, diced tomatoes, crumbled cotija cheese, a drizzle of crema mexicana, and a spoonful of your favorite salsa.
- Serve hot and enjoy your incredible homemade chalupas!
Tips & Suggestions
Making homemade chalupas is an art, and a few key tips can elevate your experience from good to absolutely fantastic:
- Masa Dough Consistency is King: This is the most critical element. Your masa dough should feel like soft play-dough – moist but not sticky, and it shouldn’t crack at the edges when you gently press it. If it’s too dry, add water in tiny increments (half a teaspoon at a time). If it’s too wet, add a little more masa harina.
- Don’t Skip the Rest: Allowing the masa dough to rest for 15-20 minutes is vital. This hydration period makes the dough more pliable, easier to work with, and prevents cracking when you’re shaping the chalupas.
- Oil Temperature Matters: Maintaining a consistent oil temperature is crucial for perfectly fried chalupas. If the oil is too cool, the chalupas will absorb too much oil and become greasy. If it’s too hot, they’ll burn on the outside before cooking through and won’t develop that desirable internal chewiness. Aim for 350-375°F (175-190°C). Use a kitchen thermometer if you have one.
- Shaping for Success: When shaping the chalupas, remember they should be thicker than a standard tortilla, about 1/4-inch. This thickness gives them their substantial texture. An oval or oblong shape works best. You can create a slight indentation in the center as they fry to help them resemble a “boat” and hold toppings better.
- Batch Fry and Serve Immediately: Chalupas are at their absolute best when fresh out of the fryer – crispy and warm. Fry them in batches just before serving. If you’re cooking for a crowd, you can keep the finished shells warm in a low oven (around 200°F/95°C) for a short period, but they will start to lose some crispness.
- Get Creative with Toppings: While the classic toppings are fantastic, feel free to experiment! Consider adding pickled red onions, sliced radishes for crunch, fresh cilantro, different types of cheese, a dollop of guacamole or sliced avocado, or even a spicy jalapeño sauce.
Storage
While chalupas are definitely best enjoyed fresh, you can store components separately to make future meals easier:
- Unfried Masa Dough: If you have leftover dough, wrap it tightly in plastic wrap and store it in an airtight container in the refrigerator for up to 1-2 days. Before using, let it come to room temperature for about 30 minutes, and you might need to knead in a tiny bit more water if it feels dry.
- Fried Chalupa Shells: These are best consumed immediately. If you happen to have a few leftover, store them in an airtight container at room temperature for no more than 1 day. They will lose their crispness. To attempt to revive them, you can gently reheat them in a dry skillet over medium heat, in an oven at 300°F (150°C) for a few minutes, or in an air fryer until slightly crispy, but they won’t be quite the same as fresh.
- Cooked Beef Filling: The seasoned ground beef filling stores beautifully! Transfer it to an airtight container and refrigerate for up to 3-4 days. You can easily reheat it on the stovetop over medium-low heat or in the microwave until warmed through.
- Assembled Chalupas: I do not recommend storing assembled chalupas. The moisture from the toppings will quickly make the crispy shell soggy, and the texture will be disappointing. Always store your components separately and assemble right before serving.
Final Thoughts
So, there you have it – our culinary adventure culminating in the creation of your very own Homemade Chalupa! I truly believe this recipe is a must-try for anyone looking to bring a burst of flavor and a touch of fiesta into their kitchen. The joy of preparing each component, from the perfectly crisp shell to the rich, savory beef filling, is incredibly rewarding.
What makes this particular Homemade Chalupa stand out is the incredible freshness and the ability to customize every element to your liking. The robust flavor of the beef, seasoned to perfection, truly shines through, offering a hearty and satisfying experience. And for those looking to explore, don’t hesitate to experiment with various non-alcohol alternatives in your marinades or salsas to add even more complexity and depth.
Trust me, once you take that first bite of your custom-made Homemade Chalupa, savoring the crunch, the tender beef, and all the fresh toppings, you’ll understand why it’s so much more than just a meal – it’s an experience. It’s a wonderful way to enjoy authentic, vibrant flavors right at home. So go ahead, gather your ingredients, and get ready to create something truly delicious and memorable. Happy cooking!

Mouthwatering Homemade Chalupa: Crispy Shell, Savory Beef
- Total Time: 1 hour
- Yield: 4 servings
Description
Experience the incredible flavors of homemade chalupas with crispy masa shells and a rich, savory beef filling. This recipe is a delightful culinary adventure that will impress your family and friends!
Ingredients
- Masa Harina
- Warm Water
- Salt
- Neutral Oil for Frying
- Ground Beef
- Aromatics (Onion & Garlic)
- Chalupa Seasoning Blend (chili powder, ground cumin, dried oregano, garlic powder, onion powder)
- Tomato Paste or Diced Tomatoes
- Beef Broth
- Toppings (shredded iceberg lettuce, diced fresh tomatoes, crumbled cotija cheese, crema mexicana, salsa)
Instructions
- Prepare the Beef Filling: Heat a large skillet over medium-high heat. Add the ground beef and cook, breaking it up with a spoon, until browned. Drain any excess fat.
- Add the chopped onion to the skillet with the beef and cook until softened, about 5 minutes. Stir in the minced garlic and cook for another minute until fragrant.
- Stir in the chili powder, cumin, oregano, garlic powder, onion powder, salt, and pepper. Cook for 1 minute, allowing the spices to toast.
- Add the tomato paste and beef broth. Bring to a simmer, then reduce heat to low, cover, and let it cook for at least 15-20 minutes for the flavors to meld. Stir occasionally. Keep warm.
- Make the Masa Dough: In a large bowl, combine the masa harina and salt.
- Gradually add the warm water, about 1/2 cup at a time, mixing with your hands until a soft, pliable dough forms. The dough should be moist but not sticky, similar to play-dough consistency. If it's too dry, add a little more water; if too wet, add a tablespoon of masa harina.
- Knead the dough gently for about 2-3 minutes until smooth. Cover the bowl with a damp cloth or plastic wrap and let the dough rest for at least 15-20 minutes.
- Shape the Chalupa Shells: Divide the masa dough into golf-ball sized portions (about 1.5 to 2 ounces each).
- Line a tortilla press with two pieces of plastic wrap. Place one dough ball between the plastic, slightly off-center towards the hinge.
- Press gently to flatten the dough into an oval or oblong shape, about 1/4-inch thick.
- Carefully peel the plastic wrap off the shaped masa. If you want a slightly boat-like shape, you can gently pinch the sides upwards.
- Fry the Chalupa Shells: Heat 1 to 2 inches of neutral oil in a deep skillet or Dutch oven over medium-high heat to about 350-375°F (175-190°C).
- Carefully place one or two chalupa shells into the hot oil. Fry for 2-3 minutes per side, or until golden brown and crispy.
- Using tongs, transfer the fried shells to a plate lined with paper towels to drain excess oil. Repeat with the remaining dough.
- Assemble and Serve: Immediately fill each warm chalupa shell with a generous scoop of the seasoned beef filling.
- Top with shredded lettuce, diced tomatoes, crumbled cotija cheese, a drizzle of crema mexicana, and a spoonful of your favorite salsa.
- Serve hot and enjoy your incredible homemade chalupas!
- Prep Time: 30 mins
- Cook Time: 30 mins
- Category: Dinner
- Method: Frying
- Cuisine: Mexican
Nutrition
- Serving Size: 1 chalupa
- Calories: 350
- Sugar: 2 g
- Sodium: 600 mg
- Fat: 20 g
- Saturated Fat: 6 g
- Unsaturated Fat: 12 g
- Trans Fat: 0 g
- Carbohydrates: 30 g
- Fiber: 3 g
- Protein: 15 g
- Cholesterol: 50 mg
Keywords: Masa dough should feel like soft play-dough. Allow the masa dough to rest for 15-20 minutes for better pliability. Maintain oil temperature around 350-375°F for perfect frying. Assemble chalupas right before serving to keep shells crispy.
Leave a Comment