
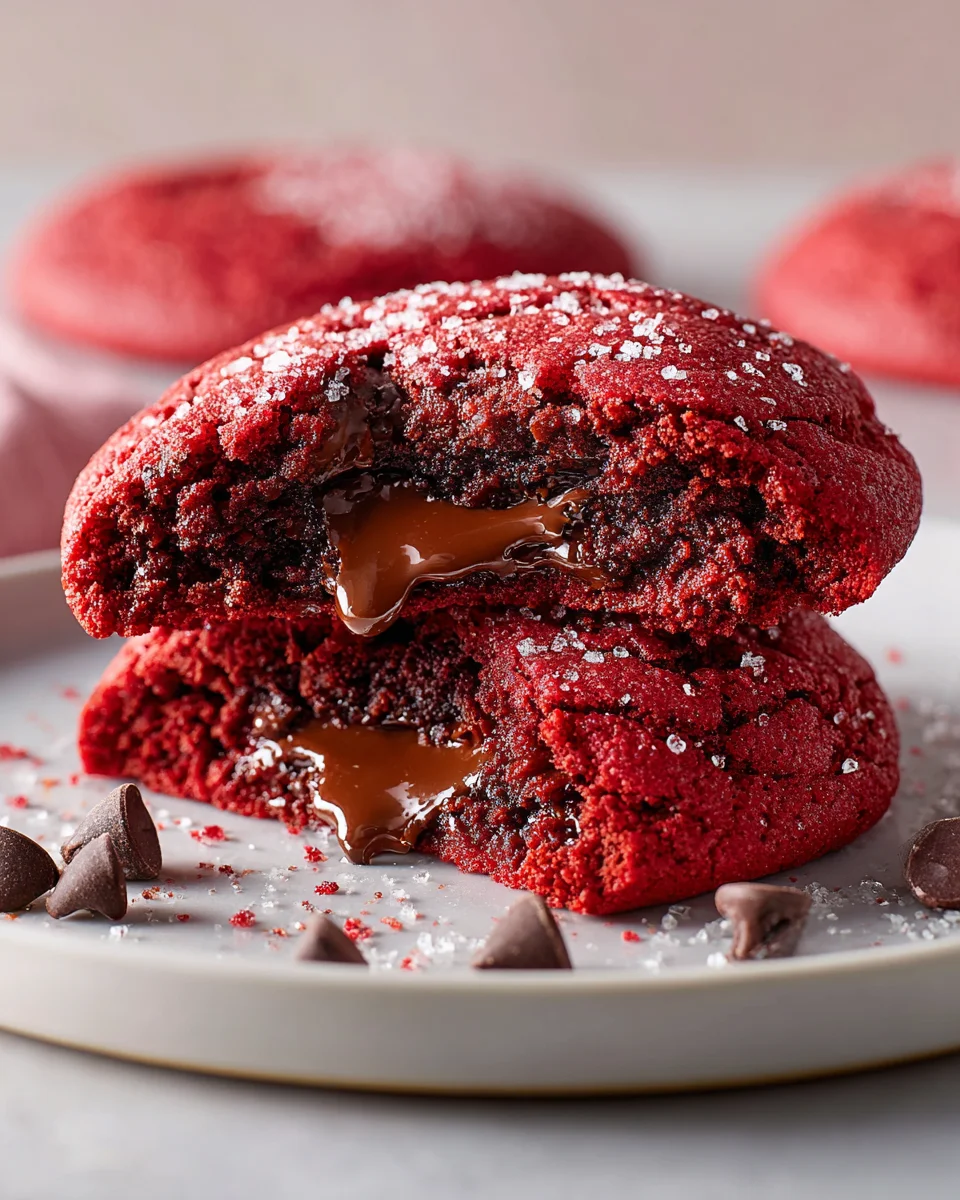
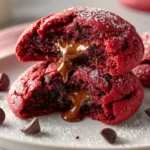
Red Velvet Nutella Stuffed Cookies
I’m so excited to share one of my absolute favorite cookie recipes with you today! We’re talking about Red Velvet Nutella Stuffed Cookies, a dessert that truly has it all. Imagine the classic, subtly cocoa-infused tang of a perfect red velvet cookie, made even more irresistible with its signature vibrant hue. But here’s where we take things from delicious to absolutely divine…
Every bite of these cookies promises a delightful surprise. Nestled within that soft, chewy red velvet exterior is a gooey, molten core of rich, creamy Nutella. It’s a flavor combination that will make your taste buds sing! These aren’t just any cookies; they’re an experience, a showstopper that’s perfect for celebrations, a special treat for yourself, or impressing absolutely anyone. I promise you, once you try the magical contrast of the tangy red velvet and the sweet, warm Nutella, you’ll understand why these Red Velvet Nutella Stuffed Cookies are destined to become your new go-to indulgence. Let’s get baking!

Ingredient Notes
Creating the perfect batch of Red Velvet Nutella Stuffed Cookies relies on a few key ingredients working in harmony to deliver that iconic flavor and texture. Here’s a breakdown of what you’ll need and some helpful notes on substitutions to ensure your cookies turn out amazing.
For the Red Velvet Cookie Dough:
- All-Purpose Flour: This is our base. Use a standard unbleached all-purpose flour for the best results. I haven’t experimented with gluten-free flours for this particular recipe, so I can’t guarantee the same outcome, but a 1:1 gluten-free baking blend might work.
- Unsweetened Cocoa Powder: For classic red velvet, natural unsweetened cocoa powder is key. It reacts with the baking soda and buttermilk to help create that signature tangy flavor and a subtle chocolate background. Avoid Dutch-processed cocoa powder here, as it won’t have the same acidic properties needed for the leavening.
- Baking Soda: Our main leavening agent, which works with the acidic ingredients (buttermilk, vinegar, natural cocoa) to give the cookies their lift and tender crumb.
- Salt: Don’t skip the salt! It balances the sweetness and enhances all the other flavors.
- Unsalted Butter: Make sure your butter is at room temperature. This is crucial for creaming it properly with the sugars, creating an airy base for the dough. If you only have salted butter, reduce the added salt in the recipe by about half. For a dairy-free option, a good quality vegan butter substitute should work well.
- Granulated Sugar & Brown Sugar: A combination gives us the best of both worlds – granulated sugar for crisp edges and chewiness, and brown sugar for moisture and a slight molasses note. Light brown sugar is what I typically use.
- Large Eggs: Room temperature eggs incorporate better into the dough. They add structure, richness, and moisture.
- Vanilla Extract: Pure vanilla extract is a must for any good cookie recipe, adding depth to the flavor profile.
- Red Food Coloring: This is how we get that vibrant red hue! Gel food coloring is highly recommended over liquid food coloring. Gel provides a much more intense color without adding excess liquid to your dough, which could alter the texture. Start with a good amount and add more if you desire a deeper red.
- Buttermilk: Buttermilk is essential for red velvet’s characteristic tang and tender texture. If you don’t have any on hand, you can easily make your own: add 1 tablespoon of white vinegar (or lemon juice) to a liquid measuring cup, then fill it to the 1-cup mark with regular milk. Let it sit for 5-10 minutes until it slightly curdles.
- White Vinegar: Another acidic ingredient that reacts with the baking soda and buttermilk, contributing to the red velvet flavor and texture.
For the Stuffed Center:
- Nutella: The star of the stuffing! You’ll need a good amount of this beloved chocolate-hazelnut spread. There’s no real substitute if you want to call them “Nutella Stuffed Cookies,” but if you’re open to other fillings, peanut butter, Biscoff spread, or even a soft caramel could be delicious alternatives. The key is to freeze your chosen filling solid before stuffing to prevent blowouts during baking.
I find that adhering to these specific ingredients and their intended roles truly makes these Red Velvet Nutella Stuffed Cookies stand out. Don’t worry about any ingredients like pork or alcohol – they aren’t part of my cookie making adventures!
Step-by-Step Instructions
Let’s get baking! Here’s how I make my Red Velvet Nutella Stuffed Cookies, ensuring each one is perfectly red, chewy, and bursting with a gooey Nutella center.
-
Prepare the Nutella Filling:
This is a critical first step! Scoop out 1-tablespoon portions of Nutella onto a parchment-lined baking sheet. You’ll want about 18-20 scoops for a batch of cookies. Transfer the baking sheet to the freezer and freeze until the Nutella portions are solid, at least 2-3 hours, or even overnight. This step is absolutely essential to prevent the Nutella from melting out of your cookies during baking.
-
Whisk Dry Ingredients:
In a medium bowl, whisk together the all-purpose flour, unsweetened cocoa powder, baking soda, and salt. Make sure there are no lumps of cocoa powder. Set this bowl aside.
-
Cream Wet Ingredients:
In a large bowl, using an electric mixer (handheld or stand mixer with a paddle attachment), cream together the softened unsalted butter, granulated sugar, and brown sugar on medium speed until the mixture is light and fluffy, about 2-3 minutes. Scrape down the sides of the bowl as needed.
-
Add Eggs and Flavoring:
Beat in the eggs one at a time, mixing well after each addition until just combined. Stir in the vanilla extract and the red gel food coloring. Start with a generous amount of food coloring and mix until the desired vibrant red color is achieved. The dough will look very red at this stage!
-
Combine Wet and Dry Mixtures:
In a small bowl or measuring cup, whisk together the buttermilk and white vinegar. Gradually add the dry ingredients mixture to the wet ingredients in three additions, alternating with the buttermilk mixture in two additions (beginning and ending with dry ingredients). Mix on low speed until just combined. Be careful not to overmix; overmixing can lead to tough cookies.
-
Chill the Dough:
Cover the bowl with plastic wrap and chill the cookie dough in the refrigerator for at least 30 minutes. This helps the dough firm up, preventing spreading during baking and enhancing the flavors.
-
Preheat Oven and Prepare Baking Sheets:
Once the dough has chilled, preheat your oven to 350°F (175°C). Line two baking sheets with parchment paper or silicone baking mats.
-
Stuff and Shape the Cookies:
Take out your chilled cookie dough and the frozen Nutella balls. Scoop about 2 tablespoons of cookie dough and flatten it into a disk in the palm of your hand. Place one frozen Nutella ball in the center of the flattened dough. Carefully wrap the cookie dough around the Nutella, sealing it completely so no Nutella is exposed. Roll it gently into a smooth ball. Repeat with the remaining dough and Nutella.
-
Bake the Cookies:
Place the stuffed cookie dough balls on the prepared baking sheets, leaving about 2 inches between each cookie. Bake for 10-12 minutes, or until the edges are set and lightly golden, but the centers still look slightly soft. They will continue to cook a bit as they cool.
-
Cool:
Let the Red Velvet Nutella Stuffed Cookies cool on the baking sheets for about 5 minutes before transferring them to a wire rack to cool completely. This allows them to firm up without breaking apart. Resist the urge to cut into them immediately to let the Nutella set slightly, but a warm, gooey center is certainly a treat!
Tips & Suggestions
I’ve baked many batches of these Red Velvet Nutella Stuffed Cookies, and along the way, I’ve picked up a few tricks that I always apply. Here are my top tips and suggestions to ensure your cookies are nothing short of spectacular:
- Don’t Skimp on Freezing the Nutella: This is arguably the most crucial tip for stuffed cookies. If your Nutella isn’t completely frozen solid, it will melt too quickly in the oven and potentially burst out of your cookies, creating a mess. Plan ahead and ensure it has ample time in the freezer.
- Gel Food Coloring is Your Best Friend: For that truly vibrant red velvet color, a good quality gel food coloring is essential. Liquid food coloring can thin out your dough, requiring more flour, which can lead to a tougher cookie. Gel gives you maximum color impact with minimal liquid.
- Chill Your Dough: While chilling for 30 minutes is the minimum, if you have an hour or even two, your cookies will thank you. Chilled dough spreads less, results in a thicker, chewier cookie, and allows the flavors to meld together, deepening that classic red velvet taste.
- Seal the Nutella Completely: When you’re wrapping the dough around the frozen Nutella, take a moment to really pinch and seal all the seams. Any small gap can become an escape route for the molten Nutella during baking. You want that surprise gooey center!
- Avoid Overmixing the Dough: As with most cookie recipes, overmixing after adding the flour can develop the gluten too much, leading to tough, dense cookies. Mix until just combined – a few streaks of flour are fine; they’ll disappear during baking.
- Don’t Overbake: Red Velvet Nutella Stuffed Cookies are best when they’re slightly underbaked in the center. The edges should be set, but the center should still look a little soft. They will continue to firm up as they cool on the baking sheet. Overbaking will dry them out and make them less chewy.
- Warm Them Up for Ultimate Gooeyness: While delicious at room temperature, for that ultimate gooey Nutella experience, pop a cooled cookie into the microwave for 10-15 seconds. Pure bliss!
- Classic Cream Cheese Drizzle: For an extra touch of red velvet authenticity, consider whipping up a simple cream cheese glaze. A mix of softened cream cheese, powdered sugar, and a splash of milk or vanilla makes a wonderful drizzle once the cookies have cooled.
- A Sprinkle of Sea Salt: A tiny sprinkle of flaky sea salt on top of the cookies right after they come out of the oven can elevate the flavors, providing a lovely contrast to the sweetness of the red velvet and Nutella.
Storage
These Red Velvet Nutella Stuffed Cookies are best enjoyed fresh, but sometimes you just can’t eat them all (or you want to extend the deliciousness!). Here’s how I store them to keep them tasting great:
- At Room Temperature: Once completely cooled, store your baked Red Velvet Nutella Stuffed Cookies in an airtight container at room temperature for up to 3-4 days. While they’ll still be tasty, the Nutella center will be firm rather than gooey. A quick 10-15 second zap in the microwave will bring back some of that molten goodness!
- In the Refrigerator: If you want to extend their freshness slightly, you can store them in an airtight container in the refrigerator for up to a week. Again, they’ll be firmer, and a quick reheat is recommended for the best experience.
- Freezing Baked Cookies: These cookies freeze remarkably well! Once completely cooled, place the cookies in a single layer on a baking sheet and freeze until solid (about 1-2 hours). Then, transfer the frozen cookies to a freezer-safe airtight container or heavy-duty freezer bag. They can be stored for up to 2-3 months. To enjoy, simply thaw them at room temperature or gently warm them in the microwave or a low oven until heated through.
- Freezing Unbaked Cookie Dough (with Nutella): This is my favorite trick for having fresh Red Velvet Nutella Stuffed Cookies on demand! Prepare the dough and stuff the Nutella as per the instructions. Then, place the unbaked, stuffed cookie dough balls on a parchment-lined baking sheet and freeze until solid. Once frozen, transfer them to a freezer-safe airtight container or freezer bag. They can be stored for up to 3 months. When you’re ready to bake, you can bake them directly from frozen, adding an extra 2-4 minutes to the baking time (so about 12-16 minutes total) until the edges are set. This is perfect for a spontaneous cookie craving!
No matter how you store them, I promise these Red Velvet Nutella Stuffed Cookies are a treat worth savoring!
Final Thoughts
So there you have it! My recipe for Red Velvet Nutella Stuffed Cookies. I truly believe these are not just any cookies; they’re an experience. The vibrant red velvet hue, that soft, chewy texture, and then – the absolute best part – the molten, hazelnut chocolate surprise waiting inside. Every bite is a delightful journey of rich cocoa, subtle vanilla, and the irresistible warmth of melted Nutella. These aren’t just for dessert; they’re a statement, a delicious act of self-care, or the perfect way to impress friends and family.
Seriously, you have to try making these Red Velvet Nutella Stuffed Cookies. I promise, they’re worth every moment in the kitchen, and you’ll be so glad you did!
Best Red Velvet Nutella Stuffed Cookies – Ultimate Recipe!
- Total Time: 42 minutes
- Yield: 18-20 cookies 1x
Description
Indulge in the delightful contrast of tangy red velvet cookies and a gooey Nutella center. These cookies are perfect for celebrations or a special treat for yourself.
Ingredients
- 2 1/2 cups All-Purpose Flour
- 1/4 cup Unsweetened Cocoa Powder
- 1 teaspoon Baking Soda
- 1/2 teaspoon Salt
- 1 cup Unsalted Butter, at room temperature
- 1/2 cup Granulated Sugar
- 1 cup Brown Sugar, light
- 2 Large Eggs, room temperature
- 2 teaspoons Vanilla Extract
- 1 tablespoon Red Food Coloring, gel
- 1/2 cup Buttermilk
- 1 teaspoon White Vinegar
- Nutella, for stuffing (about 1 tablespoon per cookie)
Instructions
- Prepare the Nutella Filling: Scoop out 1-tablespoon portions of Nutella onto a parchment-lined baking sheet. Freeze until solid, at least 2-3 hours or overnight.
- Whisk Dry Ingredients: In a medium bowl, whisk together the all-purpose flour, unsweetened cocoa powder, baking soda, and salt. Set aside.
- Cream Wet Ingredients: In a large bowl, cream together the softened unsalted butter, granulated sugar, and brown sugar on medium speed until light and fluffy, about 2-3 minutes.
- Add Eggs and Flavoring: Beat in the eggs one at a time, mixing well after each addition. Stir in the vanilla extract and red gel food coloring until desired color is achieved.
- Combine Wet and Dry Mixtures: In a small bowl, whisk together the buttermilk and white vinegar. Gradually add the dry ingredients to the wet ingredients in three additions, alternating with the buttermilk mixture.
- Chill the Dough: Cover the bowl with plastic wrap and chill the cookie dough in the refrigerator for at least 30 minutes.
- Preheat Oven and Prepare Baking Sheets: Preheat your oven to 350°F (175°C) and line two baking sheets with parchment paper.
- Stuff and Shape the Cookies: Scoop about 2 tablespoons of cookie dough, flatten it, place one frozen Nutella ball in the center, wrap the dough around it, and roll into a ball.
- Bake the Cookies: Place the stuffed cookie dough balls on the prepared baking sheets, leaving about 2 inches between each cookie. Bake for 10-12 minutes.
- Cool: Let the cookies cool on the baking sheets for about 5 minutes before transferring them to a wire rack to cool completely.
- Prep Time: 30 mins
- Cook Time: 12 mins
- Category: Dessert
- Method: Baking
- Cuisine: American
Nutrition
- Serving Size: 1 cookie
- Calories: 200
- Sugar: 15 g
- Sodium: 150 mg
- Fat: 10 g
- Saturated Fat: 5 g
- Unsaturated Fat: 3 g
- Trans Fat: 0 g
- Carbohydrates: 25 g
- Fiber: 1 g
- Protein: 2 g
- Cholesterol: 30 mg
Keywords: Ensure the Nutella is completely frozen before stuffing to prevent it from melting out during baking. Use gel food coloring for a vibrant red hue, and chill the dough for better texture.
Leave a Comment