
Banana Pudding Cheesecake
Oh my goodness, where do I even begin with this magical creation? Imagine taking two of the most comforting, soul-satisfying desserts – the rich, tangy creaminess of a cheesecake and the nostalgic, sweet layers of a classic banana pudding – and uniting them into one glorious treat. That’s exactly what we’re doing with this Banana Pudding Cheesecake, and trust me, you are going to fall head over heels for it.
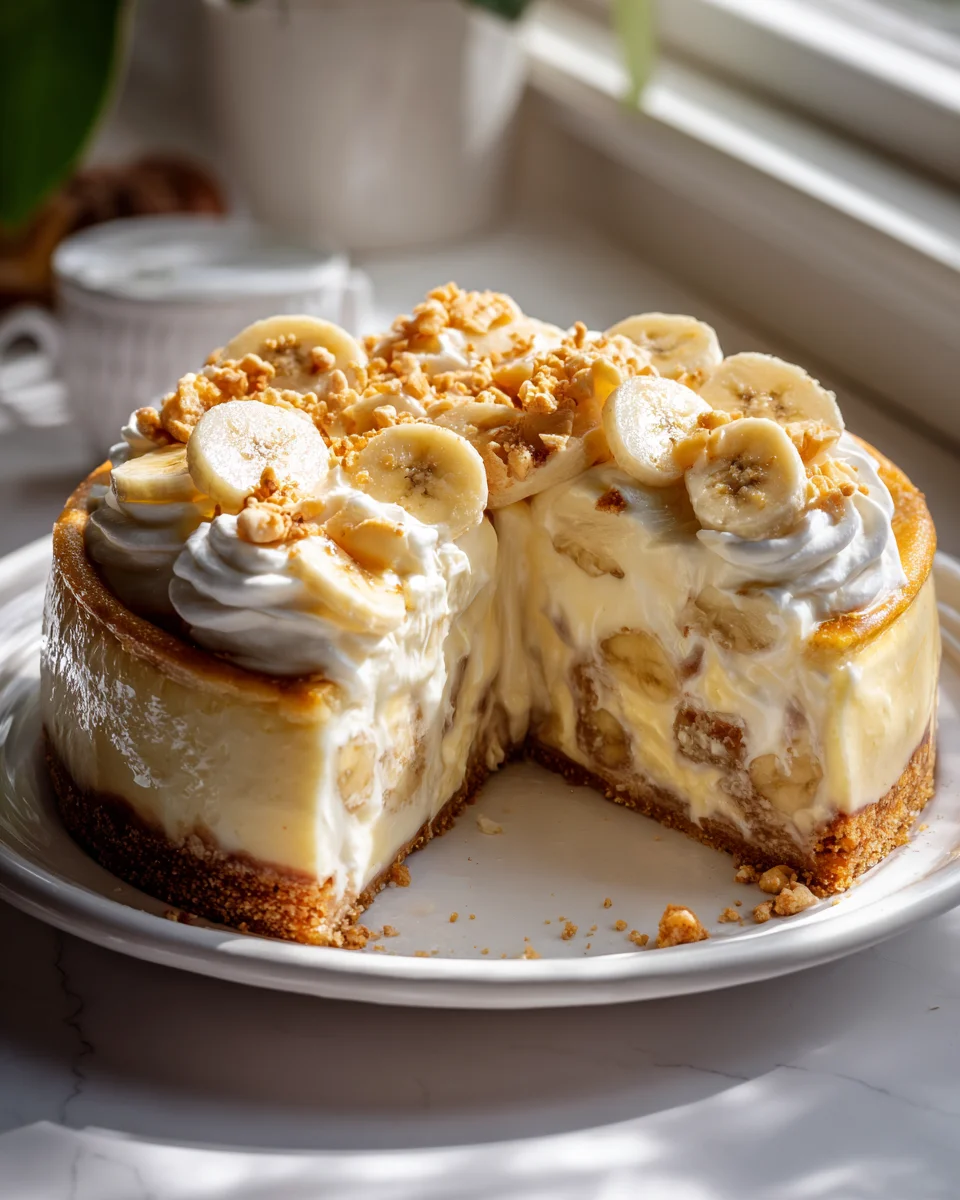
What makes this recipe so special, you ask? It’s the ultimate dessert mashup! We’re talking about a velvety smooth cheesecake base, bursting with the natural sweetness of ripe bananas, all resting on a buttery vanilla wafer crust. Then, to truly capture that banana pudding essence, we layer it with fresh banana slices, billowy whipped cream, and a generous sprinkle of crunchy vanilla wafer crumbs.
You’ll love it because it’s a showstopper that tastes incredibly indulgent yet feels wonderfully familiar. Every bite delivers that perfect harmony of creamy, crunchy, sweet, and tangy. It’s perfect for impressing guests, delighting your family, or simply treating yourself to something truly extraordinary. Get ready for a dessert that’s guaranteed to become a new favorite!

Ingredient Notes
Creating the perfect Banana Pudding Cheesecake starts with selecting the right ingredients. Each component plays a vital role in achieving that incredible layered flavor and texture we’re aiming for. Here’s a rundown of what you’ll need and some helpful tips for substitutions.
For the Nilla Wafer Crust:
- Nilla Wafers: These classic vanilla wafers are non-negotiable for an authentic banana pudding flavor profile. I crush them finely to create a perfect base.
- Unsalted Butter: Melted butter binds the crust together beautifully. If you only have salted butter, just omit any additional salt in the recipe.
For the Creamy Cheesecake Layer:
- Cream Cheese: Full-fat cream cheese, softened to room temperature, is crucial for a smooth, lump-free cheesecake batter. Please don’t use reduced-fat varieties; they can impact the texture and richness.
- Granulated Sugar: Sweetens the cheesecake layer.
- Large Eggs: Also at room temperature, eggs provide structure and richness. Add them one at a time and mix just until combined to avoid overmixing, which can lead to cracks.
- Sour Cream: Full-fat sour cream adds a beautiful tang and helps create that signature creamy, smooth cheesecake texture. You could substitute with full-fat plain Greek yogurt for a similar effect, but sour cream is my preference here.
- Pure Vanilla Extract: Enhances all the flavors. Don’t skimp on quality here!
For the Banana Pudding Layer:
- Ripe but Firm Bananas: This is key! You want bananas that are yellow with a few brown speckles, indicating sweetness, but still firm enough to slice neatly. Overly ripe bananas will be too mushy, and green bananas won’t offer enough flavor.
- Instant Vanilla Pudding Mix: A box of instant vanilla pudding mix is what makes this layer so quick and easy. You could try banana-flavored pudding mix if you want an even stronger banana punch, but vanilla lets the fresh banana shine.
- Whole Milk: For preparing the pudding. Whole milk yields the creamiest pudding; lower-fat milks might result in a thinner consistency.
For the Topping and Garnish:
- Whipped Topping: Such as Cool Whip, or you can certainly make your own homemade whipped cream for an even richer finish. If making your own, whip heavy cream with a bit of powdered sugar and vanilla until stiff peaks form.
- Extra Nilla Wafers & Banana Slices: For decoration and an extra textural element when serving.
Step-by-Step Instructions
Alright, let’s get baking! Here’s how I put together this incredible Banana Pudding Cheesecake, layer by delicious layer. Follow these steps, and you’ll be enjoying a masterpiece in no time.
- Prepare Your Pan and Oven: First things first, preheat your oven to 325°F (160°C). Grab a 9-inch springform pan and lightly grease the bottom and sides. To prepare for the water bath (which I highly recommend for a crack-free cheesecake!), tightly wrap the outside of the springform pan with a double layer of heavy-duty aluminum foil. This prevents water from seeping in.
- Make the Nilla Wafer Crust: In a food processor, pulse about 2 cups of Nilla Wafers until they form fine crumbs. Alternatively, you can place them in a Ziploc bag and crush them with a rolling pin. Transfer the crumbs to a medium bowl and stir in 1/4 cup of melted unsalted butter until fully combined. Press this mixture evenly into the bottom of your prepared springform pan. Bake the crust for 8-10 minutes, just until lightly golden and fragrant. Remove from the oven and let it cool slightly while you prepare the filling.
- Prepare the Cheesecake Filling: In a large bowl using an electric mixer, beat 24 ounces (three 8-ounce packages) of softened cream cheese on medium speed until smooth and creamy, about 2-3 minutes. Gradually add 1 and 1/4 cups of granulated sugar and continue beating until fully incorporated and light. Scrape down the sides of the bowl as needed.
- Add Eggs and Sour Cream: Reduce the mixer speed to low. Add 1/2 cup of sour cream and 1 teaspoon of pure vanilla extract, mixing until just combined. Then, add 3 large eggs, one at a time, mixing on low speed just until each egg is incorporated. Be careful not to overmix after adding the eggs, as this can introduce too much air and cause cracks during baking.
- Bake the Cheesecake: Pour the cheesecake batter over the cooled Nilla Wafer crust in the springform pan. Place the foil-wrapped springform pan into a larger roasting pan. Carefully pour hot water into the roasting pan, coming about halfway up the sides of the springform pan. Transfer the whole setup to your preheated oven. Bake for 60-75 minutes, or until the edges are set and the center still has a slight jiggle when gently shaken.
- Cool and Chill the Cheesecake: Once baked, turn off the oven and prop the oven door open slightly with a wooden spoon. Let the cheesecake cool in the oven for about an hour. This gradual cooling helps prevent cracking. Carefully remove the roasting pan from the oven, then lift the springform pan out of the water bath. Remove the foil and let the cheesecake cool completely on a wire rack at room temperature for another hour or two. Once at room temperature, cover loosely and refrigerate for at least 6-8 hours, or preferably overnight, to allow it to set completely.
- Prepare the Banana Pudding Layer: Once the cheesecake is thoroughly chilled, it’s time for the banana pudding layer! In a medium bowl, whisk together one 3.4-ounce box of instant vanilla pudding mix with 2 cups of cold whole milk for about 2 minutes, or until thickened. Let it sit for 5 minutes to set even more.
- Assemble the Layers: Carefully run a thin knife around the edge of the chilled cheesecake before releasing the springform pan sides. Arrange about 2-3 sliced ripe but firm bananas in an even layer over the top of the cheesecake. Gently spread the prepared vanilla pudding over the banana slices.
- Top and Chill Again: Finally, spread the whipped topping evenly over the pudding layer. For the best results and flavor development, refrigerate the entire Banana Pudding Cheesecake for at least another 2-4 hours before serving. This allows the pudding to fully set and the flavors to meld beautifully.
- Garnish and Serve: Before serving, garnish with additional Nilla Wafers and freshly sliced bananas. Enjoy!
Tips & Suggestions
I’ve made my fair share of cheesecakes, and specifically this Banana Pudding Cheesecake, so I’ve picked up a few tricks along the way to ensure yours turns out perfectly. These tips will help you achieve that luscious texture and incredible flavor every time.
- Room Temperature Ingredients are Key: For the smoothest cheesecake batter, make sure your cream cheese, eggs, and sour cream are all at room temperature. This helps them combine uniformly without lumps and ensures a consistent texture. Take them out of the fridge at least an hour before you plan to start baking.
- Don’t Overmix the Cheesecake Batter: This is a common pitfall! Overmixing, especially after adding the eggs, incorporates too much air into the batter. This air expands during baking and then collapses as the cheesecake cools, often leading to cracks. Mix on low speed and only until just combined.
- The Water Bath is Your Friend: I can’t stress this enough – using a water bath (bain-marie) for baking cheesecake creates a moist, steamy environment in the oven. This promotes even baking, prevents the top from browning too quickly, and significantly reduces the risk of cracks. It’s worth the extra step!
- Choose the Right Bananas: For the banana pudding layer and garnish, select bananas that are ripe (yellow with a few speckles) but still firm. Overly ripe bananas will be too mushy and release too much liquid, while underripe bananas lack sweetness and flavor.
- Preventing Banana Browning: Bananas brown quickly once sliced. To keep them looking fresh on your cheesecake, I recommend slicing them just before assembly. You can also toss them very gently in a tiny bit of lemon juice or a non-alcohol fruit juice alternative like pineapple juice before layering, but be sparing so it doesn’t affect the pudding’s flavor too much.
- Chill, Chill, Chill: Patience is truly a virtue with cheesecake. The long chilling times (after baking and again after assembling the pudding layer) are crucial for the cheesecake to set properly, for the pudding to firm up, and for all the incredible flavors to fully meld. Rushing this step will result in a messy, less satisfying slice.
- Garnish Just Before Serving: While the Nilla Wafers on the pudding layer can soften a bit (which some people love!), if you want crisp wafers and fresh-looking banana slices for presentation, add your final garnishes right before you plan to serve.
Storage
Proper storage is essential to keep your Banana Pudding Cheesecake tasting fresh and delicious. Because it contains dairy, fresh fruit, and pudding, it needs to be handled with care.
- Refrigeration is Key: Always store your Banana Pudding Cheesecake in the refrigerator. It cannot be left at room temperature for more than a couple of hours due to the cream cheese, milk, and fresh bananas.
- Airtight is Best: To prevent the cheesecake from absorbing other odors from your fridge and to keep the fresh bananas from browning too quickly, cover it tightly. You can use plastic wrap directly over the top and around the sides, or store it in an airtight cake carrier.
- How Long It Lasts: When properly stored in the refrigerator, your Banana Pudding Cheesecake will generally stay fresh for 3-4 days. After this, the bananas tend to brown and become mushier, and the texture of the pudding may degrade slightly.
- Freezing (Not Recommended for Bananas): While cheesecake itself often freezes well, I do not recommend freezing the entire Banana Pudding Cheesecake. The fresh bananas will turn very mushy and discolored upon thawing, significantly impacting the texture and appeal of the pudding layer. If you wanted to freeze the cheesecake base before adding the banana pudding layer, that’s possible for up to 1 month, wrapped tightly. Then, thaw and add the fresh pudding and bananas. But for the assembled masterpiece, enjoy it fresh!
Final Thoughts
There’s something truly magical about bringing together two universally loved desserts into one spectacular creation. That’s exactly what happens with our Banana Pudding Cheesecake, and I sincerely hope you give it a try. This isn’t just any dessert; it’s a symphony of creamy cheesecake, the nostalgic comfort of banana pudding, and the delightful crunch of a wafer crust, all in one glorious slice. It’s a dish that promises to impress your loved ones and satisfy even the most discerning sweet tooth.
From the moment you take your first bite, you’ll understand why this Banana Pudding Cheesecake is destined to become a new favorite. It’s rich yet refreshing, familiar yet exciting, and utterly irresistible. So go ahead, treat yourself and those you cherish to this incredible dessert. I promise, the smiles and satisfied sighs will make every moment spent crafting this masterpiece absolutely worth it!
Decadent Banana Pudding Cheesecake: Your New Favorite Dessert
- Total Time: 1 hour 45 minutes
- Yield: 12 servings 1x
Description
This Banana Pudding Cheesecake combines the rich creaminess of cheesecake with the nostalgic layers of banana pudding. It’s a showstopper dessert that will impress your guests and delight your taste buds.
Ingredients
- 2 cups Nilla Wafers
- 1/4 cup Unsalted Butter, melted
- 24 ounces Cream Cheese, softened to room temperature
- 1 and 1/4 cups Granulated Sugar
- 3 Large Eggs, at room temperature
- 1/2 cup Sour Cream
- 1 teaspoon Pure Vanilla Extract
- Ripe but Firm Bananas, sliced
- 1 box (3.4 ounces) Instant Vanilla Pudding Mix
- 2 cups Whole Milk
- Whipped Topping (such as Cool Whip)
- Extra Nilla Wafers & Banana Slices for garnish
Instructions
- Preheat your oven to 325°F (160°C). Lightly grease a 9-inch springform pan and wrap the outside with a double layer of heavy-duty aluminum foil.
- In a food processor, pulse about 2 cups of Nilla Wafers until they form fine crumbs. Stir in 1/4 cup of melted unsalted butter until fully combined. Press this mixture into the bottom of the prepared springform pan and bake for 8-10 minutes until lightly golden. Let it cool slightly.
- In a large bowl, beat 24 ounces of softened cream cheese on medium speed until smooth. Gradually add 1 and 1/4 cups of granulated sugar and continue beating until light and fully incorporated.
- Reduce the mixer speed to low. Add 1/2 cup of sour cream and 1 teaspoon of pure vanilla extract, mixing until just combined. Then, add 3 large eggs one at a time, mixing on low speed just until incorporated.
- Pour the cheesecake batter over the cooled Nilla Wafer crust. Place the foil-wrapped springform pan into a larger roasting pan and pour hot water into the roasting pan halfway up the sides of the springform pan. Bake for 60-75 minutes until the edges are set and the center has a slight jiggle.
- Turn off the oven and prop the door open slightly. Let the cheesecake cool in the oven for about an hour, then remove the roasting pan and let the cheesecake cool completely on a wire rack at room temperature for another hour or two. Cover loosely and refrigerate for at least 6-8 hours, preferably overnight.
- In a medium bowl, whisk together one box of instant vanilla pudding mix with 2 cups of cold whole milk for about 2 minutes until thickened. Let it sit for 5 minutes.
- Run a thin knife around the edge of the chilled cheesecake before releasing the springform pan sides. Arrange 2-3 sliced ripe bananas over the cheesecake and gently spread the prepared vanilla pudding over the banana slices.
- Spread the whipped topping evenly over the pudding layer. Refrigerate the entire cheesecake for at least 2-4 hours before serving.
- Garnish with additional Nilla Wafers and freshly sliced bananas before serving.
- Prep Time: 30 mins
- Cook Time: 75 mins
- Category: Dessert
- Method: Baking
- Cuisine: American
Nutrition
- Serving Size: 1 slice
- Calories: 350
- Sugar: 25 g
- Sodium: 250 mg
- Fat: 20 g
- Saturated Fat: 10 g
- Unsaturated Fat: 8 g
- Trans Fat: 0 g
- Carbohydrates: 35 g
- Fiber: 1 g
- Protein: 5 g
- Cholesterol: 80 mg
Keywords: Ensure all ingredients are at room temperature for the smoothest batter. Avoid overmixing after adding eggs to prevent cracks. Use a water bath for even baking.
Leave a Comment