
Ice Cream Sundae Helmet Cups
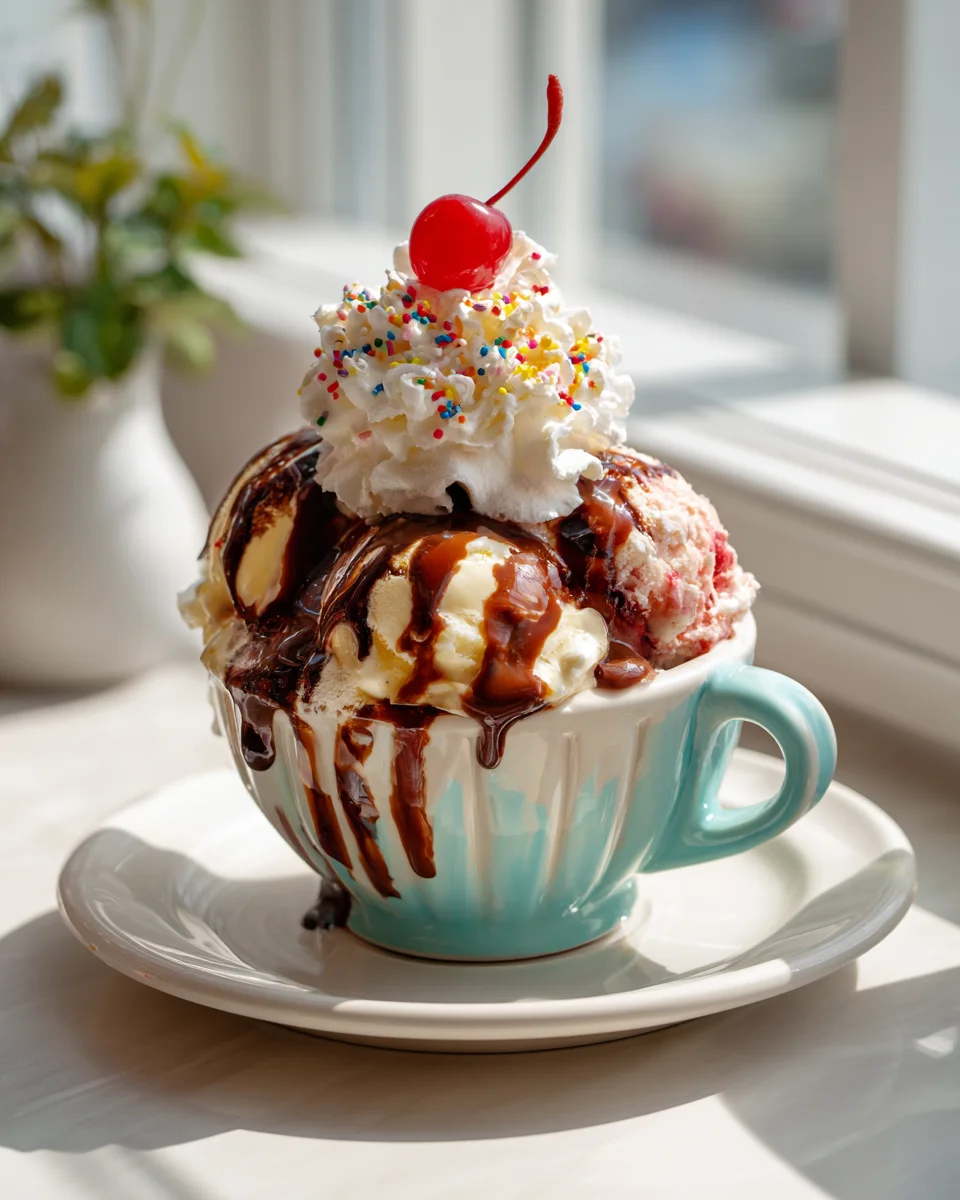
Get ready to tackle your sweet tooth with these incredible Ice Cream Sundae Helmet Cups! I absolutely love this recipe because it takes the classic, beloved ice cream sundae and turns it into an unforgettable, personalized experience. What makes these so special, you ask? Well, it’s all in the presentation! Each sundae is served in its very own fun, themed ‘helmet cup’ – perfect for game day, birthday parties, or just bringing a little extra cheer to your dessert table. Readers like you are going to adore them because they’re not only super easy to assemble but also completely customizable. Everyone gets to be the MVP of their own dessert, piling on their favorite ice cream flavors and a mountain of delicious toppings. Imagine creamy scoops of vanilla, chocolate, or strawberry ice cream, layered with rich fudge, crunchy sprinkles, whipped cream, and a cherry on top, all contained in an adorable, individual ‘helmet’ that’s ready to be devoured. It’s a dessert that’s as much fun to make as it is to eat, ensuring smiles all around!

Ingredient Notes
Oh, you’re in for a real treat with these Ice Cream Sundae Helmet Cups! The fun truly starts with the unique serving vessel, those adorable mini helmet cups that give this dessert its signature charm. When I’m putting these together, I think about both flavor and presentation to make sure every scoop is a touchdown!
Ice Cream: The Star Player
- Your Favorite Ice Cream: This is where you can really personalize things! I love using classic vanilla bean or rich chocolate as a base, but don’t be afraid to experiment. For a themed event, consider flavors that match team colors – perhaps a vibrant strawberry for red, a refreshing mint chip for green, or even a blue moon ice cream if you’re rooting for a blue team. A good quality, creamy ice cream will make all the difference.
- Dairy-Free Option: If you have guests with dietary restrictions, a good quality dairy-free ice cream works wonderfully here. There are so many fantastic almond, oat, or coconut milk-based options that are just as decadent.
Toppings: The Winning Team
This is where the magic happens and you can really get creative with your “helmet” theme!
- Hot Fudge and Caramel Sauce: These are non-negotiable in my book! Warm them slightly before serving for that ultimate gooey goodness. You can also find sugar-free versions if needed.
- Whipped Cream: Freshly whipped cream truly elevates a sundae, but a good quality canned version works perfectly well too, especially when you’re making a bunch of these.
- Maraschino Cherries: The classic finishing touch! I always make sure to have plenty on hand.
- Sprinkles: Use a variety! Rainbow sprinkles are always a hit, but themed sprinkles (like green and white for a specific team, or gold and silver for a championship feel) really drive home the helmet cup theme.
- Crushed Cookies & Candy: Think about what would look fun or taste great. Crushed chocolate sandwich cookies, mini peanut butter cups, or even candy that can be shaped to look like small footballs or team logos. I sometimes crush chocolate wafers to resemble “dirt” on a field!
- Nuts: Chopped peanuts, pecans, or walnuts add a lovely crunch. Always offer them on the side for those with nut allergies.
- Mini Candy Bars or Gummies: Cut mini candy bars into smaller pieces or use sports-themed gummy candies to add an extra layer of fun to your helmet sundaes.
- Non-Alcoholic Syrups/Liqueurs: While traditional sundaes don’t typically include alcohol, if you wanted to add a sophisticated twist, you could consider non-alcoholic vanilla, hazelnut, or raspberry syrups. They add a lovely flavor dimension without the alcohol content.
The “Helmet Cups” Themselves
This is the most critical “ingredient” that makes this recipe unique!
- Mini Helmet Cups: You’ll need actual miniature sports helmet cups. These are typically plastic and can often be found online, at party supply stores, or even during sports seasons in various team colors. Make sure they are food-safe and clean. Chilling them beforehand can help keep your ice cream from melting too quickly.
Step-by-Step Instructions
Alright, let’s assemble these amazing Ice Cream Sundae Helmet Cups! It’s a super fun and simple process, perfect for getting everyone involved, especially kids. I find it’s helpful to have all your ingredients prepped and ready to go before you start scooping.
Step 1: Prepare Your Station
- Gather Your Gear: First things first, make sure your mini helmet cups are sparkling clean and dry. If you have the space, pop them into the freezer for about 10-15 minutes before you start. This will help keep your ice cream firmer for longer, especially when you’re building multiple sundaes.
- Prep Toppings: Warm your hot fudge and caramel sauces gently. You can do this in a microwave-safe bowl or in a small saucepan over low heat. Chop any nuts, crush cookies, and get all your sprinkles, cherries, and other goodies into small, easy-to-access bowls. This really streamlines the assembly line process.
- Scoop Ready: Have your ice cream scooper clean and ready, perhaps sitting in a small bowl of warm water for easier scooping.
Step 2: The Ice Cream Foundation
- Scoop into Helmets: Take your pre-chilled helmet cup. I usually start with one generous scoop of your chosen ice cream flavor right into the bottom of the helmet. If you’re feeling extra indulgent, or if your helmet cups are larger, you can add a second scoop. Don’t press it down too hard; you want that lovely, fluffy texture.
Step 3: Lay Down the Liquid Gold
- Drizzle with Sauces: Now, for the delectable sauces! Generously drizzle your warm hot fudge over the ice cream. Follow that up with a lovely swirl of warm caramel sauce. I like to let them cascade down the sides of the ice cream a little, creating those tempting rivulets. This is where the magic begins to happen!
Step 4: Pile on the Crunch and Color
- Add Your Solid Toppings: This is where you bring in the texture and theme! Sprinkle your crushed cookies, candy pieces, or nuts over the sauces and ice cream. If you’re using themed sprinkles, now’s the time to scatter them generously. I often arrange a few of the larger candy pieces or mini candy bar chunks to sit nicely on top for visual appeal.
Step 5: The Grand Finale
- Crown with Whipped Cream: Grab that can or bowl of whipped cream and create a beautiful, billowy peak right on top of your sundae. This is the “cherry on top” before the actual cherry!
- The Cherry on Top (Literally!): Finally, crown your masterpiece with a bright red maraschino cherry. If you want to get really creative, you could even add a tiny paper flag or a candy number to stick into the whipped cream to further enhance the sports helmet theme!
Serve immediately and watch the smiles light up! These are best enjoyed right after assembly.
Tips & Suggestions
Making Ice Cream Sundae Helmet Cups isn’t just about assembling dessert; it’s about creating an experience! Over the years, I’ve picked up a few tricks that really make these stand out, whether you’re serving them at a big game day party or just for a fun family treat.
Make it an Interactive Sundae Bar
- DIY Station: My absolute favorite way to serve these is to set up a “Build Your Own Helmet Sundae” bar! Lay out all the prepped ingredients – ice cream flavors in their tubs, sauces in small warmers or microwave-safe dishes, and all your dry toppings in cute bowls with small spoons. Provide a stack of clean helmet cups and let everyone unleash their creativity. It’s fantastic for parties because it keeps guests engaged and ensures everyone gets exactly what they want.
- Label Everything: If you have a large spread of toppings, consider small labels for each bowl. This is especially helpful for identifying nut-free options or unique candy choices.
Themed Customization is Key
- Team Spirit: If you’re hosting a game day, lean into the team colors! Use sprinkles, candies, and even ice cream flavors that match your favorite team. For example, if it’s a green and gold team, you could have mint chip ice cream, green sprinkles, and yellow M&M’s.
- Sport Specifics: Think beyond just football. If your helmet cups are for baseball, use red stitches of icing on white chocolate pieces. For soccer, crushed chocolate cookies can resemble dirt and white chocolate pieces could be the ball.
- Edible Decorations: Look for small edible footballs, baseballs, or even tiny plastic flags you can stick into the whipped cream. These really enhance the “helmet” visual.
Presentation Perfection
- Pre-Chill Your Cups: I mentioned it in the instructions, but it’s worth repeating: chilling your helmet cups in the freezer for 10-15 minutes before assembly is a game-changer. It significantly slows down the melting process, giving you more time to assemble and enjoy.
- Layering for Impact: Don’t just dump toppings! I like to add a layer of ice cream, a drizzle of sauce, then some solid toppings, another scoop of ice cream (if doing two), more sauce, and then the rest of the toppings. This ensures every bite has a mix of textures and flavors, not just a pile of toppings on top.
- Mini Spoons: Standard spoons can sometimes feel a bit large for mini helmet cups. Keep some fun, colorful mini plastic spoons on hand; they’re perfect for navigating those smaller spaces.
Don’t Forget the Details
- Napkins are Your Friend: Ice cream sundaes, especially in unique containers, can be messy fun. Have plenty of napkins or small paper towels readily available.
- Consider Underliners: For extra neatness, especially at a party, you could place each helmet cup on a small paper doily or a themed coaster. This catches any drips and adds another layer of presentation.
Storage
When it comes to Ice Cream Sundae Helmet Cups, I have to be upfront: these are truly a “make and eat immediately” kind of dessert. The very nature of ice cream and its toppings means they don’t hold up well over time once assembled. However, I can definitely give you some tips on how to prepare ahead so that assembly is a breeze, and how to store the individual components!
Assembled Sundaes: Not Recommended for Storage
- Melting Mayhem: Once you put ice cream into a helmet cup and start adding warm sauces and other toppings, the clock starts ticking. The ice cream will begin to melt, sauces can thin out and become watery, and crunchy toppings can become soggy. It’s just not the delightful experience you want!
- Soggy Situation: Whipped cream can deflate, and sprinkles or cookies will lose their crispness quickly when exposed to moisture from melting ice cream.
- Best Fresh: My strong recommendation is to assemble your Ice Cream Sundae Helmet Cups right before you plan to serve them. This ensures the best texture, temperature, and visual appeal.
Preparing Components Ahead of Time
This is where you can be a superstar planner! While you can’t store the finished product, you can certainly get all your ingredients prepped hours, or even days, in advance.
- Ice Cream: Keep your ice cream firmly frozen in its original container in the coldest part of your freezer until just before you’re ready to scoop.
- Sauces: Hot fudge, caramel, or any other liquid toppings can be made or purchased ahead of time.
- Homemade Sauces: If you’re making your own, prepare them and store them in airtight containers in the refrigerator for up to a week. Gently reheat them when you’re ready to serve.
- Store-Bought Sauces: Store these according to package directions. You’ll just need to warm them before drizzling.
- Dry Toppings: This is the easiest part to prepare in advance!
- Nuts: Chop nuts and store them in an airtight container at room temperature for several days.
- Crushed Cookies/Candy: Crush your cookies or candies and store them in airtight containers at room temperature. This can be done a day or two before.
- Sprinkles: Keep sprinkles in their original containers in a cool, dry place.
- Cherries: Store maraschino cherries in their jar in the refrigerator. Just drain them when it’s time to serve.
- Whipped Cream:
- Canned Whipped Cream: Store in the refrigerator until ready to use.
- Homemade Whipped Cream: If you’re making fresh whipped cream, it’s best to whip it right before serving for the best volume and texture. However, you can whip it up to an hour or two in advance and keep it chilled in the refrigerator, giving it a gentle whisk just before serving if it’s settled slightly.
By prepping everything beforehand, you can have a full “sundae bar” ready to go in minutes, minimizing fuss and maximizing fun when it’s time to enjoy these fantastic Ice Cream Sundae Helmet Cups!
Final Thoughts
And just like that, you’ve created something truly special! I can honestly say that making these Ice Cream Sundae Helmet Cups is an experience as delightful as eating them. This isn’t just another dessert; it’s a celebration in a cup, tailor-made for smiles and memories. I mean, who wouldn’t want their very own, perfectly portioned, customizable sundae, all presented in such a fun and unique way? The joy of choosing your toppings and digging into your personal, adorable helmet full of sweet delight is precisely what makes these Ice Cream Sundae Helmet Cups an absolute must-try. I promise, they’ll bring a huge cheer to any occasion!
Easy Ice Cream Sundae Helmet Cups: Fun Dessert Recipe
- Total Time: 15 minutes
- Yield: 4 servings
Description
Get ready to tackle your sweet tooth with these incredible Ice Cream Sundae Helmet Cups! These personalized sundaes are served in adorable mini helmet cups, making them perfect for any celebration.
Ingredients
- Your Favorite Ice Cream (vanilla bean, chocolate, strawberry, or dairy-free options)
- Hot Fudge Sauce
- Caramel Sauce
- Whipped Cream
- Maraschino Cherries
- Sprinkles (variety including themed sprinkles)
- Crushed Cookies (chocolate sandwich cookies, mini peanut butter cups)
- Nuts (chopped peanuts, pecans, walnuts)
- Mini Candy Bars or Gummies
- Non-Alcoholic Syrups (vanilla, hazelnut, raspberry)
- Mini Helmet Cups (food-safe and clean)
Instructions
- Prepare Your Station: Gather your mini helmet cups, ensuring they are clean and dry. Chill them in the freezer for 10-15 minutes.
- Prep Toppings: Warm hot fudge and caramel sauces. Chop nuts, crush cookies, and organize toppings in small bowls.
- Scoop into Helmets: Take a chilled helmet cup and add one or two generous scoops of your chosen ice cream flavor.
- Drizzle with Sauces: Generously drizzle warm hot fudge and caramel sauce over the ice cream.
- Add Your Solid Toppings: Sprinkle crushed cookies, candy pieces, or nuts over the sauces and ice cream, adding themed sprinkles if desired.
- Crown with Whipped Cream: Create a peak of whipped cream on top of the sundae.
- The Cherry on Top: Finish with a maraschino cherry on top, and optionally add a tiny paper flag or candy number for decoration.
- Serve immediately and enjoy!
- Prep Time: 15 mins
- Cook Time: 0 mins
- Category: Dessert
- Method: No cooking required
- Cuisine: American
Nutrition
- Serving Size: 1 helmet cup
- Calories: 350
- Sugar: 40 g
- Sodium: 150 mg
- Fat: 15 g
- Saturated Fat: 8 g
- Unsaturated Fat: 5 g
- Trans Fat: 0 g
- Carbohydrates: 50 g
- Fiber: 1 g
- Protein: 5 g
- Cholesterol: 30 mg
Keywords: For a fun experience, set up a 'Build Your Own Helmet Sundae' bar with all ingredients prepped. Consider using themed colors for toppings based on your favorite sports team.
Leave a Comment