
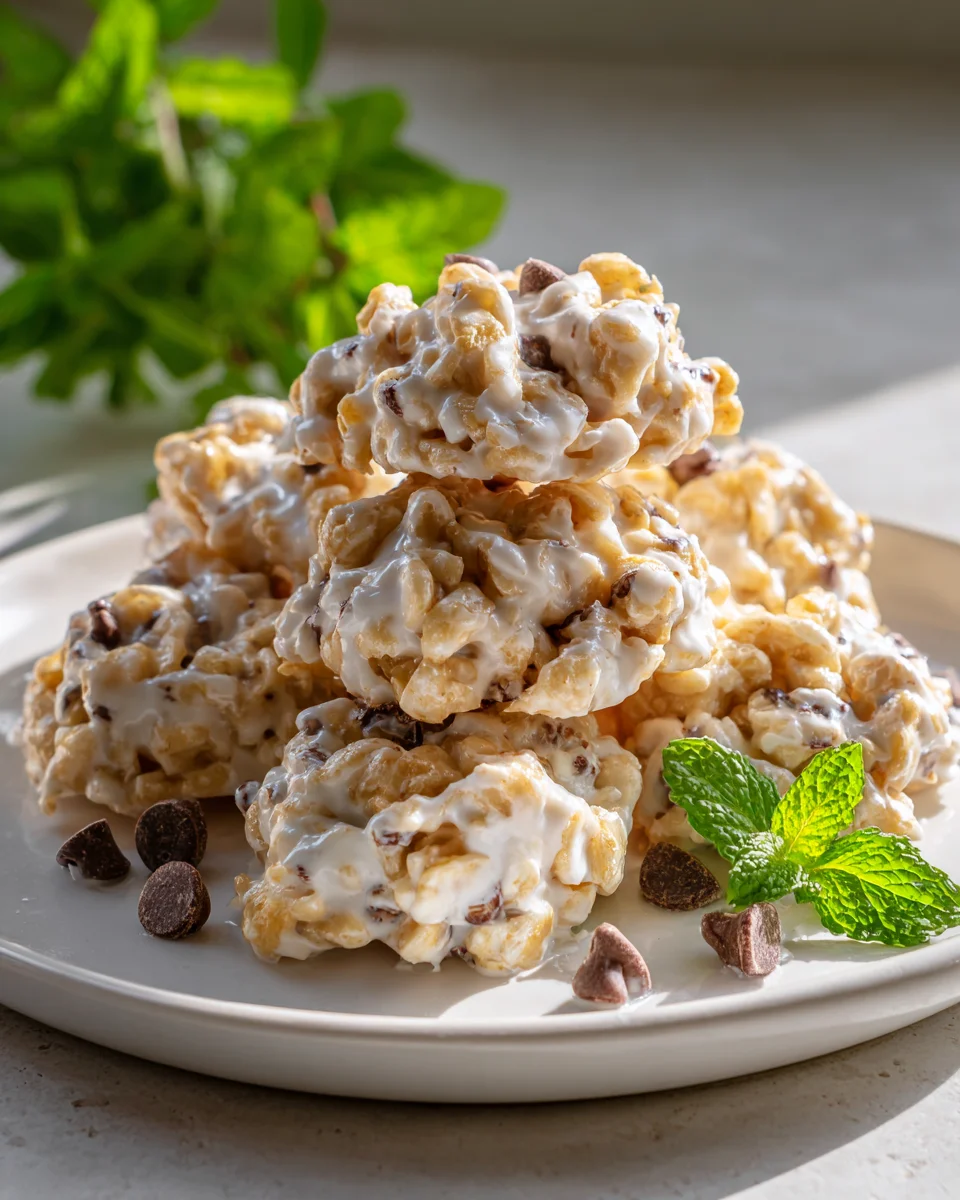
No Bake Avalanche Cookies With Peanut Butter & Marshmallows
Are you ready for a dessert that’s going to make your taste buds sing without ever needing to turn on the oven? Because I certainly am! Let me tell you, these No Bake Avalanche Cookies With Peanut Butter & Marshmallows are an absolute game-changer. They’re what I reach for when I want something incredibly satisfying, deliciously sweet, and ridiculously easy.
What makes them so special? Well, for starters, they’re ‘no bake’ – hello, summer dessert hero, or just a quick treat anytime you don’t want to heat up the kitchen! But beyond that, it’s the magical combination of rich, creamy peanut butter and soft, gooey mini marshmallows, all brought together in a delightful, chewy texture that just melts in your mouth. Imagine a perfectly sweet bite that comes together in minutes, chilled to perfection, and ready to enjoy.
Trust me when I say you’re going to fall head over heels for these. They’re perfect for impromptu gatherings, a fun activity with the kids, or simply when that late-night sweet craving hits. No fussy ingredients, no complicated steps, just pure, unadulterated cookie joy that’s packed with flavor. Get ready to whip up a batch of these unbelievably easy and utterly delicious avalanche cookies – your dessert dreams are about to come true!

Ingredient Notes
Making No Bake Avalanche Cookies With Peanut Butter & Marshmallows is a pure joy, and the beauty of it lies in the simplicity of the ingredients. There aren’t many, which means each one really shines and contributes to that irresistible flavor and texture. Let’s talk about what makes these cookies so delightfully “avalanche-like.”
Peanut Butter
-
Type: For that classic, creamy avalanche texture, I always recommend using a smooth, processed peanut butter (like Jif or Skippy). Natural peanut butters tend to be oilier and less consistent, which can sometimes make the mixture too soft or separated. If you do use natural, make sure to stir it extremely well to incorporate the oils before measuring.
-
Crunchy vs. Creamy: While I typically stick to creamy for the base, if you’re a fan of extra crunch and peanut bits, a crunchy peanut butter would work! It just adds another layer of texture to an already crunchy cookie.
Marshmallows
-
Mini Marshmallows: These are absolutely non-negotiable for an authentic avalanche cookie. Their small size means they disperse evenly throughout the mixture and provide those perfect chewy pockets. Trying to chop larger marshmallows is just asking for a sticky mess, and they don’t integrate as well. Save yourself the trouble and grab a bag of minis!
-
Freshness: Ensure your marshmallows are fresh and soft. Stale, hardened marshmallows won’t give you the same delightful chewiness.
Chocolate
-
Chocolate Chips: I usually reach for semi-sweet chocolate chips. They offer a lovely balance, providing that classic chocolatey goodness without being overly sweet when combined with the other ingredients. Milk chocolate chips can also be used if you prefer a sweeter, creamier profile, but I find semi-sweet prevents the cookies from becoming cloyingly sweet.
-
Chopping a Bar: If you don’t have chips, you can finely chop a bar of baking chocolate. Just ensure it’s a good quality chocolate that melts smoothly.
Crisped Rice Cereal
-
The Crunch Factor: This is where the “avalanche” part truly comes alive! Crisped rice cereal (like Rice Krispies) provides that essential light, airy crunch that contrasts beautifully with the soft marshmallows and creamy peanut butter chocolate base. Don’t skip or skimp on this!
-
Freshness: Make sure your cereal is fresh and not stale, otherwise, you’ll lose that satisfying crispness.
Butter
-
Unsalted is Best: I always use unsalted butter so I can control the salt content myself. If you only have salted butter, you can still use it, just be mindful that your cookies might be a touch saltier, which isn’t necessarily a bad thing with peanut butter!
Vanilla Extract
-
Pure Vanilla: A good quality pure vanilla extract really enhances all the other flavors, especially the chocolate and peanut butter. It brings a warmth and depth that you’d miss without it.
Powdered Sugar
-
For Texture and Sweetness: Powdered sugar (also known as confectioners’ sugar) not only adds sweetness but also helps to bind the mixture and create that smooth, almost fudge-like consistency in the base. Don’t substitute granulated sugar, as it won’t dissolve properly and will leave a gritty texture.
Step-by-Step Instructions
Making these No Bake Avalanche Cookies is wonderfully simple and quick, which is why I love them so much! Here’s how I bring them together:
-
Prepare Your Workspace: First things first, I get my baking sheets ready. I line two large baking sheets with parchment paper or silicone baking mats. This is super important because these cookies are sticky and you want them to come off easily after chilling.
-
Melt the Wet Ingredients: In a large, microwave-safe bowl (or a saucepan over low heat on the stovetop), I combine the butter, creamy peanut butter, and chocolate chips. If I’m using the microwave, I heat them in 30-second intervals, stirring well after each, until everything is smooth and melted. This usually takes about 1.5 to 2 minutes. On the stovetop, I stir constantly until just melted and combined. You don’t want to overheat it; just melt until smooth.
-
Sweeten and Flavor the Base: Once melted and smooth, I remove the bowl from the heat (or microwave). I then stir in the powdered sugar and vanilla extract until everything is fully incorporated and the mixture is glossy and well-combined. This forms the delicious, rich base for our cookies.
-
Add the Crunch: Next, I gently fold in the crisped rice cereal. I use a spatula to mix it in thoroughly, making sure every flake is coated with that wonderful peanut butter chocolate mixture. Be careful not to crush the cereal too much, as we want to maintain that crisp texture.
-
Fold in the Marshmallows: This is a crucial step! As soon as the cereal is mixed in, I add the mini marshmallows. I fold them in very gently and quickly. The goal is to coat them without melting them completely. If your mixture is too hot, the marshmallows will turn into a gooey mess, which isn’t what we want for those distinct marshmallow pockets. A few squishy ones are okay, but mostly we want them whole.
-
Form the Cookies: Now for the fun part! Using a 1.5 to 2-tablespoon cookie scoop or two spoons, I drop mounds of the mixture onto my prepared baking sheets. I like to lightly press down on them to flatten them slightly into cookie shapes, but you can also leave them as rustic mounds. Don’t worry if they look a little messy; that’s part of their charm!
-
Chill Time: This is the last and most important step for no-bake cookies! I transfer the baking sheets to the refrigerator and chill the cookies for at least 30-60 minutes, or until they are firm and set. If I’m in a hurry, I sometimes pop them in the freezer for about 15-20 minutes, but the fridge yields a slightly better texture.
-
Serve and Enjoy: Once firm, I remove them from the parchment paper and they’re ready to enjoy! They’re best served slightly chilled, but they also taste great at room temperature once set.
Tips & Suggestions
Over the years, making these No Bake Avalanche Cookies With Peanut Butter & Marshmallows, I’ve picked up a few tricks and learned some things that really make a difference. Here are my top tips to help you achieve avalanche cookie perfection every time:
-
Don’t Overheat the Base: When melting the butter, peanut butter, and chocolate, be careful not to overheat the mixture. If it gets too hot, the chocolate can seize, and when you add the marshmallows, they’ll melt instantly into a sticky goo rather than remaining distinct. Just melt until smooth, then immediately remove from heat before adding other ingredients.
-
Room Temperature Marshmallows: Make sure your mini marshmallows are at room temperature, not straight from a cold pantry. This helps them incorporate more easily and reduces the chance of them turning into a melted blob when they hit the slightly warm base.
-
Gentle Marshmallow Fold: I cannot stress this enough – fold those marshmallows in gently and quickly! You want to coat them but retain their shape. If you overmix or mix too vigorously, they will melt and disappear into the mixture, and you’ll lose those delightful pockets of chewiness.
-
Consistency Check: If your mixture seems too sticky or too loose after adding the cereal and marshmallows, don’t panic. If it’s too sticky to scoop, you might need a tiny bit more crisped rice cereal (add a tablespoon at a time). If it’s too dry, it could be that your peanut butter was too thick; a tiny splash of milk (dairy or non-dairy) might help, but this rarely happens if you follow the recipe closely.
-
Scooping Uniformly: For consistent cookie size and even chilling, I love using a cookie scoop (the kind with the spring release). If you don’t have one, two spoons work just fine. I usually give the scooped mixture a gentle press to flatten it slightly into a more traditional cookie shape.
-
Chilling is Key: Don’t skip or shorten the chilling time! These are “no-bake” for a reason, and they need time in the fridge for the butter and chocolate to firm up, binding all the ingredients together. Rushing this step will result in soft, crumbly cookies.
-
Preventing Sticking on Sheets: Always use parchment paper or silicone mats on your baking sheets. These cookies are wonderfully sticky, and you’ll regret it if you try to put them directly on a metal pan!
-
Fun Variations:
- Chocolate Drizzle: For an extra touch, once the cookies are firm, melt a little extra chocolate (white or dark) and drizzle it over the tops.
- Nutty Twist: A handful of chopped peanuts or other nuts (like pecans or cashews) can be folded in with the crisped rice cereal for more texture and flavor.
- Pretzel Power: Crushed pretzels are a fantastic addition for a sweet and salty crunch!
- Sprinkles: Add some colorful sprinkles into the mixture or on top before chilling for a festive look.
Storage
One of the best things about these No Bake Avalanche Cookies With Peanut Butter & Marshmallows is how well they store, making them perfect for meal prep or making ahead for parties. Here’s how I keep them fresh and delicious:
-
Refrigerator: This is my go-to for storing these cookies. Once they are fully set and firm, I transfer them to an airtight container. I like to place a piece of parchment paper between layers to prevent them from sticking to each other. Stored in the refrigerator, they will stay fresh and perfectly chewy for up to 1 week. They maintain their shape and texture beautifully when chilled.
-
Room Temperature: While they can technically sit at room temperature for a short period (a few hours) after they’ve been chilled, I generally don’t recommend storing them this way for an extended time, especially in warmer climates. The butter and chocolate in the base will soften, making the cookies very sticky and potentially a bit messy. For optimal texture and firmness, the fridge is best.
-
Freezing: Yes, you can absolutely freeze these cookies! They freeze wonderfully, which is great if you want to make a big batch or save some for later.
- Initial Freeze: After they’ve fully chilled and set in the refrigerator, arrange the cookies in a single layer on a parchment-lined baking sheet.
- Flash Freeze: Place the baking sheet in the freezer for about 1-2 hours, or until the cookies are solid. This prevents them from sticking together when you bag them.
- Transfer to Container: Once flash-frozen, transfer the solid cookies to a freezer-safe airtight container or a heavy-duty freezer bag. Again, you can place parchment paper between layers if you have multiple.
- Storage Duration: They will keep well in the freezer for up to 2-3 months.
- Thawing: When you’re ready to enjoy them, simply take them out of the freezer and let them thaw in the refrigerator for a few hours, or at room temperature for about 30 minutes, until they reach your desired consistency. I sometimes even enjoy them straight from the freezer for a super-chilled, dense treat!
-
Preventing Stickiness in Storage: Regardless of where you store them, I always recommend using parchment paper or wax paper between layers of cookies in your container. This prevents them from fusing together, making it much easier to grab just one (or two!) when the craving strikes.
Final Thoughts
And there you have it! I truly think these No Bake Avalanche Cookies With Peanut Butter & Marshmallows are an absolute game-changer for anyone craving a spectacular treat without the fuss of baking. The magic lies in the simple, yet incredibly satisfying, blend of creamy peanut butter, delightful marshmallows, and a perfect crunch that makes every bite an experience.
These aren’t just any cookies; they’re a whirlwind of flavor and texture, coming together in mere minutes to deliver pure joy. Whether you’re looking for a quick dessert for unexpected guests, a last-minute potluck contribution, or simply a sweet escape for yourself, I promise you that these No Bake Avalanche Cookies With Peanut Butter & Marshmallows will hit all the right spots. They’re undeniably a must-try for their ease, speed, and utterly delicious outcome!

Easy No Bake Avalanche Cookies: Peanut Butter & Marshmallow
- Total Time: 15 minutes
- Yield: 24 cookies 1x
Description
These No Bake Avalanche Cookies are a delightful treat that combines creamy peanut butter and soft mini marshmallows for a chewy, satisfying dessert. Perfect for any occasion, they come together quickly without the need for an oven!
Ingredients
- 1 cup smooth peanut butter
- 1 cup mini marshmallows
- 1 cup semi-sweet chocolate chips
- 3 cups crisped rice cereal
- 1/2 cup unsalted butter
- 1 teaspoon pure vanilla extract
- 1 cup powdered sugar
Instructions
- Prepare Your Workspace: Line two large baking sheets with parchment paper or silicone baking mats.
- Melt the Wet Ingredients: In a large, microwave-safe bowl, combine the butter, creamy peanut butter, and chocolate chips. Heat in 30-second intervals, stirring well after each, until smooth and melted, about 1.5 to 2 minutes.
- Sweeten and Flavor the Base: Remove from heat and stir in the powdered sugar and vanilla extract until fully incorporated and glossy.
- Add the Crunch: Gently fold in the crisped rice cereal with a spatula, ensuring every flake is coated without crushing it.
- Fold in the Marshmallows: Quickly and gently fold in the mini marshmallows, being careful not to melt them.
- Form the Cookies: Using a cookie scoop or two spoons, drop mounds of the mixture onto the prepared baking sheets, pressing down lightly to flatten if desired.
- Chill Time: Transfer the baking sheets to the refrigerator and chill the cookies for at least 30-60 minutes until firm.
- Serve and Enjoy: Once firm, remove from parchment paper and enjoy slightly chilled or at room temperature.
- Prep Time: 15 mins
- Cook Time: 0 mins
- Category: Dessert
- Method: No Bake
- Cuisine: American
Nutrition
- Serving Size: 1 cookie
- Calories: 120
- Sugar: 10 g
- Sodium: 50 mg
- Fat: 7 g
- Saturated Fat: 2 g
- Unsaturated Fat: 5 g
- Trans Fat: 0 g
- Carbohydrates: 13 g
- Fiber: 1 g
- Protein: 2 g
- Cholesterol: 5 mg
Keywords: Be careful not to overheat the mixture when melting the ingredients. Use fresh mini marshmallows for the best texture, and consider adding nuts or a chocolate drizzle for variations.
Leave a Comment