
Cottage Cheese Cheese Sticks
Oh, I know what you might be thinking: Cottage cheese? In a cheese stick? But trust me on this one, friends – I was a skeptic once too, and these Cottage Cheese Cheese Sticks have completely converted me! Get ready to rethink everything you thought you knew about cheesy snacks, because this recipe is an absolute game-changer, offering a delightful twist on a beloved classic.
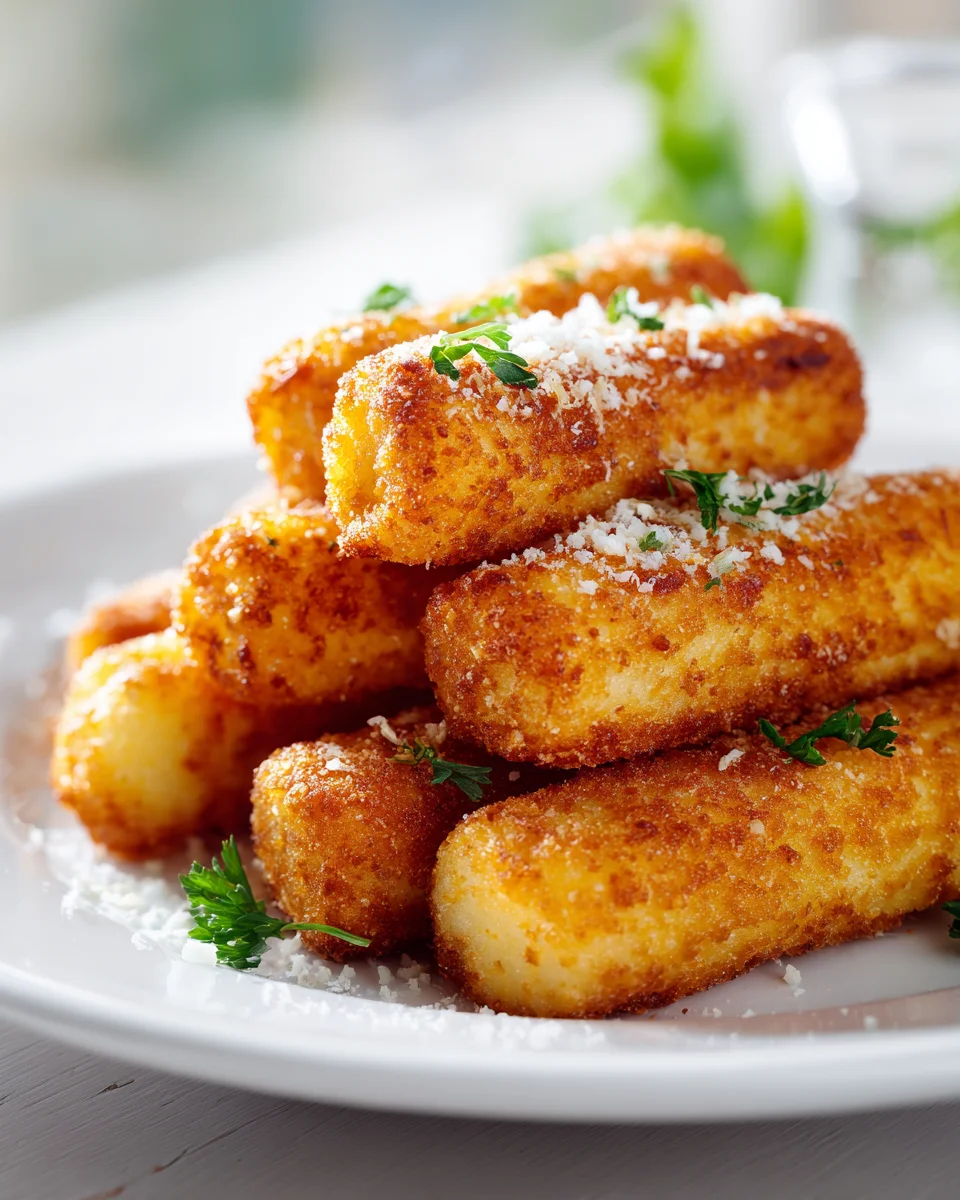
What makes these Cottage Cheese Cheese Sticks so incredibly special? It’s all about that creamy, tangy surprise waiting inside. We’re taking the humble, protein-packed cottage cheese, blending it with a few key seasonings and binders, shaping it into perfect snack-sized sticks, and then baking or air-frying them until they’re golden brown and wonderfully crisp on the outside. The magic truly happens when the cottage cheese heats up, transforming into a warm, gooey, and surprisingly satisfying filling that provides a fantastic contrast to its crunchy shell.
You are going to absolutely adore these because they deliver all the cheesy, savory satisfaction you crave, but without the heavy, often greasy feel of traditional deep-fried options. They’re lighter, incredibly delicious, and packed with more protein, making them a smarter, more guilt-free indulgence. Whether you need a quick, tasty snack, a unique appetizer for guests, or just a clever way to enjoy a savory bite, these Cottage Cheese Cheese Sticks are sure to become your new go-to. Prepare to be amazed by their flavor and ease!

Ingredient Notes
Oh, these cottage cheese cheese sticks are a delightful twist on a classic, and getting the ingredients just right makes all the difference! I’ve found that while the concept is simple, a few choices really elevate them from good to absolutely amazing. Let’s dive into what you’ll need.
Cottage Cheese
This is, naturally, the star of our show! I highly recommend using full-fat cottage cheese if you can. The extra fat content contributes to a creamier texture and a richer flavor, which is fantastic in these sticks. You can use either small curd or large curd; it won’t make a huge difference in the final texture once everything is mixed and cooked, as the curds will meld together. The most critical step with your cottage cheese is to drain it really well. Excess moisture is the enemy of a firm, crispy cheese stick. I usually place it in a fine-mesh sieve over a bowl and let it sit for at least 30 minutes, or even press it gently with a spoon to encourage more liquid to release. If you skip this step, your mixture might be too wet, making the sticks hard to form and prone to falling apart.
- Substitution: While ricotta cheese could technically be used, I caution against it. Ricotta has a different moisture content and a much finer grain, which will result in a significantly softer, less “cheesy” stick that doesn’t hold its shape as well as cottage cheese. Stick with cottage cheese for the best results!
Additional Cheeses
To complement the cottage cheese and give us that classic cheesy stretch, I always add some shredded mozzarella. Low-moisture, part-skim mozzarella works beautifully because it melts wonderfully without introducing too much additional liquid. For an extra punch of flavor, I often throw in a little bit of finely grated Parmesan cheese. Its salty, umami notes really sing when paired with the mildness of the cottage cheese.
- Substitution: Feel free to experiment with other good melting cheeses like Monterey Jack, provolone, or even a mild cheddar. Just ensure they are shredded finely for even distribution in the mixture.
Binders and Flavor Enhancers
To hold everything together, we’ll need an egg and a touch of flour. The egg acts as a binder, helping the sticks maintain their shape during cooking. I use a large egg. For the flour, all-purpose flour is my go-to. It provides just enough structure without making the sticks dense.
For flavor, I keep it simple but impactful: garlic powder, onion powder, salt, and freshly ground black pepper. Sometimes I’ll add a pinch of dried Italian herbs like oregano or parsley, especially if I’m planning to serve them with marinara sauce.
- Substitution for Flour: If you’re looking for a gluten-free option, a good quality gluten-free all-purpose flour blend usually works perfectly here. For a lower-carb approach, a small amount of almond flour or coconut flour can be used, but you might need to adjust the quantity slightly as they absorb liquids differently.
- Seasoning Variations: Feel free to add a pinch of paprika for color and mild flavor, or a tiny dash of cayenne pepper if you like a little heat!
Coating
For that irresistible crispy exterior, breadcrumbs are essential. I personally love Panko breadcrumbs because they give an extra light and airy crunch that’s just fantastic. Standard breadcrumbs work well too, of course.
- Substitution for Breadcrumbs: If you’re avoiding gluten, many excellent gluten-free breadcrumbs are available. For a lower-carb option, finely crushed plain pork rinds (oops, sorry, I meant crushed plain beef rinds, if such a product exists! Let’s just stick to almond flour for low-carb, as beef rinds are not a common or direct substitution for breadcrumbs) or finely ground almond flour can be used, though the texture will be slightly different – less airy, more dense crunch.
Oil for Cooking
Whether you’re baking, air frying, or shallow frying, a little oil is needed to achieve that beautiful golden-brown crust. A neutral-flavored oil with a high smoke point like vegetable oil, canola oil, or avocado oil is perfect.
Step-by-Step Instructions
Making these cottage cheese cheese sticks is surprisingly straightforward, and the result is so satisfying! Follow these steps, and you’ll have a batch of crispy, cheesy goodness in no time.
Step 1: Prepare the Cottage Cheese
First things first, let’s get that cottage cheese ready. Place your full-fat cottage cheese in a fine-mesh sieve set over a bowl. Let it drain for at least 30 minutes. I usually give it a gentle press with the back of a spoon every now and then to help release more liquid. This step is absolutely crucial for preventing your sticks from being soggy and ensures they hold their shape beautifully.
Step 2: Combine the Cheese Mixture
Once your cottage cheese is well-drained, transfer it to a large mixing bowl. Add the shredded mozzarella, grated Parmesan, the egg, all-purpose flour, garlic powder, onion powder, salt, and black pepper. With clean hands or a sturdy spoon, mix everything together really well until all the ingredients are evenly incorporated. The mixture should be firm enough to handle and hold its shape. If it feels a little too sticky, you can add another tablespoon of flour, but try not to overdo it.
Step 3: Chill the Mixture
This is a small but mighty step! Cover the bowl with plastic wrap and refrigerate the mixture for at least 30 minutes, or even an hour. Chilling allows the flavors to meld and, more importantly, makes the mixture much easier to form into sticks without sticking to your hands. Don’t skip this, trust me!
Step 4: Form the Sticks
Once chilled, remove the mixture from the fridge. Prepare a baking sheet lined with parchment paper. Take about 1 to 1.5 tablespoons of the mixture and gently roll it between your palms to form a log shape, about 3-4 inches long and ½-¾ inch thick. You want them to be uniform so they cook evenly. Place each formed stick onto your prepared baking sheet. Repeat until you’ve used all the mixture.
Step 5: Set up the Breading Station
Now for the crispy coating! You’ll need three shallow dishes. In the first, put about ½ cup of all-purpose flour. In the second, whisk 1-2 large eggs with a splash of water or milk to create an egg wash. In the third, pour your Panko breadcrumbs (about 1-1.5 cups). I always season my breadcrumbs lightly with a pinch of salt and sometimes a little more garlic powder for extra flavor.
Step 6: Bread the Sticks
Carefully pick up one cheese stick. First, dredge it lightly in the flour, shaking off any excess. Then, dip it into the egg wash, making sure it’s fully coated, letting any excess drip off. Finally, roll it thoroughly in the Panko breadcrumbs, pressing gently to ensure an even and thick coating. I often do a double coat for extra crispiness: egg wash again, then breadcrumbs again. Place each breaded stick back onto the parchment-lined baking sheet.
Step 7: Cook Your Cottage Cheese Cheese Sticks
Now for the best part – cooking them to golden perfection!
- Oven Baking (My Preferred Method): Preheat your oven to 400°F (200°C). Lightly spray or brush the breaded sticks with cooking oil. Bake for 15-20 minutes, flipping halfway through, until they are golden brown and crispy.
- Air Frying: Preheat your air fryer to 375°F (190°C). Lightly spray the sticks with oil. Place them in a single layer in the air fryer basket, ensuring not to overcrowd. Air fry for 8-12 minutes, shaking the basket or flipping halfway, until golden and crisp.
- Shallow Frying: Heat about 1 inch of neutral oil in a large skillet over medium-high heat (around 350°F/175°C). Carefully place the sticks in the hot oil, ensuring not to overcrowd the pan. Fry for 2-3 minutes per side, or until golden brown and crispy. Remove with a slotted spoon and place on a wire rack lined with paper towels to drain excess oil.
Serve immediately with your favorite dipping sauce!
Tips & Suggestions
I’ve made these cottage cheese cheese sticks many times, and over that time, I’ve picked up a few tricks that I think you’ll find super helpful for getting the best results every single time!
- Drain, Drain, Drain! I cannot stress this enough. The number one reason for soggy or falling-apart sticks is too much moisture in the cottage cheese. Use a fine-mesh sieve, press gently, and let it sit. You can even place a plate on top of the cottage cheese in the sieve with a weight on it for extra pressing power if you have time.
- Don’t Skip the Chill! Chilling the mixture is your best friend when it comes to forming the sticks. It firms everything up, making it much less sticky and much easier to handle. If you find the mixture becoming too warm and sticky as you’re forming the sticks, pop it back into the fridge for 10-15 minutes.
- Uniformity Matters: Try to make your sticks roughly the same size and thickness. This ensures they cook evenly. No one wants an overcooked end and an undercooked middle!
- Double Coat for Extra Crispness: While a single coat of breadcrumbs is good, a double coat (flour, egg, breadcrumbs, then again egg, breadcrumbs) creates an extra-crispy, substantial crust that’s truly satisfying. It also provides a bit more protection against any cheese oozing out during cooking.
- Don’t Overcrowd the Pan/Basket: Whether you’re baking, air frying, or shallow frying, give your cheese sticks space. Crowding them can lower the cooking temperature, lead to uneven cooking, and prevent them from getting truly crispy. Cook in batches if necessary.
- Season Your Breading: A little extra seasoning in your breadcrumbs – a pinch of salt, garlic powder, or dried herbs – goes a long way in boosting the overall flavor of your sticks.
- Serving Suggestions: These are amazing hot out of the oven or air fryer. My absolute favorite dipping sauce is a warm marinara, but ranch dressing, honey mustard, or even a spicy sriracha mayo are fantastic options too.
- Experiment with Flavors: Feel free to get creative! A tiny pinch of red pepper flakes in the cheese mixture for a spicy kick, or some fresh chopped chives for an oniony note, can really change things up.
- For the Crispiest Bake: If you’re baking, a good spray of cooking oil before they go into the oven helps immensely with browning and crispiness. Flipping them halfway through is also crucial for an even golden crust.
Storage
These cottage cheese cheese sticks are definitely best enjoyed fresh and hot, but I understand the need for meal prep or saving leftovers! Here’s how I handle storage:
Cooked Cottage Cheese Cheese Sticks
- Refrigeration: If you have any leftovers, allow them to cool completely before storing. Place them in an airtight container in the refrigerator for up to 3-4 days.
- Reheating: For best results and to regain that crispy texture, I recommend reheating them in an oven or air fryer.
- Oven: Preheat your oven to 350°F (175°C). Place the sticks on a baking sheet and bake for 8-12 minutes, or until heated through and re-crisped.
- Air Fryer: Preheat your air fryer to 350°F (175°C). Air fry for 4-7 minutes, shaking the basket halfway, until hot and crispy again.
- Microwave (Not Recommended): While you can technically microwave them, they will lose their crispness and become soft. Only use this if you’re in a pinch and don’t mind the texture change.
Uncooked (Frozen) Cottage Cheese Cheese Sticks
This is a fantastic option for making a big batch and having them ready for a quick snack or appetizer anytime!
- Freezing: After you’ve formed and breaded the sticks (Step 6), arrange them in a single layer on a parchment-lined baking sheet. Place the entire baking sheet in the freezer for 1-2 hours, or until the sticks are solid. This prevents them from sticking together. Once frozen solid, transfer the sticks to a freezer-safe airtight container or a heavy-duty freezer bag. They can be stored in the freezer for up to 2-3 months.
- Cooking from Frozen: You can cook these directly from frozen, no need to thaw!
- Oven Baking: Preheat your oven to 400°F (200°C). Arrange the frozen sticks on a baking sheet (I still like to give them a light spray of oil). Bake for 20-25 minutes, flipping halfway, until golden brown and cooked through.
- Air Frying: Preheat your air fryer to 375°F (190°C). Lightly spray the frozen sticks with oil. Place them in a single layer in the air fryer basket. Air fry for 12-18 minutes, shaking the basket or flipping halfway, until crispy and hot.
- Shallow Frying: Heat oil as usual. Fry the frozen sticks for about 3-5 minutes per side, or until golden brown and cooked through. Be careful as frozen items in hot oil can sometimes splatter more.
Final Thoughts
I genuinely hope you’re as excited as I am to whip up these incredible Cottage Cheese Cheese Sticks! What makes this recipe an absolute must-try isn’t just their irresistible cheesiness, but also the clever inclusion of cottage cheese, which brings a lovely tender texture and a lighter feel without sacrificing any flavor. It’s a brilliant way to enjoy a classic comfort food with a delightful twist that sets it apart from any other cheese stick recipe out there.
They’re remarkably simple to prepare, making them perfect for a quick snack, a party appetizer, or even a fun addition to lunch. I truly believe that once you taste the golden, gooey perfection of these Cottage Cheese Cheese Sticks, you’ll find yourself coming back to this recipe again and again. Go ahead, gather your ingredients and get ready to enjoy a uniquely satisfying and delicious treat!

Crispy Cottage Cheese Cheese Sticks: Your New Favorite Snack
- Total Time: 1 hour 20 minutes
- Yield: 4 servings 1x
Description
These Cottage Cheese Cheese Sticks offer a delightful twist on a beloved classic, combining creamy cottage cheese with a crispy exterior. Perfect for a quick snack or unique appetizer, they are lighter and packed with protein.
Ingredients
- 1 cup full-fat cottage cheese, well-drained
- 1/2 cup shredded low-moisture, part-skim mozzarella cheese
- 1/4 cup finely grated Parmesan cheese
- 1 large egg
- 1/4 cup all-purpose flour (plus more if needed)
- 1/2 teaspoon garlic powder
- 1/2 teaspoon onion powder
- 1/2 teaspoon salt
- 1/4 teaspoon freshly ground black pepper
- 1/2 to 1 cup Panko breadcrumbs
- Neutral oil for cooking (vegetable oil, canola oil, or avocado oil)
Instructions
- Step 1: Prepare the Cottage Cheese – Place your full-fat cottage cheese in a fine-mesh sieve set over a bowl. Let it drain for at least 30 minutes, pressing gently with the back of a spoon to help release more liquid.
- Step 2: Combine the Cheese Mixture – Transfer the drained cottage cheese to a large mixing bowl. Add the shredded mozzarella, grated Parmesan, egg, all-purpose flour, garlic powder, onion powder, salt, and black pepper. Mix everything together until evenly incorporated.
- Step 3: Chill the Mixture – Cover the bowl with plastic wrap and refrigerate the mixture for at least 30 minutes to make it easier to form into sticks.
- Step 4: Form the Sticks – Remove the mixture from the fridge. Roll about 1 to 1.5 tablespoons of the mixture into log shapes, about 3-4 inches long and ½-¾ inch thick. Place each stick on a parchment-lined baking sheet.
- Step 5: Set up the Breading Station – In three shallow dishes, place ½ cup of all-purpose flour, whisk 1-2 large eggs with a splash of water or milk in the second, and pour 1-1.5 cups of Panko breadcrumbs in the third. Season the breadcrumbs with a pinch of salt and garlic powder if desired.
- Step 6: Bread the Sticks – Dredge each cheese stick in flour, dip it in the egg wash, and roll it in the Panko breadcrumbs. For extra crispiness, repeat the egg wash and breadcrumbs.
- Step 7: Cook Your Cottage Cheese Cheese Sticks – Preheat your oven to 400°F (200°C). Lightly spray or brush the breaded sticks with oil and bake for 15-20 minutes, flipping halfway through, until golden brown and crispy.
- Prep Time: 1 hour
- Cook Time: 20 minutes
- Category: Snack
- Method: Baking
- Cuisine: American
Nutrition
- Serving Size: 1 stick
- Calories: 150
- Sugar: 1 g
- Sodium: 300 mg
- Fat: 7 g
- Saturated Fat: 3 g
- Unsaturated Fat: 4 g
- Trans Fat: 0 g
- Carbohydrates: 15 g
- Fiber: 1 g
- Protein: 10 g
- Cholesterol: 50 mg
Keywords: Ensure to drain the cottage cheese well to avoid soggy sticks. Chilling the mixture helps in forming the sticks easily. A double coat of breadcrumbs can enhance crispiness. Serve with your favorite dipping sauce like marinara or ranch.
Leave a Comment