
Raspberry Lemon Breakfast Loaf
I don’t know about you, but there’s something incredibly uplifting about starting the day with a treat that feels both indulgent and wonderfully fresh. And that, my friends, is exactly what my Raspberry Lemon Breakfast Loaf delivers!
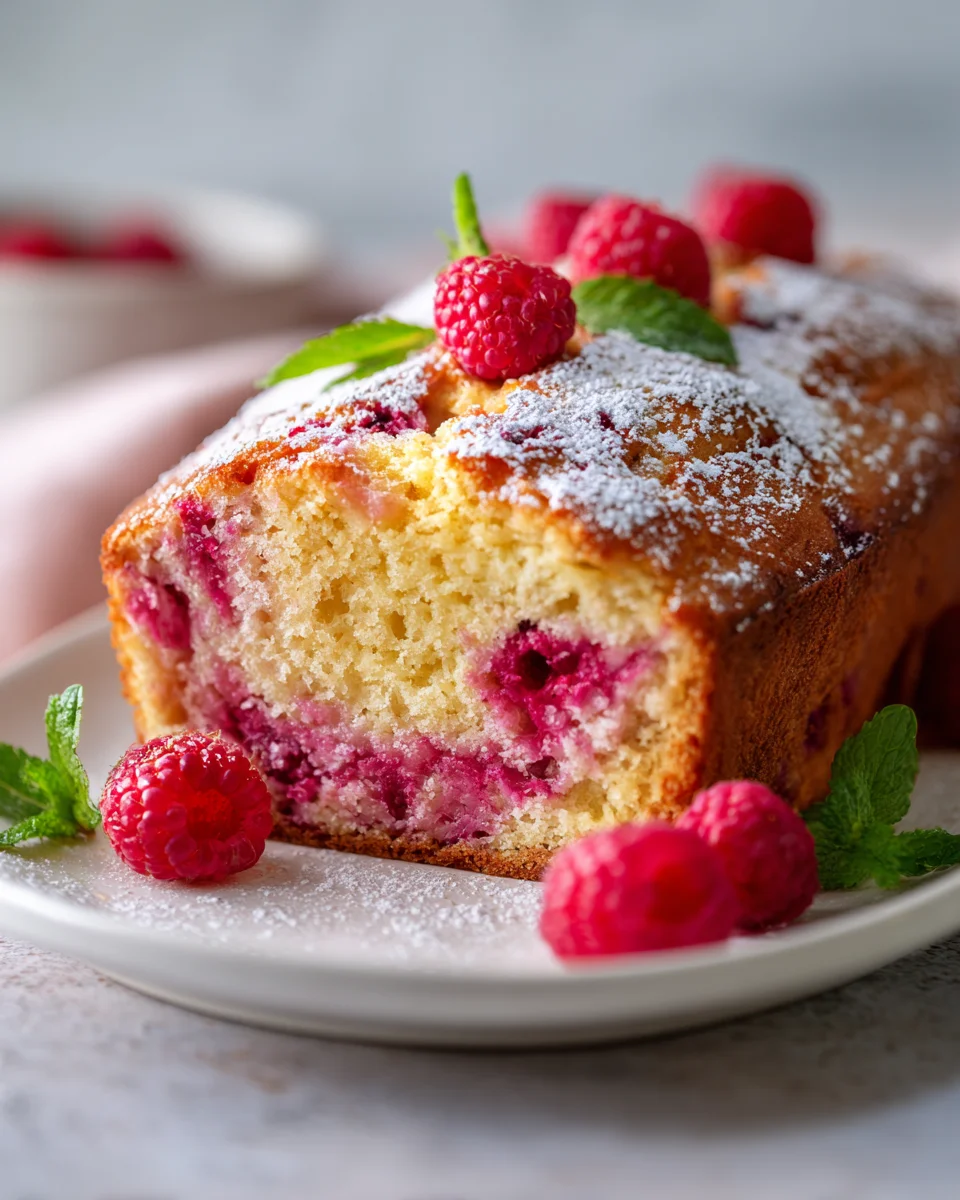
This isn’t just any ordinary loaf; it’s a burst of sunshine in every slice. What makes it so special, you ask? It’s the magical combination of juicy, tart raspberries studded throughout a perfectly moist and tender crumb, all brightened by the irresistible zest and tang of fresh lemon. I promise you, this loaf is a celebration of flavor! Readers will absolutely adore how effortlessly it brings a touch of gourmet goodness to their morning routine, whether it’s a leisurely weekend brunch or a quick grab-and-go on a busy weekday.
Imagine a beautifully golden loaf, fragrant with citrus, where each bite offers a delightful explosion of sweet-tart raspberry balanced by that vibrant lemon zing. It’s truly a delight for the senses. Get ready to fall in love with your new favorite way to start the day!

Oh, I am so excited to share one of my absolute favorite recipes with you today: my Raspberry Lemon Breakfast Loaf! This isn’t just any loaf; it’s a burst of sunshine in every slice, perfect for a leisurely weekend breakfast, a quick grab-and-go snack, or even a light dessert. The vibrant tang of fresh lemon perfectly complements the sweet-tart pop of raspberries, all baked into a wonderfully moist and tender loaf. I’ve refined this recipe over time to ensure maximum flavor and the perfect texture, and I can’t wait for you to try it. Let’s get baking!
Ingredient Notes
Creating the perfect Raspberry Lemon Breakfast Loaf starts with understanding the role each ingredient plays. While this recipe is quite forgiving, a little knowledge goes a long way in achieving bakery-quality results right in your own kitchen.
- All-Purpose Flour: This is the backbone of our loaf, providing structure. I always recommend using a good quality unbleached all-purpose flour. For a slightly healthier twist, you could substitute up to half of the all-purpose flour with whole wheat pastry flour, which offers a bit more fiber without making the loaf too dense. If you need a gluten-free option, a 1:1 gluten-free baking blend designed for cakes and muffins usually works well, though the texture might be slightly different.
- Granulated Sugar: Our primary sweetener for the loaf itself. It not only adds sweetness but also contributes to the loaf’s tender crumb and golden-brown crust. Don’t be tempted to reduce it too much, as sugar plays an important role beyond just taste.
- Baking Powder & Salt: These are our leavening agents, making the loaf rise and giving it that lovely, airy texture. Ensure your baking powder isn’t expired; an easy test is to drop a little into hot water – if it bubbles, it’s good to go! Salt, while seemingly minor, is crucial for balancing the sweetness and enhancing all the other flavors.
- Large Eggs: Eggs act as a binder, adding richness, moisture, and helping the loaf hold together. For the best results, I always use large eggs at room temperature. This helps them emulsify better with the other wet ingredients, leading to a smoother batter and a more uniform texture.
- Whole Milk (or Buttermilk): Milk adds moisture and tenderness. I prefer whole milk for its richness, but 2% milk works too. If you happen to have buttermilk on hand, I highly recommend using it! Its acidity reacts with the baking powder, yielding an even more tender and moist crumb with a subtle tang that complements the lemon beautifully. If you don’t have buttermilk, you can make a quick substitute by adding 1 tablespoon of lemon juice or white vinegar to regular milk and letting it sit for 5-10 minutes until it curdles.
- Neutral Oil or Melted Butter: For this loaf, you can choose between a neutral-flavored oil (like canola, vegetable, or grapeseed) or melted unsalted butter. Oil tends to make for a more consistently moist loaf that stays fresh longer, while melted butter contributes a wonderful, rich flavor. Both are excellent choices, so pick what you prefer!
- Fresh Lemons: The star flavor alongside raspberries! We’ll use both the zest and the juice. Always, always use fresh lemons for their superior brightness and aroma. The zest contains essential oils that pack a powerful flavor punch, so don’t skip it.
- Fresh or Frozen Raspberries: The beautiful jewels in our loaf. Fresh raspberries are wonderful, but good quality frozen raspberries work equally well and are often more readily available year-round. If using frozen, there’s no need to thaw them fully; in fact, it’s better if they’re still mostly frozen when you fold them in, as this helps prevent them from bleeding their color too much into the batter.
- Vanilla Extract: A splash of pure vanilla extract always enhances the overall flavor profile, adding warmth and depth that rounds out the bright lemon and raspberries.
- For the Glaze: You’ll need powdered sugar (confectioners’ sugar) and more fresh lemon juice. Sometimes, a tiny bit of milk or water is needed to get the perfect drizzling consistency.
Step-by-Step Instructions
Let’s walk through the process of creating this delightful Raspberry Lemon Breakfast Loaf. It’s truly straightforward, even for beginner bakers!
-
Prepare Your Pan & Oven:
First things first, preheat your oven to 350°F (175°C). Then, prepare a standard 9×5-inch loaf pan. I like to either grease and flour it thoroughly or, even better, line it with parchment paper, leaving an overhang on the longer sides to create a “sling.” This makes it incredibly easy to lift the baked loaf out once it’s cooled a bit.
-
Whisk the Dry Ingredients:
In a large bowl, combine your dry ingredients: the all-purpose flour, granulated sugar, baking powder, and salt. Use a whisk to really get them combined well. This step ensures that the leavening agents and salt are evenly distributed throughout the batter, which is key for a consistent rise and flavor.
-
Combine the Wet Ingredients:
In a separate medium bowl, whisk together your wet ingredients: the large eggs (remember, room temperature is best!), milk (or buttermilk), neutral oil or melted butter, the vibrant lemon zest, and vanilla extract. Whisk until everything is well combined and the mixture looks smooth.
-
Gently Combine Wet and Dry:
Pour the wet ingredient mixture into the bowl with your dry ingredients. Now, here’s a crucial tip for tender loaves: mix gently! Using a spatula or a wooden spoon, stir until just combined. A few streaks of flour are perfectly fine. Overmixing develops the gluten in the flour too much, leading to a tough, dense loaf, and we want a light, tender crumb. Stop mixing as soon as you don’t see any dry flour pockets.
-
Fold in the Raspberries:
Gently fold the fresh or frozen raspberries into the batter. If you’re using frozen raspberries, I sometimes like to toss them with about a tablespoon of the flour from the initial dry ingredient mix before adding them to the batter. This helps them stay suspended in the batter and prevents them from sinking to the bottom during baking. Be gentle to avoid crushing them too much, as we want those lovely pockets of whole fruit.
-
Bake the Loaf:
Pour the batter evenly into your prepared loaf pan. Give the pan a gentle tap or two on the counter to settle the batter and release any large air bubbles. Place it in your preheated oven and bake for 50-60 minutes. The baking time can vary depending on your oven, so start checking around the 50-minute mark. You’ll know it’s done when the top is golden brown, and a wooden skewer or toothpick inserted into the center comes out clean or with just a few moist crumbs attached.
-
Cool and Glaze:
Once baked, remove the loaf from the oven and let it cool in the pan for about 10-15 minutes. This allows the loaf to set up properly and prevents it from crumbling. After this initial cooling, use your parchment sling (or carefully invert) to transfer the loaf to a wire rack to cool completely. While the loaf is cooling, prepare your lemon glaze: whisk together the powdered sugar and fresh lemon juice until smooth. If it’s too thick, add a tiny splash more lemon juice or a drop of milk/water until it’s a pourable but not watery consistency. Once the loaf is fully cool, drizzle the glaze generously over the top. Cooling completely before glazing is important, otherwise the glaze will melt right off!
Tips & Suggestions
Making a truly excellent Raspberry Lemon Breakfast Loaf is all about those small details. Here are my favorite tips to help you achieve perfection every time:
- Room Temperature Ingredients are Key: This is a tip I preach often! Ensuring your eggs and milk are at room temperature helps them incorporate more smoothly into the batter, creating a uniform emulsion. This leads to a more consistent texture and a better rise in your baked goods. If you forget, a quick trick for eggs is to place them in a bowl of warm (not hot!) water for 5-10 minutes.
- Don’t Overmix the Batter: I really can’t stress this enough. Overmixing is the most common mistake in quick bread baking. Once you combine the wet and dry ingredients, mix just until the flour streaks disappear. A few lumps are perfectly fine! Overmixing develops gluten, which makes your loaf tough instead of tender and moist.
- The Power of Fresh Lemon Zest: The zest contains all the essential oils and powerful lemon flavor. Use a microplane zester for fine zest, being careful to only remove the yellow part and avoid the bitter white pith underneath. Zest your lemons before you juice them – it’s much easier!
- Handling Raspberries: If using fresh raspberries, be gentle when folding them in to avoid crushing them. For frozen raspberries, don’t thaw them completely. Tossing them lightly in a tablespoon of flour (from your measured dry ingredients) before adding them to the batter can help prevent them from sinking to the bottom during baking, ensuring they are beautifully distributed throughout the loaf.
- Parchment Paper Sling for Easy Removal: While greasing and flouring your loaf pan is sufficient, I highly recommend lining your pan with parchment paper, leaving an overhang on the two longer sides. Once baked and slightly cooled, you can simply lift the entire loaf out using the parchment paper handles. This prevents sticking and makes for a pristine loaf every time.
- Check for Doneness Accurately: Ovens can vary widely. While the baking time is a good guideline, always rely on the visual cues and the skewer test. The loaf should be golden brown, and a wooden skewer inserted into the center should come out clean or with only a few moist crumbs attached. If it’s still gooey, it needs more time.
- Cool Completely Before Glazing: I know it’s tempting, but patience is a virtue here! Glazing a warm loaf will cause the glaze to melt and run off, resulting in a soggy top. Let your loaf cool completely on a wire rack before you drizzle on that luscious lemon glaze.
- Variations to Try:
- Add Poppy Seeds: For a classic flavor pairing, add 1-2 tablespoons of poppy seeds to your dry ingredients for a lovely texture and visual appeal.
- White Chocolate Chips: A handful of white chocolate chips (about ½ cup) can be folded in with the raspberries for an extra layer of sweetness and creaminess.
- Other Berries: While raspberries are fantastic, feel free to experiment with other berries like blueberries, blackberries, or a mix of berries.
- Almond Extract: For a slightly different flavor profile, you could swap half of the vanilla extract for almond extract. Almond and lemon pair beautifully!
Storage
Once you’ve baked this delightful Raspberry Lemon Breakfast Loaf, you’ll want to make sure it stays fresh for as long as possible (which, let’s be honest, might not be very long once everyone gets a taste!). Here’s how I recommend storing it:
- Countertop Storage: Your breakfast loaf will stay wonderfully fresh at room temperature for up to 3-4 days. The key is an airtight container. Wrap the cooled loaf snugly in plastic wrap, then place it inside an airtight container or a large zip-top bag. This prevents it from drying out and keeps the crust tender.
- Refrigerator Storage: If your kitchen is particularly warm or humid, or if you want to extend its shelf life by a day or two, you can store the loaf in the refrigerator. Again, wrap it tightly in plastic wrap or store it in an airtight container. It will last for up to 5-6 days this way. Just be aware that refrigeration can sometimes slightly alter the texture, making it a little denser. I like to let slices come to room temperature or warm them gently before serving when storing this way.
- Freezing for Longer Term: This loaf freezes beautifully! It’s an excellent way to prepare it in advance or save some for later.
- To Freeze Whole: Ensure the loaf is completely cooled. Wrap it tightly first in plastic wrap, then in a layer of aluminum foil. This double layer protects against freezer burn. Place it in a freezer-safe bag. It can be stored for up to 2-3 months.
- To Freeze Slices: If you prefer to have individual portions ready, slice the cooled loaf, then place the slices on a baking sheet lined with parchment paper. Freeze for about an hour until firm, then transfer the frozen slices to an airtight freezer bag or container, separating layers with parchment paper if stacking. This method allows you to grab just one slice at a time. Slices will also last for 2-3 months.
- Thawing: To thaw a whole loaf, remove it from the freezer and let it sit at room temperature for several hours or overnight, still wrapped, to prevent condensation. For individual slices, you can either thaw them on the counter for about 30 minutes, or gently warm them in the microwave for 15-30 seconds, or in a toaster oven.
- Reviving Slices: If your loaf has been sitting for a day or two and you want to bring back some of that freshly baked warmth, individual slices can be popped into a toaster or toaster oven for a few minutes. This can crisp up the edges slightly and warm the interior beautifully.
Final Thoughts
And there you have it! I truly hope you’re as excited as I am about this incredible Raspberry Lemon Breakfast Loaf. It’s more than just a simple bake; it’s a delightful experience that brings a burst of sunshine to any morning. I promise you, the way the tart, juicy raspberries perfectly complement the bright, zesty lemon creates a flavor profile that is simply irresistible. This Raspberry Lemon Breakfast Loaf isn’t just for breakfast either – it makes a fantastic snack, a lovely addition to brunch, or even a light dessert. It’s a testament to simple ingredients creating something truly extraordinary. Don’t just take my word for it; whip up a batch and let this wonderful loaf brighten your day!

Raspberry Lemon Breakfast Loaf: Bright & Delicious Treat
- Total Time: 1 hour 15 minutes
- Yield: 8 servings 1x
Description
Start your day with a delightful Raspberry Lemon Breakfast Loaf that combines the sweetness of raspberries with the zesty brightness of fresh lemons. This moist and tender loaf is perfect for breakfast, a snack, or even a light dessert!
Ingredients
- 2 cups All-Purpose Flour
- 1 cup Granulated Sugar
- 2 teaspoons Baking Powder
- 1/2 teaspoon Salt
- 2 Large Eggs
- 1 cup Whole Milk (or Buttermilk)
- 1/2 cup Neutral Oil or Melted Butter
- Zest of 2 Fresh Lemons
- 1 teaspoon Vanilla Extract
- 1 cup Fresh or Frozen Raspberries
- 1 cup Powdered Sugar (for the glaze)
- 2 tablespoons Fresh Lemon Juice (for the glaze)
- Milk or Water (as needed for glaze consistency)
Instructions
- Preheat your oven to 350°F (175°C) and prepare a standard 9×5-inch loaf pan by greasing and flouring it or lining it with parchment paper.
- In a large bowl, whisk together the all-purpose flour, granulated sugar, baking powder, and salt until well combined.
- In a separate medium bowl, whisk together the large eggs, milk (or buttermilk), neutral oil or melted butter, lemon zest, and vanilla extract until smooth.
- Pour the wet ingredients into the dry ingredients and mix gently with a spatula or wooden spoon until just combined, leaving a few streaks of flour.
- Gently fold in the fresh or frozen raspberries, being careful not to crush them.
- Pour the batter into the prepared loaf pan and tap it gently on the counter to settle the batter. Bake for 50-60 minutes, checking for doneness with a skewer.
- Once baked, let the loaf cool in the pan for 10-15 minutes before transferring it to a wire rack to cool completely.
- While the loaf cools, prepare the glaze by whisking together the powdered sugar and fresh lemon juice until smooth, adjusting with milk or water if necessary. Once the loaf is cool, drizzle the glaze over the top.
- Prep Time: 15 mins
- Cook Time: 60 mins
- Category: Breakfast
- Method: Baking
- Cuisine: American
Nutrition
- Serving Size: 1 slice
- Calories: 200
- Sugar: 15 g
- Sodium: 150 mg
- Fat: 8 g
- Saturated Fat: 2 g
- Unsaturated Fat: 5 g
- Trans Fat: 0 g
- Carbohydrates: 30 g
- Fiber: 1 g
- Protein: 3 g
- Cholesterol: 40 mg
Keywords: Ensure your ingredients are at room temperature for better incorporation. Don't overmix the batter to keep the loaf tender. Use fresh lemon zest for the best flavor.
Leave a Comment