
Chocolate Meringue Cookies
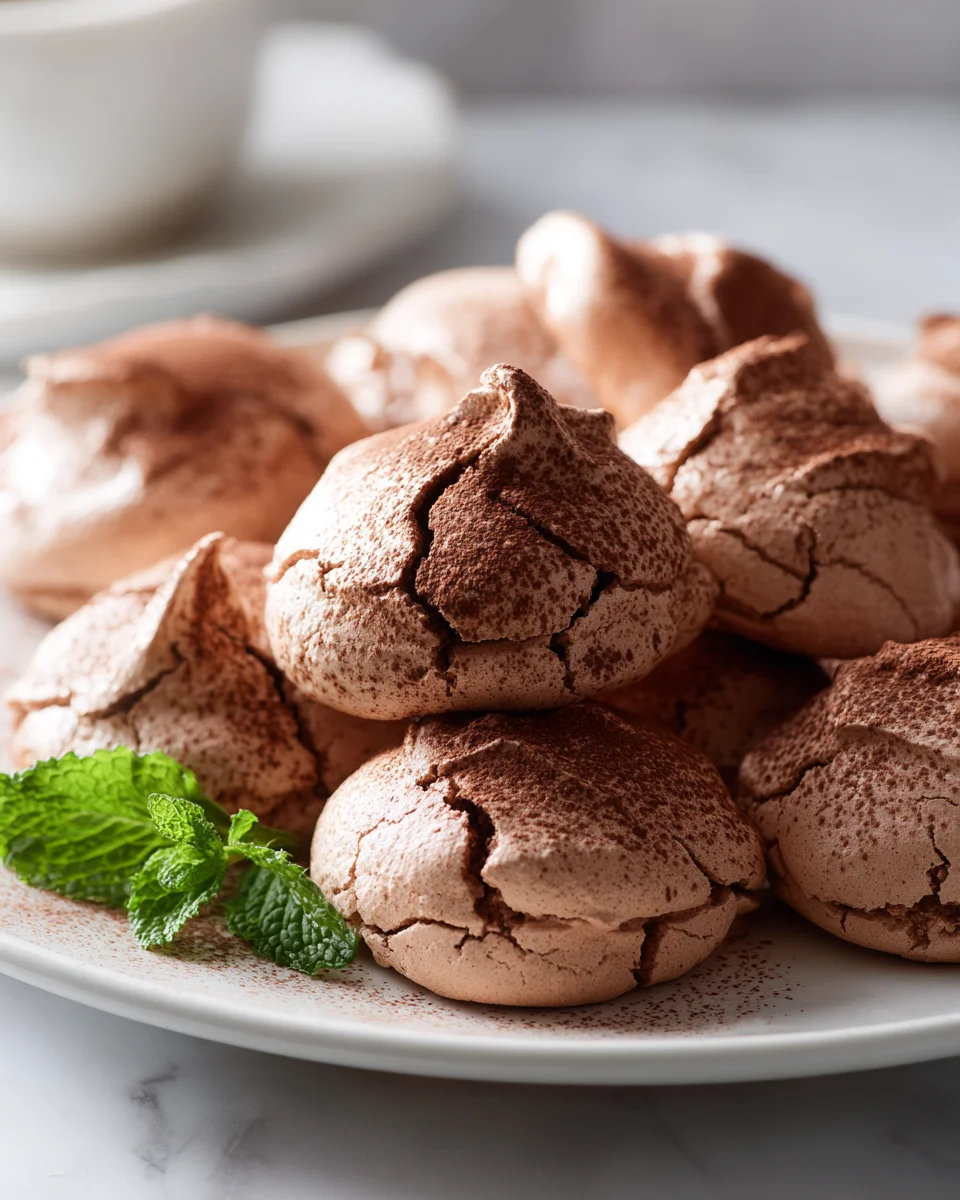
Oh, my goodness, are you ready for a little magic in your kitchen? Because that’s exactly what these Chocolate Meringue Cookies deliver! I’m absolutely thrilled to share this recipe with you because it’s one of those special treats that looks incredibly fancy and delicious, but is surprisingly straightforward to make. What makes these cookies truly special is their delightful texture – a wonderfully crisp, delicate shell that shatters beautifully, giving way to a soft, melt-in-your-mouth interior, all infused with a deep, satisfying chocolate flavor. It’s a sophisticated bite that’s both light and intensely flavorful.
You are going to absolutely love making and sharing these! They are perfect for impressing guests at a dinner party, a delightful addition to a holiday cookie platter, or simply a sophisticated treat to enjoy with your afternoon coffee. They’re naturally gluten-free (a lovely bonus!), incredibly airy, and a fantastic alternative to heavier chocolate desserts. Get ready to whisk up some egg whites and create these little clouds of chocolatey bliss – I promise, they’ll become a new favorite!

Ingredient Notes
Crafting perfect Chocolate Meringue Cookies starts with understanding the role of each key ingredient. While the list is short, quality and careful preparation are paramount to achieving that light, crisp texture we all adore. Allow me to share my insights on what makes these ingredients shine.
Egg Whites
Egg whites are the absolute foundation of your meringues! For the best volume and stability, I highly recommend using large, fresh egg whites that are at room temperature. Cold egg whites won’t whip up as voluminous, and we want those airy, sky-high peaks. When separating, ensure not even a speck of yolk gets into your whites, as fat is the enemy of meringue and will prevent proper whipping.
Granulated Sugar
Regular granulated sugar works beautifully for these cookies. The trick is to add it gradually to your whipped egg whites, allowing it to fully dissolve as you continue to whip. This process not only sweetens but also stabilizes the meringue, yielding that wonderfully crisp yet delicate texture. Don’t rush adding the sugar; it’s essential for structural integrity.
Unsweetened Cocoa Powder
This is where our meringues get their delicious chocolate identity! I personally prefer unsweetened Dutch-processed cocoa powder. It imparts a beautiful, deep dark color and a slightly milder, less acidic chocolate flavor that perfectly complements the meringue’s sweetness. If you only have natural unsweetened cocoa, it will still work, though the color might be lighter and the chocolate flavor a bit more intense. Always use unsweetened to control the overall sweetness.
Cream of Tartar (or a Substitute)
Consider cream of tartar a meringue’s secret weapon. This acidic powder stabilizes the egg whites, helping them whip up faster, hold more air, and maintain their structure even after sugar is incorporated. If you don’t have cream of tartar, a tiny bit of fresh lemon juice or white vinegar can achieve a similar effect. I usually use about half a teaspoon for every four egg whites.
Vanilla Extract
A touch of vanilla extract adds a lovely warmth and depth that truly enhances the chocolate flavor. I typically stir it in towards the end of the whipping process, just before folding in the cocoa powder.
A Pinch of Salt
Never underestimate a tiny pinch of salt! It magically balances the sweetness of the sugar and significantly amplifies the rich chocolate notes. It’s a small addition that makes a surprisingly big difference, trust me.
Step-by-Step Instructions
Now that we’ve covered the ingredients, let’s get into the delightful process of making these heavenly Chocolate Meringue Cookies! It’s a precise process, but incredibly rewarding when you see those beautiful, airy peaks come to life.
Preparation is Key
-
Preheat Your Oven: Begin by preheating your oven to a very low temperature, typically around 200°F (95°C). Meringues don’t bake; they slowly dry out, and this low temperature is crucial for achieving that crisp, melt-in-your-mouth texture without browning.
-
Line Your Baking Sheets: Line two large baking sheets with parchment paper. Avoid wax paper or aluminum foil, as the meringues may stick. Parchment paper is essential here.
-
Gather and Measure: Have all your ingredients measured and ready to go. Meringue making moves quickly once you start whipping!
Separating the Eggs (Carefully!)
-
Carefully separate room-temperature egg whites from yolks. Even a tiny speck of yolk can prevent your whites from whipping properly. I recommend cracking each egg into a small bowl first, removing the yolk, then transferring the white to your main, impeccably clean mixing bowl. This prevents contaminating your entire batch if a yolk breaks.
Whipping the Egg Whites to Perfection
-
Using an electric mixer (a stand mixer with a whisk attachment is ideal, but a hand mixer works well too), begin whipping the egg whites on medium-low speed. Continue until they become foamy and opaque, which takes a couple of minutes.
-
Once foamy, add your cream of tartar (or lemon juice/vinegar) and the pinch of salt. Increase the speed to medium-high. Whip until soft peaks form—when you lift the whisk, the peaks should gently flop over.
-
Now, start adding the granulated sugar, about a tablespoon at a time, while the mixer is running on medium-high speed. Do not rush this step! Allow each addition of sugar to incorporate fully before adding more. This ensures the sugar dissolves completely and helps build a stable meringue. Continue whipping until you achieve glossy, stiff peaks. When you lift the whisk, the peaks should stand straight up and feel firm, and when you rub a little meringue between your fingers, it should feel smooth, not gritty from undissolved sugar.
Folding in the Flavor
-
Gently fold in your vanilla extract. Then, very carefully, sift your unsweetened cocoa powder over the meringue. Use a spatula and fold gently, from the bottom up, rotating the bowl as you go. You want to incorporate the cocoa powder without deflating all that precious air. Stop folding as soon as the cocoa is just combined; a few streaks are perfectly acceptable and indicate you haven’t overmixed.
Piping or Spooning Your Cookies
-
For shaping, you can either spoon dollops of the meringue onto your prepared baking sheets, or, for a more uniform look, transfer the meringue to a piping bag fitted with a star or round tip. Pipe small, consistent cookies, leaving about an inch between each. They won’t spread much, but spacing is good practice.
The Long, Slow Dry
-
Place your baking sheets in the preheated oven. Bake for approximately 1 to 1.5 hours, or until the cookies feel firm to the touch and lift easily from the parchment paper. They should be dry and crisp, not soft or sticky.
-
Once the baking time is up, turn off the oven but leave the cookies inside with the oven door ajar. Allow them to cool completely in the turned-off oven for at least an hour, or even overnight. This slow cooling process ensures they dry out completely and remain super crisp. Resist the urge to open the oven door during this crucial cooling phase!
Tips & Suggestions
Achieving perfect Chocolate Meringue Cookies can feel a bit like a science, but with these pointers, you’ll be whipping up masterpieces in no time. Here are my top tips and some fun variations to try!
The Cleanliness Rule
-
This is crucial: your mixing bowl and whisk attachment MUST be spotlessly clean and completely grease-free. Even a tiny bit of fat (from residual oil, butter, or even a speck of egg yolk) will prevent your egg whites from whipping properly. I always give my bowl and whisk a quick wipe with a paper towel dampened with lemon juice or white vinegar to be absolutely sure.
Room Temperature Egg Whites are Non-Negotiable
-
Cold egg whites are stubborn and won’t reach the same volume as room-temperature ones. Plan ahead and take your eggs out of the fridge at least 30 minutes to an hour before you intend to start baking.
Don’t Overmix the Cocoa
-
Once you have those beautiful stiff peaks, the folding step requires a gentle hand. Overmixing the cocoa powder will deflate your meringue, leading to flat, dense cookies instead of light, airy ones. Fold just until combined; a few streaks of chocolate are perfectly fine!
Humidity is the Enemy
-
Meringues are hygroscopic, meaning they absorb moisture from the air. High humidity can make them sticky, chewy, or prevent them from crisping properly. If possible, bake meringues on a dry day. If it’s humid, bake them a little longer and ensure they cool completely in the turned-off oven.
Patience with the Oven
-
Resist the urge to open the oven door during the baking and especially during the cooling phase. Opening the door too soon lets heat and moisture escape (or enter!), which can cause your meringues to crack, deflate, or remain soft in the middle.
Fun Variations to Try
-
Chocolate Chip Meringues: Fold in a quarter cup of mini chocolate chips along with the cocoa powder for an extra chocolatey crunch.
-
Espresso Kiss: Add half a teaspoon of espresso powder with the cocoa powder to beautifully deepen the chocolate flavor.
-
Mint Chocolate: Substitute half of the vanilla extract with peppermint extract for a refreshing twist, perfect for the holidays!
Storage
You’ve invested time into making these delightful Chocolate Meringue Cookies, so let’s ensure they stay wonderfully crisp and delicious for as long as possible!
Airtight is Right
-
The golden rule for storing meringues is an airtight container. Because they are so prone to absorbing moisture, exposing them to air will quickly turn them sticky and chewy. Once completely cooled, transfer them immediately to a container with a tight-fitting lid.
Room Temperature is Best
-
Store your chocolate meringue cookies at room temperature, away from direct sunlight or any heat sources. There’s no need for refrigeration; in fact, the fridge can introduce moisture, which is precisely what we want to avoid.
Shelf Life
-
When stored properly in an airtight container, your Chocolate Meringue Cookies should stay beautifully crisp for up to two weeks. I find they are best enjoyed within the first week for optimal texture, but they’ll still be lovely after that!
Avoid Freezing
-
I generally don’t recommend freezing meringue cookies. The thawing process can introduce a lot of moisture, potentially leading to a chewy, rather than crisp, texture. They really are best enjoyed fresh or stored at room temperature.
Final Thoughts
So there you have it – my go-to recipe for the most delightful Chocolate Meringue Cookies. I truly believe these cookies are in a league of their own. They offer that incredible crisp shell, giving way to a light, airy, and wonderfully chewy interior that just melts in your mouth, all while delivering a rich chocolate punch. It’s a combination of textures and flavors that you simply won’t find in your average cookie, making them an unforgettable treat.
I absolutely encourage you to give these Chocolate Meringue Cookies a try. Whether you’re baking for a special occasion, treating yourself, or simply looking for a unique dessert that’s both elegant and utterly satisfying, this recipe is a true gem. You’ll be amazed at how such simple ingredients can transform into something so magical and utterly irresistible. Happy baking!
Chocolate Meringue Cookies: Light, Crispy & Irresistible Treat!
- Total Time: 58 minute
- Yield: 24 cookies 1x
Description
These Chocolate Meringue Cookies are a delightful treat with a crisp shell and a soft, melt-in-your-mouth interior. Perfect for impressing guests or enjoying with your afternoon coffee!
Ingredients
- 4 large egg whites
- 1 cup granulated sugar
- 1/4 cup unsweetened cocoa powder
- 1/2 teaspoon cream of tartar (or a substitute like lemon juice or white vinegar)
- 1 teaspoon vanilla extract
- A pinch of salt
Instructions
- Preheat your oven to a very low temperature, around 200°F (95°C).
- Line two large baking sheets with parchment paper.
- Carefully separate room-temperature egg whites from yolks, ensuring no yolk gets into the whites.
- Using an electric mixer, whip the egg whites on medium-low speed until foamy and opaque.
- Add the cream of tartar and the pinch of salt, then increase the speed to medium-high and whip until soft peaks form.
- Gradually add the granulated sugar, about a tablespoon at a time, while continuing to whip until glossy, stiff peaks form.
- Gently fold in the vanilla extract, then sift the unsweetened cocoa powder over the meringue and fold carefully until just combined.
- Spoon dollops of the meringue onto the prepared baking sheets or transfer to a piping bag to pipe small cookies.
- Bake for approximately 1 to 1.5 hours, or until the cookies feel firm to the touch and lift easily from the parchment paper.
- Turn off the oven and leave the cookies inside with the door ajar to cool completely for at least an hour or overnight.
- Prep Time: 15 mins
- Cook Time: 1.5 hours
- Category: Dessert
- Method: Baking
- Cuisine: American
Nutrition
- Serving Size: 1 cookie
- Calories: 30
- Sugar: 7 g
- Sodium: 5 mg
- Fat: 0 g
- Saturated Fat: 0 g
- Unsaturated Fat: 0 g
- Trans Fat: 0 g
- Carbohydrates: 7 g
- Fiber: 0 g
- Protein: 1 g
- Cholesterol: 0 mg
Keywords: Ensure your mixing bowl and whisk are completely clean and grease-free. Use room-temperature egg whites for the best volume and stability. Avoid overmixing the cocoa to maintain the airy texture of the meringues.
Leave a Comment