
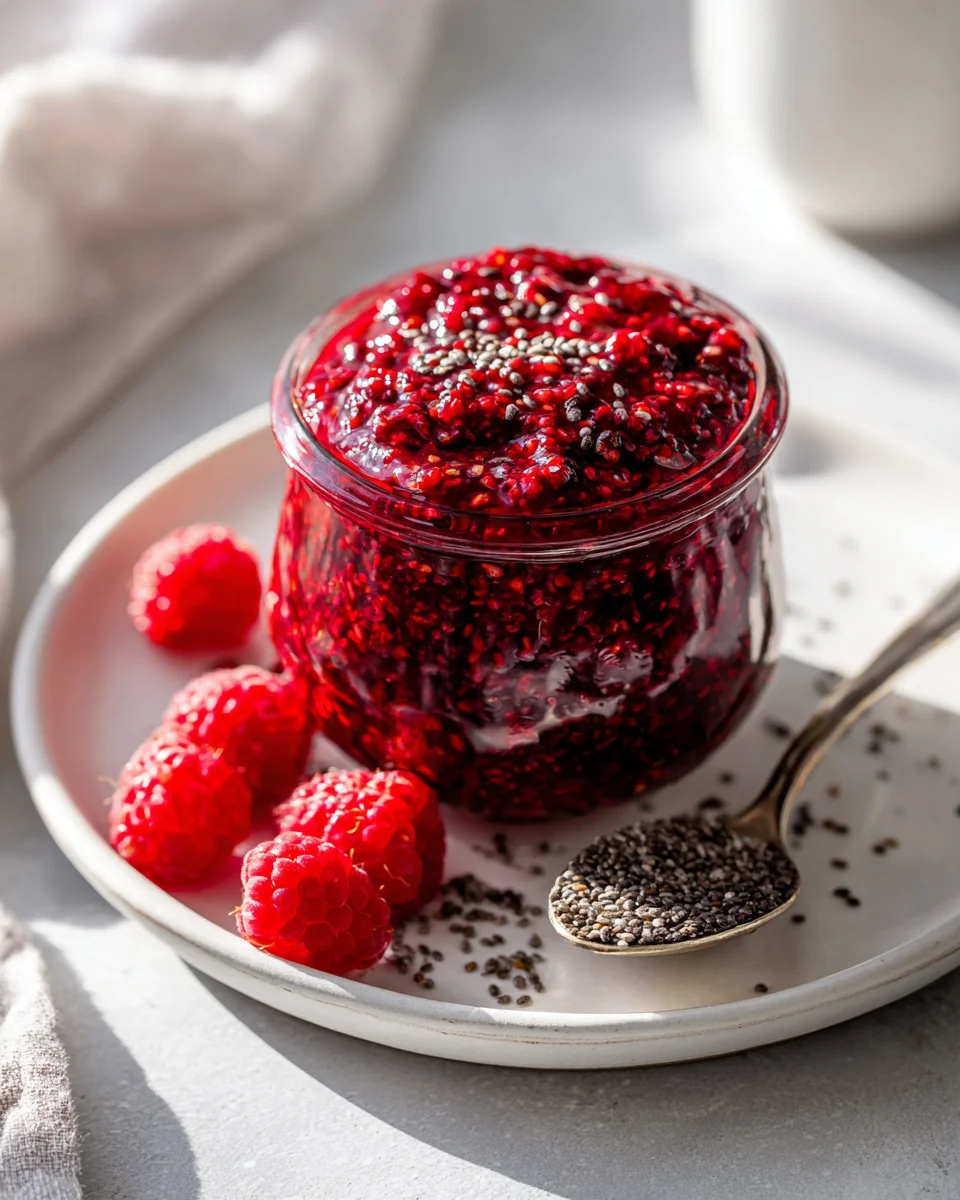
Raspberry Chia Jam (no Cook)
Oh my goodness, let me tell you about a little kitchen magic that’s about to change your breakfast game! I’m absolutely thrilled to share my recipe for Raspberry Chia Jam (no Cook) with you. This isn’t just any jam; it’s a vibrant, wholesome, and incredibly easy spread that tastes like pure sunshine.
What makes this recipe truly special, you ask? Well, for starters, it’s right there in the name: ‘no cook’! That means no standing over a hot stove, no complicated canning process, and no need for pectin. Instead, we harness the power of tiny, mighty chia seeds to create a perfectly thick, spreadable jam in minutes. You’re going to love how quickly this comes together, preserving all that fresh, bright raspberry flavor without any fuss.
It’s a healthier twist on traditional jam, too, packed with fiber and omega-3s from the chia seeds, and you can easily adjust the sweetness to your liking. Imagine slathering this on your morning toast, swirling it into yogurt, topping your pancakes, or even just eating it by the spoonful (no judgment here!). It’s sweet, tangy, and bursting with the taste of fresh raspberries, making every bite feel like a treat you can feel good about. Get ready to fall in love with homemade jam – the effortless way!

Ingredient Notes
Making a delicious batch of no-cook raspberry chia jam is incredibly simple, and it all starts with just a few key ingredients. What I love most about this recipe is its flexibility – you can easily tweak it to suit your taste preferences and what you have on hand. Here’s a rundown of what you’ll need and my thoughts on each.
Raspberries
- Fresh Raspberries: These are fantastic when they’re in season, offering the brightest, most vibrant flavor. If you’re using fresh, give them a quick rinse and pat them dry.
- Frozen Raspberries: My go-to for convenience and consistency, especially since this is a no-cook jam. They’re often picked at their peak ripeness and are readily available year-round. You’ll want to thaw them completely before using. A simple way to do this is to spread them out on a plate or in a bowl and let them sit at room temperature for an hour or two, or pop them in the fridge overnight. Thawed berries will release more liquid, which is perfect for activating the chia seeds.
- Substitutions: This recipe is incredibly versatile! Feel free to experiment with other berries like strawberries, blueberries, blackberries, or even a mixed berry blend. The liquid content might vary slightly, so you might need to adjust the chia seeds a little.
Chia Seeds
- Whole Chia Seeds: These are the magical ingredient that thickens our jam without any cooking! When exposed to liquid, they absorb it and form a gel-like consistency. I always use whole chia seeds for this recipe. They contribute a slight, pleasant texture to the jam, which I adore.
- Ground Chia Seeds: While you could use ground chia seeds, they will create a much smoother, almost pureed jam texture, which some people prefer. However, I find whole seeds give that classic jam feel.
- Importance: Don’t skimp on the chia seeds! They are what makes this “jam” and not just mashed fruit.
Sweetener
- Maple Syrup: This is my preferred sweetener for its rich flavor and the fact that it’s a natural, unrefined option. It pairs beautifully with the tartness of raspberries.
- Honey: Another excellent natural sweetener. If you use honey, start with a slightly smaller amount as it can be sweeter than maple syrup.
- Agave Nectar: A good vegan alternative to honey, with a neutral flavor profile.
- Granulated Sugar: If you don’t mind using refined sugar, regular white sugar or cane sugar works perfectly well. You might want to dissolve it first in a tiny bit of warm water or pureed fruit before adding chia seeds, just to ensure it fully incorporates.
- Amount: The amount of sweetener is completely up to your personal preference and the ripeness of your raspberries. I recommend starting with a smaller amount and tasting, then adding more if needed.
Lemon Juice
- Freshly Squeezed Lemon Juice: This is a must-have for me! It brightens the flavor of the raspberries, balances the sweetness, and adds a lovely zesty tang that makes the jam truly sing. Fresh is always best here for maximum impact.
- Bottled Lemon Juice: While acceptable in a pinch, it won’t give you the same vibrant punch as fresh.
Vanilla Extract (Optional but Recommended)
- Pure Vanilla Extract: A splash of pure vanilla extract adds a wonderful depth and warmth to the jam, subtly enhancing the fruit flavor. It’s not strictly necessary, but I find it elevates the jam to another level.
- Other Extracts: For a twist, a tiny drop of almond extract could be interesting with raspberries, but use sparingly!
Pinch of Salt (Optional)
- Just a tiny pinch of fine sea salt can miraculously enhance all the other flavors, making the jam taste even more vibrant and complex. It’s a chef’s secret for almost anything sweet!
Step-by-Step Instructions
Get ready for the easiest jam you’ve ever made! Seriously, this no-cook raspberry chia jam comes together in minutes with minimal effort. Here’s exactly how I make my batches:
Step 1: Prepare Your Raspberries
- If you’re using fresh raspberries, give them a gentle rinse under cool water and pat them dry with a clean kitchen towel.
- If you’re using frozen raspberries (my usual choice), make sure they are completely thawed. You can thaw them by spreading them on a plate at room temperature for an hour or two, or by placing them in the refrigerator overnight. It’s important they’re fully thawed as they’ll release the necessary liquid for the chia seeds to work their magic.
- Once ready, transfer your raspberries to a medium-sized mixing bowl.
- Using a fork, potato masher, or the back of a spoon, gently mash the raspberries. You can mash them as much or as little as you like. For a chunkier jam, leave some larger pieces intact. For a smoother jam, mash more thoroughly. If you prefer a completely smooth, seedless jam, you could even briefly pulse them in a food processor and then strain out the seeds (though I usually skip this step for simplicity).
Step 2: Combine All Ingredients
- To your mashed raspberries, add the remaining ingredients: the chia seeds, your chosen sweetener (maple syrup, honey, etc.), the fresh lemon juice, the vanilla extract (if you’re using it), and that optional tiny pinch of salt.
Step 3: Mix Thoroughly
- With a spoon or spatula, stir everything together really well. You want to make sure the chia seeds are evenly distributed throughout the raspberry mixture. This is crucial for uniform gelling.
- Give it a good minute or two of stirring to ensure everything is fully combined and the sweetener has dissolved, especially if you’re using granulated sugar.
Step 4: Initial Rest and Thicken
- Once thoroughly mixed, let the mixture sit at room temperature for about 5-10 minutes. During this short rest, you’ll start to notice the chia seeds beginning to absorb the liquid and swell slightly.
Step 5: Stir Again
- After the initial rest, give the jam another good stir. This helps to prevent the chia seeds from clumping together and ensures an even, smooth consistency as it continues to thicken.
Step 6: Chill and Set
- Transfer your raspberry chia jam mixture into a clean airtight container or glass jar.
- Place the container in the refrigerator and let it chill for at least 1-2 hours. While it might seem a little liquidy initially, the chia seeds will continue to absorb liquid and expand, thickening the jam considerably as it chills.
- For best results and a fully set jam, I often let it chill for 4 hours or even overnight.
Step 7: Adjust Sweetness and Consistency (Optional)
- Once the jam has fully chilled and set, give it a taste.
- Too sweet or not sweet enough? If you’d like it sweeter, you can stir in a little more of your chosen sweetener. If it’s too sweet, a tiny extra squeeze of lemon juice can sometimes help balance it.
- Too thick? If your jam is too thick for your liking, simply stir in a teaspoon or two of water, or a tiny splash of additional lemon juice, until you reach your desired consistency.
- Too thin? If, by some chance, your jam hasn’t thickened enough after several hours of chilling, you can stir in another ½ to 1 teaspoon of chia seeds, mix well, and return it to the fridge for at least another hour to allow the new seeds to swell.
And there you have it! A vibrant, healthy, and incredibly delicious no-cook raspberry chia jam, ready to enjoy!
Tips & Suggestions
Making raspberry chia jam is already pretty straightforward, but I’ve picked up a few tricks along the way that can help you customize it even further and ensure you get a perfect batch every time. Here are my favorite tips and suggestions:
Achieving Your Perfect Consistency
- If it’s too thick: Sometimes, especially with very ripe or less juicy fruit, your jam might become a little too firm after chilling. Don’t worry! Simply stir in a tablespoon or two of water, or even a little extra lemon juice, until it reaches your desired spreadable consistency. Do this gradually, stirring well after each addition.
- If it’s too thin: While rare if you follow the recipe, if your jam hasn’t thickened enough after several hours in the fridge, you can always add a bit more chia seeds. Stir in an extra ½ to 1 teaspoon of chia seeds, mix it thoroughly, and then return the jam to the refrigerator for another hour or two to let those new seeds expand.
Sweetness to Your Liking
- Taste as you go: This is probably the most important tip for any no-cook recipe. Always taste your mixture before the final chilling stage. Raspberries can vary greatly in sweetness depending on their ripeness, so what works for one batch might not be perfect for the next. Start with the suggested amount of sweetener, stir it in, taste, and then add more if you prefer it sweeter.
- Balancing tartness: If you find your jam is a little too sweet, a small extra squeeze of fresh lemon juice can often balance it out beautifully. Conversely, if it’s too tart, a tiny bit more sweetener will do the trick.
Making it Seedless
- If you’re not a fan of the tiny raspberry seeds, you can easily make this jam seedless. After mashing your raspberries (Step 1), pass the mashed fruit through a fine-mesh sieve, pressing down with a spoon or spatula to extract as much pulp and juice as possible, leaving the seeds behind. Then proceed with the rest of the recipe as usual. This will result in an incredibly smooth, luxurious jam.
Flavor Variations to Experiment With
- Other extracts: Beyond vanilla, consider a drop or two of almond extract for a marzipan-like nuance, or even a tiny splash of a non-alcohol alternative like rum flavoring for a deeper, more complex note.
- Spices: A pinch of cinnamon or a tiny dash of cardamom can add a surprising warmth and complexity that pairs wonderfully with berries. Add sparingly, taste, and adjust.
- Citrus zest: For an extra burst of freshness, finely grate a little lemon or orange zest into the jam along with the juice. This adds aromatic oils that brighten the flavor even more.
Serving Suggestions
This raspberry chia jam is incredibly versatile! Here are some of my favorite ways to enjoy it:
- Spread it generously on toast, bagels, English muffins, or scones.
- Stir it into your morning oatmeal, yogurt, or cottage cheese.
- Swirl it into smoothies for a fruity, thickening boost.
- Use it as a healthy topping for pancakes, waffles, or French toast.
- Spoon it over ice cream or a scoop of dairy-free nice cream.
- Layer it in parfaits with granola and yogurt.
- Use it as a filling for thumbprint cookies or simple tarts.
Make Ahead Perfection
This jam is fantastic for meal prep! Since it keeps well in the fridge, you can whip up a batch on the weekend and enjoy it throughout the week. The flavor often deepens a bit after a day or two, too!
Storage
One of the best things about this no-cook raspberry chia jam, besides its incredible flavor, is how easily it stores! It’s perfect for making ahead and enjoying over several days or even months.
Refrigeration
- Container: Always store your raspberry chia jam in a clean, airtight container or a glass jar. This helps keep it fresh and prevents it from absorbing any odors from your refrigerator.
- Duration: Because this jam is made with fresh ingredients and without the traditional canning process (which uses high heat to create a shelf-stable seal), it needs to be kept refrigerated. Typically, it will last beautifully for about 1 to 2 weeks in the fridge. Always use a clean spoon each time you scoop out jam to prevent contamination and extend its shelf life.
- Observation: As with any fresh food, trust your senses. If you notice any off-smells, discoloration, or mold, it’s best to discard it.
Freezing
Good news! This chia jam freezes wonderfully, which is fantastic if you want to make a larger batch or stock up when raspberries are in season.
- Freezer-Safe Containers: Transfer the chilled jam into freezer-safe containers or jars. If using glass jars, be sure to leave at least an inch of headspace at the top to allow for expansion as the jam freezes, preventing the jar from cracking.
- Duration: When properly stored in the freezer, your raspberry chia jam can last for up to 3 months.
- Thawing: When you’re ready to enjoy it, simply transfer the frozen jam from the freezer to the refrigerator and let it thaw overnight. Give it a good stir before serving, as the texture might change slightly after freezing and thawing, but the flavor will remain delicious.
Labeling
- I always recommend labeling your containers or jars with the date you made the jam. This simple habit helps you keep track of freshness, especially if you have multiple batches or are freezing them. A piece of masking tape and a marker work perfectly!
Final Thoughts
And there you have it! I truly hope you’re feeling inspired to whip up a batch of this fantastic Raspberry Chia Jam (no Cook). For me, it’s a staple because it perfectly blends convenience with incredibly fresh flavor. You just can’t beat the simplicity of a “no cook” recipe that delivers such a vibrant, healthy, and utterly delicious result. I absolutely love how this Raspberry Chia Jam (no Cook) transforms everyday breakfasts and snacks into something special, all without the fuss of traditional canning or excessive sugar. It’s truly a must-try for anyone looking for a quick, wholesome, and unbelievably tasty spread. Give it a try – I know you’ll adore it as much as I do!
Raspberry Chia Jam Recipe – Quick & Easy No-Cook Spread!
- Total Time: 10 minutes
- Yield: 1 cup 1x
Description
This no-cook Raspberry Chia Jam is a vibrant and wholesome spread that transforms your breakfast. Packed with fresh raspberry flavor and healthy chia seeds, it’s incredibly easy to make and customize to your taste.
Ingredients
- 2 cups Fresh Raspberries or Frozen Raspberries (thawed)
- 1/4 cup Whole Chia Seeds
- 1/4 cup Maple Syrup or Honey or Agave Nectar or Granulated Sugar
- 2 tablespoons Freshly Squeezed Lemon Juice
- 1 teaspoon Pure Vanilla Extract (optional)
- Pinch of fine sea salt (optional)
Instructions
- If using fresh raspberries, rinse them under cool water and pat them dry. If using frozen raspberries, ensure they are completely thawed.
- Transfer the raspberries to a medium-sized mixing bowl and gently mash them using a fork, potato masher, or the back of a spoon.
- To the mashed raspberries, add the chia seeds, sweetener, lemon juice, vanilla extract (if using), and a pinch of salt.
- Stir everything together well to ensure the chia seeds are evenly distributed.
- Let the mixture sit at room temperature for about 5-10 minutes to allow the chia seeds to absorb liquid and swell.
- After the initial rest, stir the jam again to prevent the chia seeds from clumping.
- Transfer the mixture into a clean airtight container or glass jar and refrigerate for at least 1-2 hours to set.
- Prep Time: 10 mins
- Cook Time: 0 mins
- Category: Breakfast
- Method: No-Cook
- Cuisine: American
Nutrition
- Serving Size: 1 tablespoon
- Calories: 30
- Sugar: 5 g
- Sodium: 1 mg
- Fat: 1 g
- Saturated Fat: 0 g
- Unsaturated Fat: 1 g
- Trans Fat: 0 g
- Carbohydrates: 7 g
- Fiber: 1 g
- Protein: 1 g
- Cholesterol: 0 mg
Keywords: Feel free to adjust the sweetness according to your taste. You can also experiment with other berries or add spices for unique flavors.
Leave a Comment