
Hot Cocoa Peppermint Cheesecake Bites Recipe
Oh, prepare yourselves, because I am absolutely thrilled to share one of my favorite holiday-inspired treats with you today: the Hot Cocoa Peppermint Cheesecake Bites Recipe! If you’re anything like me, you probably adore the comforting warmth of a mug of hot cocoa and the invigorating tingle of peppermint, especially when the weather turns crisp. Well, imagine those beloved flavors, but transformed into a decadent, creamy, and utterly irresistible bite-sized dessert – that’s exactly what we’re creating!
What makes this recipe so incredibly special, you ask? It’s the perfect marriage of a rich, velvety cheesecake, infused with the deep, chocolatey essence of hot cocoa, and brightened with a cool, refreshing hint of peppermint. It’s not just a cheesecake; it’s a tiny, festive explosion of winter joy! You’ll love these because they deliver all the indulgence of a full-sized cheesecake in adorable, perfectly portioned bites, making them ideal for holiday parties, potlucks, or just a sweet little treat after dinner. No need for forks and plates, just pop one in and let the magic happen.
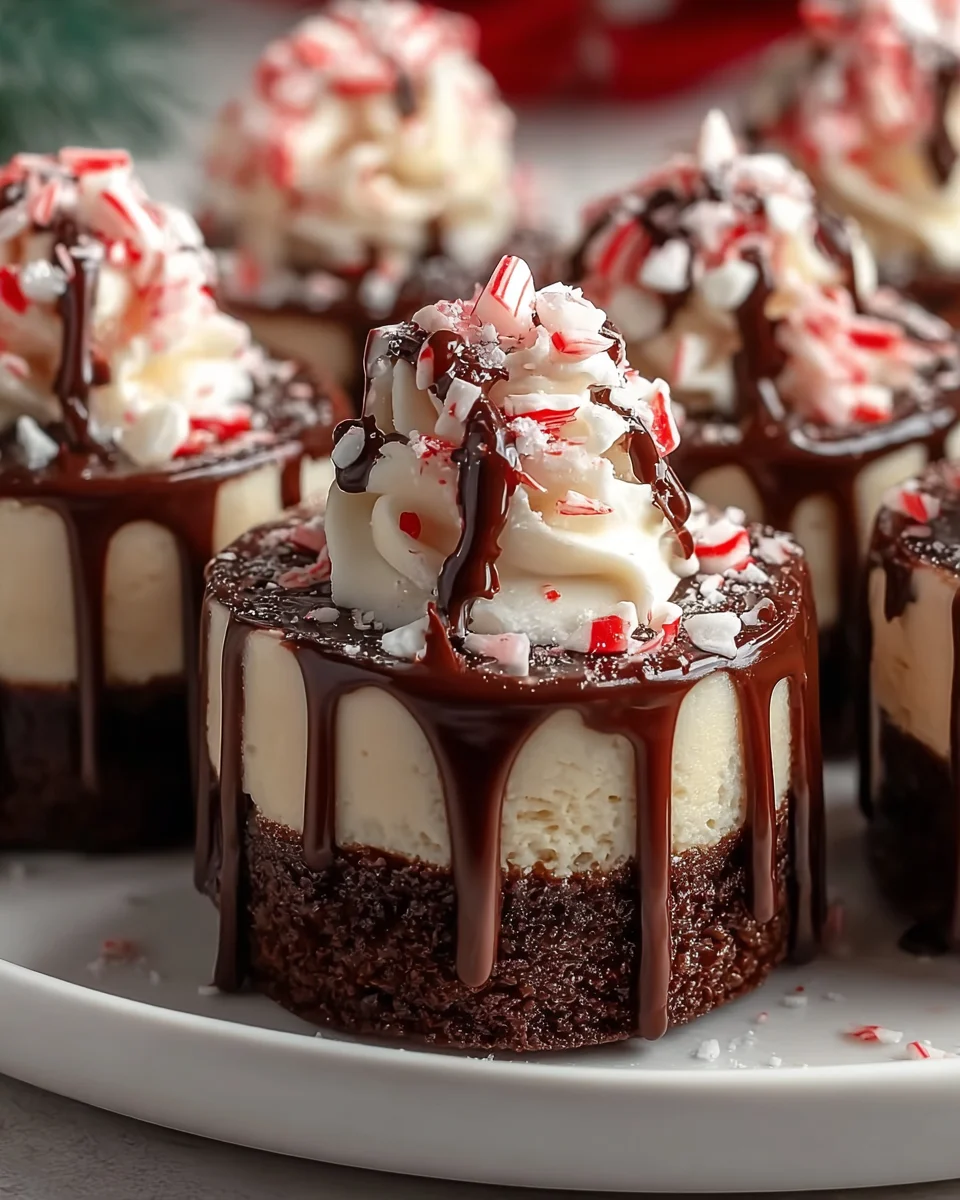
So, what exactly are we diving into? We’re taking a classic chocolate cookie crust, building on it with a lusciously smooth, cocoa-infused cheesecake filling, and then giving it that quintessential peppermint kick. Picture them, perhaps adorned with a swirl of whipped cream and a sprinkle of crushed candy canes, gleaming invitingly on a platter. These Hot Cocoa Peppermint Cheesecake Bites are designed to bring smiles, evoke cozy memories, and satisfy every single one of your sweet cravings. Get ready to bake some serious happiness!

Ingredient Notes
Oh, you are in for such a treat with these Hot Cocoa Peppermint Cheesecake Bites! The magic truly happens when the right ingredients come together, so let me walk you through what you’ll need and why I love these particular choices. Don’t worry, I’ve got some great substitutions if you need them!
For the Crust:
- Graham Cracker Crumbs: These are my go-to for that classic cheesecake base. They provide a lovely, slightly sweet, and buttery foundation.
- Substitution: If you’re feeling adventurous or want an even more chocolatey base, crushed chocolate wafer cookies or even Oreo crumbs would be absolutely divine. Just make sure to adjust the butter slightly if using a different cookie, as some absorb more than others.
- Unsalted Butter: Melted butter binds the crumbs together to form that perfect press-in crust. Unsalted is my preference so I can control the salt level in the overall recipe.
- Granulated Sugar: Just a touch to sweeten the crust and complement the graham crackers.
For the Cheesecake Filling:
- Cream Cheese: This is the star of our show! I cannot stress enough how important it is to use full-fat brick-style cream cheese and ensure it’s softened to room temperature. This is key for a super smooth, lump-free filling. Trust me, it makes all the difference!
- Substitution: While you can technically use reduced-fat cream cheese, I find it can affect the texture and richness of the cheesecake, making it a bit less creamy. If you do, just be aware the end result might be slightly different.
- Granulated Sugar: Provides the perfect amount of sweetness to balance the tang of the cream cheese.
- Hot Cocoa Mix: This is where we infuse that lovely hot cocoa flavor! I recommend using a good quality, rich hot cocoa mix for the best depth of flavor. Make sure it’s the powdered kind you’d mix with hot water or milk, not pre-made liquid cocoa.
- Substitution: You could use unsweetened cocoa powder with an extra tablespoon or two of sugar, but the hot cocoa mix often brings a unique blend of cocoa, sugar, and sometimes even a hint of powdered milk that’s hard to replicate precisely.
- Large Eggs: Also at room temperature, please! Eggs help set the cheesecake and give it its creamy texture. Adding them at room temp helps them incorporate better without overmixing.
- Vanilla Extract: A splash of good quality vanilla always enhances chocolate flavors beautifully.
- Peppermint Extract: This is our other star flavor! It brings that refreshing, festive kick. Be careful, a little goes a long way, so start with the recommended amount and add more only if you dare!
- Crushed Peppermint Candies: These add a wonderful crunch and an extra burst of peppermint flavor within the cheesecake.
- Substitution: Crushed candy canes work perfectly here! You could also use peppermint baking chips, though they won’t offer the same crunch.
For the Topping (Optional, but highly recommended!):
- Heavy Cream: For making that luscious chocolate ganache.
- Semi-Sweet Chocolate Chips: Or finely chopped semi-sweet chocolate. This forms the base of our glossy ganache.
- Substitution: Dark chocolate would give a more intense chocolate flavor, while milk chocolate would result in a sweeter, milder ganache. Your choice!
- Additional Crushed Peppermint Candies: For that final festive flourish and extra crunch on top.
Step-by-Step Instructions
Get ready to create some delightful little bites of heaven! While cheesecake might sound intimidating, these bites are surprisingly straightforward. Follow along, and we’ll have these cooling in no time.
Step 1: Get Prepped and Ready
First things first, preheat your oven to 325°F (160°C). Line a 24-cup mini muffin tin with paper liners. This is crucial for easy removal and serving. If you don’t have mini muffin tins, you can use a 9×9 inch square pan lined with parchment paper, leaving an overhang on two sides for easy lifting later. Make sure your cream cheese and eggs are at room temperature – this is key for a smooth filling!
Step 2: Craft the Perfect Crust
In a medium bowl, combine the graham cracker crumbs, melted butter, and a tablespoon of granulated sugar. Mix these together until the crumbs are evenly moistened. Now, spoon about 1 teaspoon of this mixture into the bottom of each mini muffin liner (or spread evenly in your square pan) and press down firmly using the back of a spoon or your fingertips. Bake the crusts for about 5-7 minutes, just to set them slightly. Remove from the oven and let them cool while you prepare the filling.
Step 3: Whip Up the Wonderful Filling
In a large mixing bowl, using an electric mixer, beat the softened cream cheese on medium speed until it’s completely smooth and creamy, about 2-3 minutes. This step is vital for avoiding lumps! Add the granulated sugar and continue beating until well combined and fluffy, scraping down the sides of the bowl as needed.
Next, beat in the hot cocoa mix, vanilla extract, and peppermint extract until everything is fully incorporated and the mixture smells absolutely divine. Reduce the mixer speed to low and add the eggs one at a time, mixing just until each egg is barely combined. It’s really important not to overmix here after adding the eggs, as overmixing can incorporate too much air, leading to cracks in your cheesecake.
Finally, gently fold in about half of your crushed peppermint candies. Save the rest for the topping!
Step 4: Bake Your Bites to Perfection
Carefully spoon or scoop the cheesecake filling over the cooled crusts in your mini muffin tin, filling each liner almost to the top. If using a square pan, pour the entire filling over the crust and spread evenly.
Bake for 15-20 minutes for the mini bites, or about 30-35 minutes for a square pan. The cheesecakes are done when the edges are set and slightly puffed, but the centers still have a slight jiggle when gently shaken. Resist the urge to overbake!
Step 5: Cool, Chill, and Get Ready for Topping
Once baked, turn off the oven and prop the oven door open slightly. Let the cheesecakes cool in the oven for about 15 minutes. This slow cooling helps prevent cracking. Then, remove them from the oven and let them cool completely at room temperature on a wire rack. This can take an hour or two.
Once at room temperature, transfer the muffin tin or square pan to the refrigerator and chill for at least 4 hours, or ideally, overnight. Chilling is absolutely essential for the cheesecake to firm up properly and develop its full flavor.
Step 6: Dazzle with the Ganache Topping (Optional, but highly recommended!)
When your cheesecake bites are fully chilled, it’s time for the delicious topping! In a microwave-safe bowl, heat the heavy cream until it just begins to simmer (don’t boil!). Pour the hot cream over the semi-sweet chocolate chips and let it sit undisturbed for 5 minutes. Then, whisk gently until the ganache is smooth, glossy, and completely combined. Let it cool for about 10-15 minutes, stirring occasionally, until it has thickened slightly but is still pourable.
Spoon a small dollop of ganache over each chilled cheesecake bite (or spread evenly over the entire chilled cheesecake in the square pan). Immediately sprinkle with the remaining crushed peppermint candies before the ganache sets. Return the bites to the refrigerator for another 15-30 minutes to allow the ganache to set.
Step 7: Serve and Enjoy!
Carefully remove the cheesecake bites from their liners. If you used a square pan, lift the cheesecake out using the parchment paper overhang and cut it into small, uniform bites. Serve these delightful Hot Cocoa Peppermint Cheesecake Bites chilled and bask in the deliciousness!
Tips & Suggestions
Making cheesecake, even in bite-sized form, is an art, but don’t worry, I’ve got some pro tips to help you achieve cheesecake perfection every time. These little details can make a big difference!
- Room Temperature Ingredients are Your Best Friend: I can’t emphasize this enough for cream cheese and eggs. Softened cream cheese beats up smooth without lumps, and room temperature eggs incorporate more evenly into the batter, preventing overmixing and potential cracks in your cheesecake. Plan ahead and take them out of the fridge at least an hour before you start baking.
- Don’t Overmix the Batter: Especially once you add the eggs! Overmixing incorporates too much air, which can cause the cheesecake to puff up too much during baking and then crack as it cools. Beat just until the ingredients are combined, then stop. A perfectly smooth batter is achieved primarily by starting with well-softened cream cheese.
- Patience is a Virtue (Especially with Chilling): I know, it’s hard to wait when something smells so good! But chilling your cheesecake for at least 4 hours (and ideally overnight) is crucial. It allows the cheesecake to fully set, develop its rich texture, and makes it much easier to handle and serve. Rushing this step will result in a soft, messy bite.
- For the Perfect Peppermint Crush: Place your peppermint candies or candy canes in a sturdy zip-top bag, remove excess air, and use a rolling pin or the flat side of a meat tenderizer to crush them into small pieces. You want a mix of fine dust and small chunks for the best texture and visual appeal.
- Customize Your Crust: While graham cracker is classic, feel free to experiment! Chocolate wafer cookies or even crushed gingerbread cookies (for an extra festive twist) would be amazing. Just adjust the melted butter quantity slightly as different cookies absorb fat differently.
- Alternative Toppings: If ganache isn’t your jam, a simple dusting of cocoa powder, a dollop of whipped cream with a mini candy cane, or a drizzle of melted white chocolate would also look and taste fantastic.
- Prevent Cracks (for Larger Cheesecakes): While less common with mini bites, if you ever scale this recipe up to a full cheesecake, a water bath is your secret weapon against cracks. It creates a moist environment in the oven, ensuring even, gentle baking.
Storage
These Hot Cocoa Peppermint Cheesecake Bites are so good, they might not last long! But just in case you have some willpower (or need to plan ahead), here’s how to store them to keep them fresh and delicious.
- In the Refrigerator: These cheesecake bites are best served chilled. Store any leftovers in an airtight container in the refrigerator for up to 3-4 days. Make sure they are covered well to prevent them from absorbing any unwanted odors from other foods in your fridge and to keep them from drying out.
- In the Freezer: Yes, you can freeze these! This is a fantastic option if you want to make them ahead for a party or just have some on hand for a future craving.
- To Freeze: Once the cheesecake bites are completely chilled and the ganache (if using) is set, place them in a single layer on a baking sheet and freeze for about an hour, or until solid. This prevents them from sticking together. Then, transfer the frozen bites to an airtight, freezer-safe container or a heavy-duty freezer bag. You can stack them with parchment paper in between layers.
- How Long: They will keep well in the freezer for up to 1 month for optimal freshness and texture.
- To Thaw: When you’re ready to enjoy them, simply transfer the desired number of bites from the freezer to the refrigerator and let them thaw for several hours, or overnight. They’ll taste just as good as freshly made!
- Serving: Always serve these Hot Cocoa Peppermint Cheesecake Bites chilled for the best flavor and texture. Enjoy!
Final Thoughts
And there you have it, my friends! I truly hope you’re feeling inspired to whip up a batch of these extraordinary Hot Cocoa Peppermint Cheesecake Bites. This isn’t just another dessert; it’s a culinary experience that captures the very essence of comfort and joy in every single bite. The decadent richness of hot cocoa, the invigorating burst of peppermint, and the smooth, creamy tang of cheesecake come together in a symphony of flavors that is simply irresistible.
I promise you, once you try the Hot Cocoa Peppermint Cheesecake Bites Recipe, you’ll understand why it’s a must-try. Whether you’re entertaining guests, treating yourself to something special, or looking for that perfect festive treat, these bites are guaranteed to bring smiles. They’re surprisingly easy to make and offer a delightful twist on classic holiday flavors. Don’t wait – dive into this delicious adventure!

Hot Cocoa Peppermint Cheesecake Bites Recipe – Easy & Delicious
- Total Time: 1 hour
- Yield: 24 bites
Description
Indulge in the festive flavors of winter with these delightful Hot Cocoa Peppermint Cheesecake Bites, combining rich cheesecake with a chocolate cookie crust and a refreshing peppermint twist. Perfect for holiday gatherings or a sweet treat after dinner!
Ingredients
- Graham Cracker Crumbs
- Unsalted Butter
- Granulated Sugar
- Cream Cheese
- Granulated Sugar
- Hot Cocoa Mix
- Large Eggs
- Vanilla Extract
- Peppermint Extract
- Crushed Peppermint Candies
- Heavy Cream
- Semi-Sweet Chocolate Chips
- Additional Crushed Peppermint Candies
Instructions
- Preheat your oven to 325°F (160°C) and line a 24-cup mini muffin tin with paper liners.
- In a medium bowl, combine the graham cracker crumbs, melted butter, and a tablespoon of granulated sugar. Mix until the crumbs are evenly moistened.
- Spoon about 1 teaspoon of the mixture into the bottom of each mini muffin liner and press down firmly. Bake for about 5-7 minutes to set slightly, then let cool.
- In a large mixing bowl, beat the softened cream cheese on medium speed until smooth and creamy, about 2-3 minutes. Add granulated sugar and beat until fluffy.
- Beat in the hot cocoa mix, vanilla extract, and peppermint extract until fully incorporated. Reduce speed to low and add eggs one at a time, mixing just until barely combined.
- Gently fold in half of the crushed peppermint candies.
- Spoon the cheesecake filling over the cooled crusts, filling each liner almost to the top. Bake for 15-20 minutes for mini bites or 30-35 minutes for a square pan.
- Once baked, turn off the oven and let the cheesecakes cool in the oven for about 15 minutes. Then cool completely at room temperature on a wire rack.
- Transfer to the refrigerator and chill for at least 4 hours, or ideally overnight.
- For the ganache topping, heat the heavy cream until it simmers, then pour over the semi-sweet chocolate chips. Let sit for 5 minutes, then whisk until smooth.
- Spoon a small dollop of ganache over each cheesecake bite and sprinkle with remaining crushed peppermint candies. Return to the refrigerator for another 15-30 minutes to set.
- Carefully remove the cheesecake bites from their liners and serve chilled.
- Prep Time: 30 mins
- Cook Time: 30 mins
- Category: Dessert
- Method: Baking
- Cuisine: American
Nutrition
- Serving Size: 1 bite
- Calories: 120
- Sugar: 10 g
- Sodium: 90 mg
- Fat: 7 g
- Saturated Fat: 4 g
- Unsaturated Fat: 2 g
- Trans Fat: 0 g
- Carbohydrates: 12 g
- Fiber: 1 g
- Protein: 2 g
- Cholesterol: 30 mg
Keywords: Make sure to use room temperature ingredients for a smooth filling. Don't overmix the batter after adding the eggs to prevent cracks. Chilling is essential for the best texture and flavor.
Leave a Comment